| |
About
This is Annie Whitsed's Crazy World a world where I stitch the joys and chaos of life into beautifull crazy quilts. email annie@loopylace.com
All That Jazz
Annie\'s Website
Bags-of-Fun
Blogroll
Websites


|
|
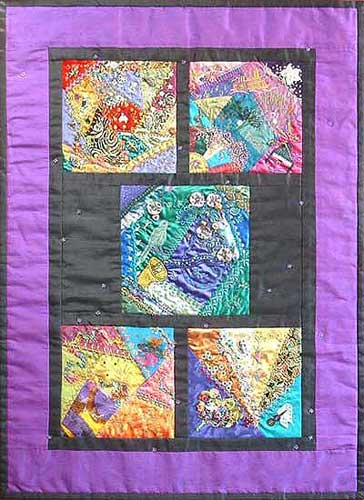
Ooops…I was so distracted by doing the labels and making the quilt roller that I forgot to show the image of the finished 3rd quilt…So here it is and you can see the big picture on flickr
|
Well actually it is an extension to my first quilt roller…when I put the skirt on the first roller I really wanted to make it as long as the quilt but it seemed like an awful lot of extra fabric that I couldn’t justify using as I alos had to make a bag to protect the outside of the quilt…So I made the roller with a mini skirt but the idea of a long skirt didn’t leave my head and in the meanwhile I had a problem with what size to make the bag, I wanted the quilt to be a snug fit in the bag so that it didn’t slip around inside…I rolled the quilt firmly and measured the circumference and could have made a bag that fitted it snuggly and but what if the next person doesn’t roll the quilt quite as firmly so it is just a little bit bigger and wont fit back in the bag, you know like tents that are all neatly folded into a bag when you buy them but never fit back in the bag again…So I just have to make the bag a bit looser and accept that it may move around in the bag…still my head is saying I don’t like that I want there to be the least chance that the embellishments will move around and rub on the back of the quilt…what if I do make the skirt longer and put ties on the end but to do that I would have to make the skirt wider so that the ties are at the end of the quilt not around the quilt itself where they could leave depression marks on the quilt…but that would require even more extra fabric…I tell myself that its all getting to complex, that I should just make the bag and be done with it…but the idea wouldn’t let go in the back of my mind I kept designing and imaging how it would work..Ummm…light bulb moment….what if as well as being wider than the quilt it is longer so that when rolled the end of the quilt would be well back in the roll and protected…I wouldn’t need to make an extra bag…and that would mean less extra fabric…and the extra fabric could be cheap fabric, actually an old sheet, which is what my quilts end up being rolled in, would work perfectly.
For most of the extra fabric I used a piece of calico that never did wash soft and was to stiff for any other use but is perfect for my long roller skirt…I made up the area with some black fabric left over from another project and to match it to the quilt I used the last strip of the green backing fabric and finished the end with a purple silk binding.
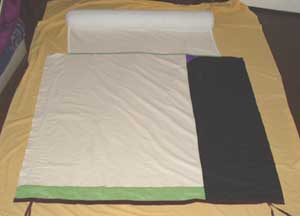
The roller skirt is about 6″ wider and longer than the quilt.
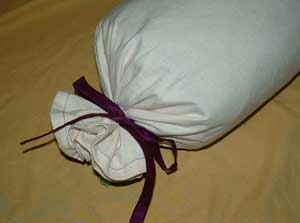
When the quilt is rolled the ends are tied
To finish off the quilt roller I used T shirt transfer to add the name of the quilt…I am delighted with how well it works…It looks like a big candy wrapper which is probably appropriate considering the eye candy that is inside…

|
A quilt isn’t really finished untill it has a label on the back so I spent today in front of my computer designing and prepareing labels for the back of the All that Jazz Quilts…
AT the Top of each label under the quilt name it says “One of 3 All That Jazz Quilts made by the Crazy Quilt Internet Community as a fundraiser in aid of Katrina Hurricane Survivors 2006”.
To indicate the maker of each block I faded images of each quilt and then typed the names of the makers on each block…it took a bit of time to work out how to put the text over the image but it was worth it because who made what block can easily be identified with no confusion.
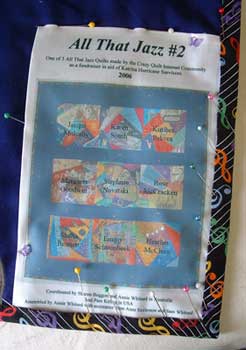 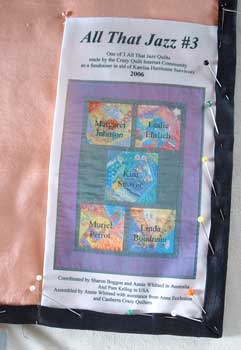
At the bottom of each label it gives the credits
Coordinated by Sharon Boggon and Annie Whitsed in Australia And Pam Kellog in USA
Fabrics Donated by Sharon Boggon and Addicted to Fabric http://www.a2f.com.au
Assembled by Annie Whitsed with assistance from Sam Whitsed, Lynne Harlow, Anne Eccleston
and Canberra Crazy Quilters
For Quilt History and Artist statements visit http://inaminuteago.com/katrina/allthatjazzindex.html
I made the labels by printing them onto T Shirt tranfers which I ironed onto white fabric which is stitched into the bottom right corner of each quilt back with 2 edges covered by the binding…the label for #1 is A4 size the other 2 are half that size…I did have to unpick a couple of the ties so that there wasn’t a bead under the label, on #3 I stitched the front bead on again without a bead on the back, on #2 I stitched them back on with the bead on the back, I thought that the butterfly beads looked cute on top of the label.
|
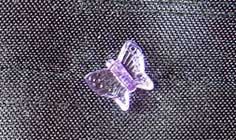
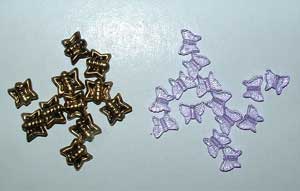
Yesturday I raided Sharon’s stash again, when I couldn’t find enough of any one bead in my own stash for the front of All that Jazz #3…As it turned out I did have the chosen bead in my stash, I just hadn’t considered it…After we had auditioned and rejected several gold beads, both in a formal grid and scattered, she handed me a packet of the same little purple butterflies that I used on the back of Jazz #2…the reason I hadn’t tried them was that they are plastic and I had been looking at more “quality beads” but when auditioned they passed with flying colours…I think that the reason the gold beads didn’t work is because this quilt needed subtle the purple butterflies are subtle and when it works I use it.
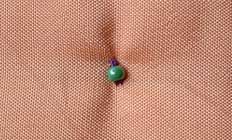
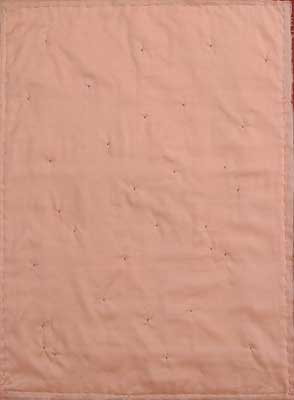
The back is an Apricot coloured Thai silk that I had in my stash…for the bead on the back I chose an apple green seed bead.
and below are the messy inner back and the real back.
|
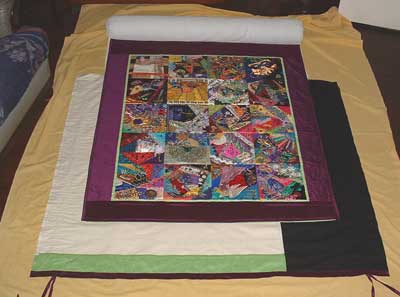
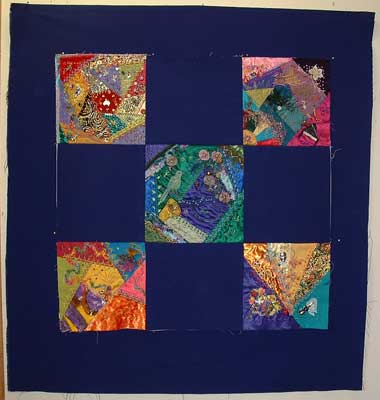
When I got the new fabric home I laid the blocks out on it again, stood back and looked at it and thought Ooops its not the right colour, it looks good with the blocks but there was to much background and I felt as if it needed another colour…I tried adding corner squares but there was still to much background which made the blocks look to sparse and spread out.
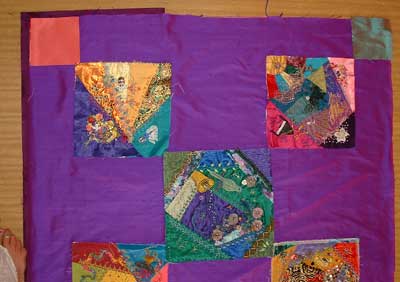
I played around with the placement of the blocks and liked this arrangement but I felt that it still needed another colour around the blocks.
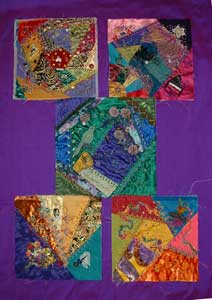
I took the blocks and fabric to the Canberra Quilters monthly meeting knowing that I would get lots of suggestions from them…and I did, they suggested framing each block log cabin style but that would have got into being a lot of piecing and I wanted the backgrounds of these quilts as simple as possible so as not to draw focus from the blocks, we tried turning the blocks on point but only the centre one looked any good on point, we tried laying them out in pennant and banner shapes..It was when somebody suggested black and the hostess of the meeting went and found some, that it came together as soon as we laid the blocks on the black background everyone agreed that it worked, I had not tried black because I had thought that it would be to sever but what it does is make the blocks shine out like jewels.
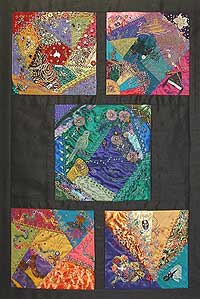
And the fabric that I purchased for the background works well as the borders, we did try it on some dark green which did look wonderful but the room was split as to which looked best and in the end I decided that the silk would be the nicest fabric to work with…going now to cut the border strips and stitch them on..
|
Something else that we needed to think about for the All that Jazz quilts is that we need to send them over the big pond from Australia to the USA and from there they will be posted out again to their new owners…I couldn’t figure out a practical way to send them flat, I didn’t think that folding was an option because #1 in particular could not be folded without folding through blocks…the option that is left is to roll them…that means that we needed something to roll them around and that something needed to be light weight so as not to cost to much when posted.
I started with the tube from a roll of fabric which I wrapped in batting to about a 6″ diameter…
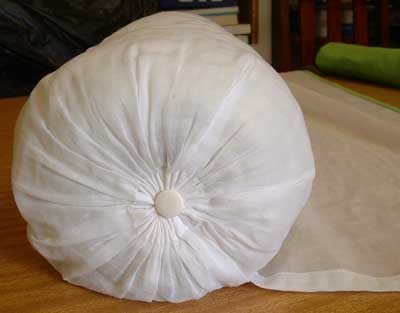
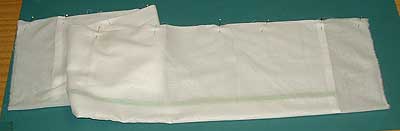
I cut a piece of muslin (calico in USA) (the width of the quilt plus the diameter of the batting roll plus 2″ for a hem at each end) x (the circumference of the roll plus seam allowance) …I hemmed the ends stitched a half inch seam down the length, turned it right sides out and inserted the batting covered tube….I used a strong thread to run a gathering stitch around each end, like the end of a bolster and when they where gathered to the centre, how could I not finish the ends with a button, I was at Sharon’s when I did the gathering and I raided her button box for 2 small white shank buttons to finish off the ends…
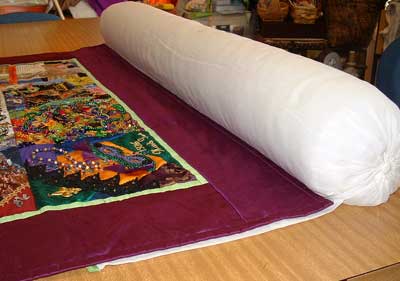
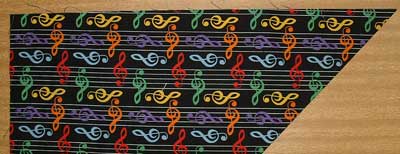
The extra bit of fabric that you can see coming out of the roll is, a rolling skirt…to make it I cut a piece of the fabric about an 1″ wider than the quilt plus hems each side by about 15″…I hemmed the edges, put a binding on one long side and put the other long side into the seam before stitching the seam on the tube cover.
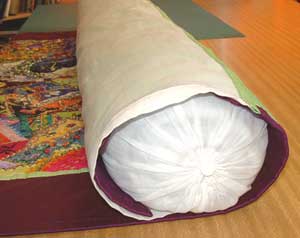
And what you ask is a rolling skirt…it is a little, possibly crazy, invention to overcome a problem that I have when rolling quilts…The problem being that it can be difficult to get the leading end of the quilt to tuck in to start the roll without catching on any embellishments or getting some of it folded back and doing it without loosing the tension of the quilt on the roll and on larger quilts you often need a second person…with the rolling skirt the end is automatically rolled in and I am single handed able to get a firm neat roll quickly.
All that Jazz #3 Update
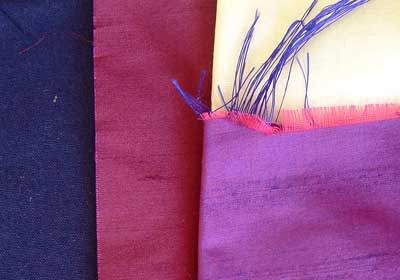
The fabric I chose to redo All that Jazz #3 is a pinkish purple slub silk, I have photographed it with the borders of the other 2 quilts and I have freyed out a bit of the fabric to show you the 2 colours of thread that have been used to weave the fabric.
|
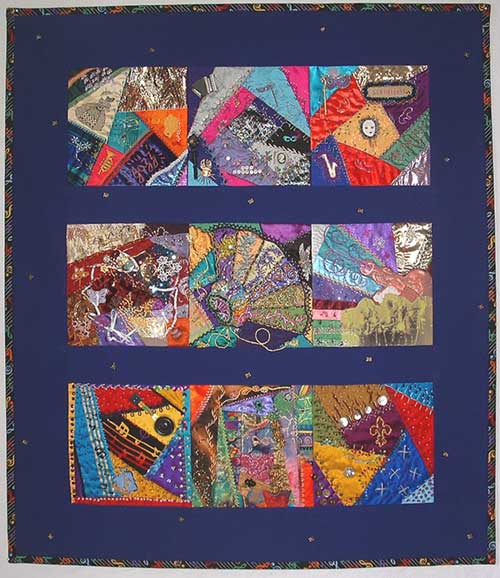
This is All that Jazz #2 and you can see a bigger picture on flickr
|
This is the binding fabric that we chose for the second All that Jazz quilt…it is a quilters cotton which is easy fabric to work with, which is just as well because I had to cut the binding on the bias to get all the colours to show. I made this binding 1/2 inch wide and stitched it on the same as last time.
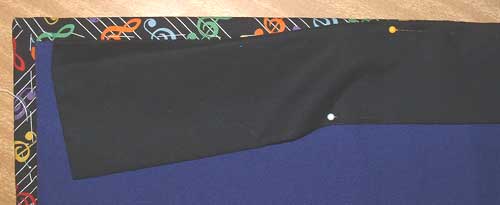
The rod pocket comes next which I have done differently because I was going to quilt hearts in the borders I couldn’t machine the rod pocket on as I did last time
I made the rod pocket the same but matched up the raw edges at the top and stitched it on with the binding before hand stitching the bottom edge….After stitching the binding on I folded the pocket up and then down so that the fold was level with the top of the quilt, this forms the pleat, and then pinned across the bottom.
This quilt is not nearly as heavy as the first one so there will not be as much stress on the rod pocket but I still want the stitches to go through the batting so that the batting takes its weight…At the same time I don’t want any stitches to come through to the front of the quilt…I have found that it is easiest to get a good grab of the batting and avoid stitches that would show on the front, by putting the needle through all the layers then pull it back through the front fabric so that the needle is between the layers take a long stitch and before pushing it back through the batting give the needle a wriggle to make sure that you havn’t caught the front fabric. I follow the long stitch with a short back stitch through the fold of the pocket so that the long stitches overlap just a little.
I have tacked the binding to the back so that I can photograph it which I will do tomorrow before taking it to my friend Anne E. who will stitch the binding down.
|
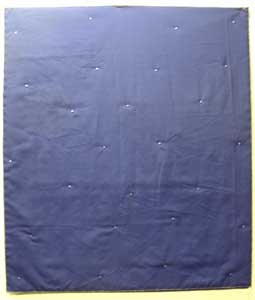
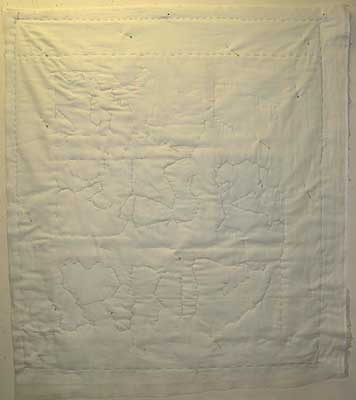
The second all that Jazz Quilt is ready to put the binding on…the photo shows how the butterflies are scattered over the back.
In the meantime I have stitched the 5 blocks with 4 plain squares into a 9 patch for the centre of the third All that Jazz Quilt…
…and tonight I unpicked them…Why…because I had used the same fabric as I did for the second quilt and whilst the colour looks great with the blocks, while I have been working on the second quilt I have grown to hate working with the fabric…it crushes but won’t take a crease, it attracts fluff, it freys badly and just doesn’t having a nice feel to it…I have been thinking about it for a few days, trying to convince myself that I was just being silly but yesturday I realized that I wasn’t looking forward to finishing the third quilt, I rang Sharon and talked it through with her and made the decision that I would reverse sew the 9 patches and change the fabric…decision made I am happy and looking forward again to pieceing All that Jazz #3…now what colour will I find for it this time?
|
I don’t know if you want to see another messy back but I thought that those girls who have a block in this quilt might like to see where I attached there blocks. To get a random placement for the butterflies on the front I actually used pins to mark the locations from the back where I fitted them in between where I had stitched the blocks down, if I had done it from the front I would have been distracted by the exact placement of the sashings and the random scatterings would have been more contrived…a bit like the theory that if you want to copy a picture turn the picture upside down because then you wil draw what you are seeing and not what you think it should look like.
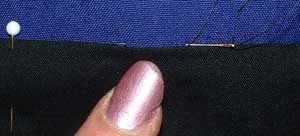
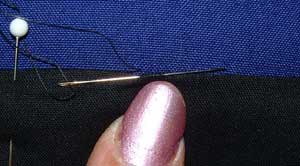
I used the same trick of adding all the threads for the ties so that all the knots are hidden by the real back…Here are the 20 needles all threaded and knotted.
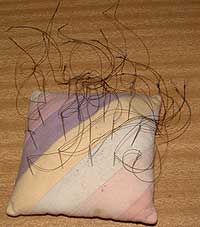
because this quilt has sashing strips, that I can put beads in, I don’t have to hide my tie stitches so I have used a different method of tying this quilt…I have used a bead on the front and on the back, much easier and quicker than hiding the stitches on the front, just a matter of going through the bead on the front and then the bead on the back about 3 times, the end of the thread is easily finished under the bead on the back then finishing the thread with a backstitch under the bead on the back and running it into the batting…The Gold butterflies are on the front and the purple butterflies are on the back.
|
|
|

