| |
About
This is Annie Whitsed's Crazy World a world where I stitch the joys and chaos of life into beautifull crazy quilts. email annie@loopylace.com
All That Jazz
Annie\'s Website
Bags-of-Fun
Blogroll
Websites


|
|
I have floundered a bit trying to interperet my January Design onto a completed post card…
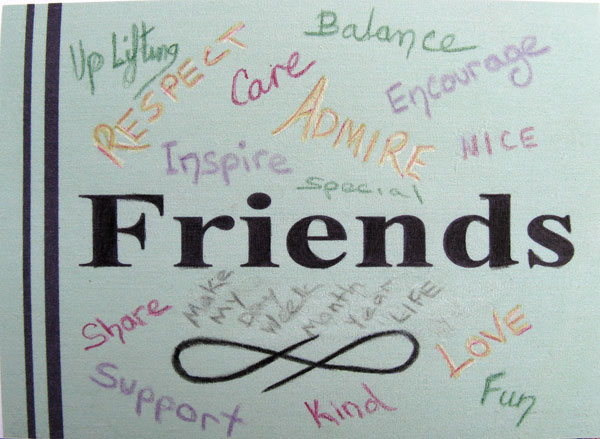
Working in photoshop I made a postcard sized image coloured the background, drew the black lines down the left side and wrote the word friends (getting the font the right size was a bit of a bother but now I know how to do it I may go back and do it again with Capital letters).
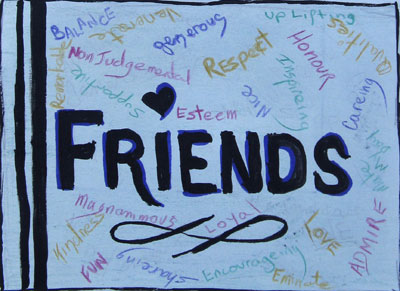 I then printed the image onto a printable fabric sheet (this caused me more problems then the font size, I tried for a bleed print but it bled to much, I should have made the image a little larger than I wanted and cut it back to size)…It also printed the background much darker than I had expected. I then printed the image onto a printable fabric sheet (this caused me more problems then the font size, I tried for a bleed print but it bled to much, I should have made the image a little larger than I wanted and cut it back to size)…It also printed the background much darker than I had expected.
For the words in the background I went to the art shop to purchase fabric marking pens, which weren’t cheap but I will use them again, which is just as well because I didn’t use them for this project, after doing a few tests I decided that the colouring in pencils gave more of the washed out effect that I wanted…..I did think that the finished product should have less words than my Draft copy But I am not so sure now as I think I like my draft design better than my finished one but for better or worse here is my Take It Further January Design on a Post Card.
Link to other posts regarding this Take it Further Challenge
|
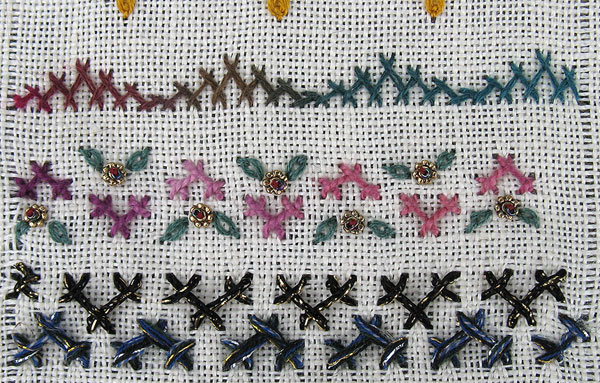
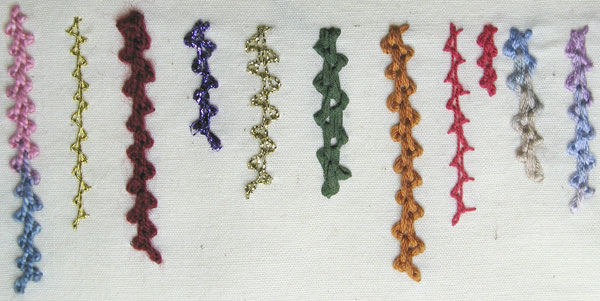
Top row is stepped Herringbone stitch done with a varigated silk thread
Middle row is groups of 3 herringbone stitches (Varigated pink cotton Pearl #5 ), they are the same groupings as the top row in section 04 but in this seam I have done a larger stitch and spaced the groupings so that you can see how they are formed…I have trimmed it with gold bead flowers with greeen detached chain stitch leaves done with 2 strands silk floss.
Bottom… The same arrangement of groupings of 3 herringbone stitches with 2 rows faced into each other done in thick Novelty knitting yarns.
|
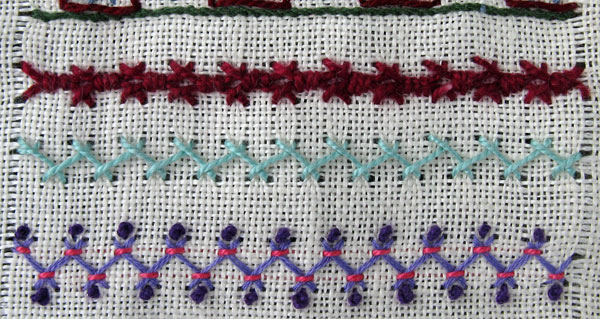
Top…A wide row of herringbone stitch, 3 strands of stranded cotton thread with a narrower row of herringbone stitched on top using cotton pearl #5 thread.
Middle…herringbone worked with wide and narrow stitches using a pearl#5 thread.
Bottom…is a basic herringbone stitch done with a cotton broder thread and trimmed with green Detached chain stitch, 2 strands of silk and Yellow Berry Stitch using 2 strands cotton.
|
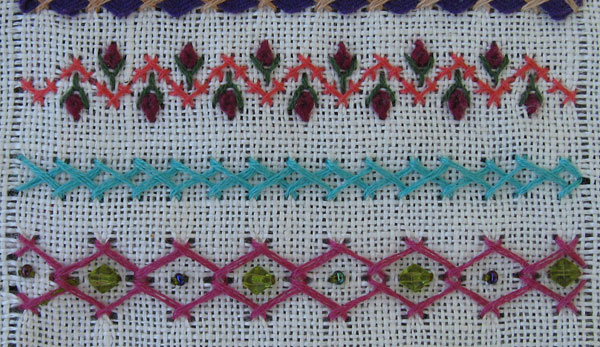
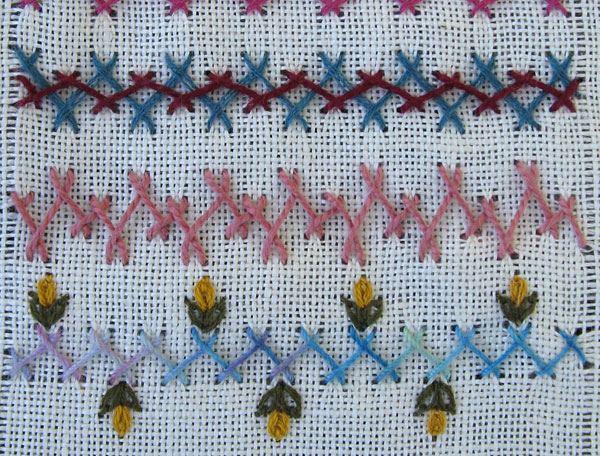
Top row is groups of 3 herringbone stitches done with 2 strands of Orange cotton stranded thread trimmed with detached chain stitch done with burgundy pearl cotton size 5 and the green is 2 strands of silk thread.
Middle row, worked with 3 strands of cotton stranded thread, is 2 rows of Herringbone Stitch, one on top of the other with the second row worked in the gaps of the first row and with alternate stitches slipped under the thread of the first row.
Bottom row is 2 rows of Herringbone stitch done with 3 strands of stranded cotton embroidery thread and decorated with beads
|
I am having fun with my band sampler, today I went to a friends place for a bar-b-que and it is very portable and easy to stitch on while talking.

The Top stitch is 2 rows of herringbone, the second row, pink, stitched into the gaps of the first row, to get the woven effect, with each alternate (upstrock stitches) pass the needle under the blue thread…both colours are 4 strands of stranded cotton thread.
The middle row is closed herringbone with increasing and decreasing stitch widths, worked in a fine silk thread.
The bottom row is using herringbone (3 strands cotton) to hold down the ric rac braid trimmed with Pistil stitch and Colonial Knots worked with a thick, soft silk thread, the trim is only on one side because that is all of the thread that I had.
|
Happy Australia Day to my fellow Aussie Readers I hope yo had a lovely day…I spent a quite one watching the cricket and Australian open tennis on TV (I don’t know what is happening to me the older I get the more sports I enjoy watching) and while watching the box I got a few stitches done on my sampler.
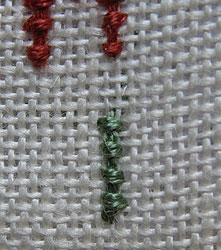
First up I did Fancy Hem Stitch, which I found in one of Sharon’s books a few weeks back, its stitched with #5 cotton pearl thread.
I was then at a loss as to just what stitch to do next with so many to choose from…to give me some direction I decided to repeat TAST, last year I did my TAST stitches on crazy quilt blocks which was a good idea because amongst other projects they helped me get Mum’s Memory Quilt finished…This year I will work the stitches and variations on my sampler so that I will have a record of them all in one place…
TAST week 1 stitch was Herringbone Stitch and the next seam on my sample is the basic herringbone which I worked with #5 cotton pearl thread.
On the bottom row the basic stitch, worked with 2 strands of cotton, is a little wider and is trimmed with short straight stitches worked with pearl 8 cotton crochet thread and French knots worked in a linen thread.
|
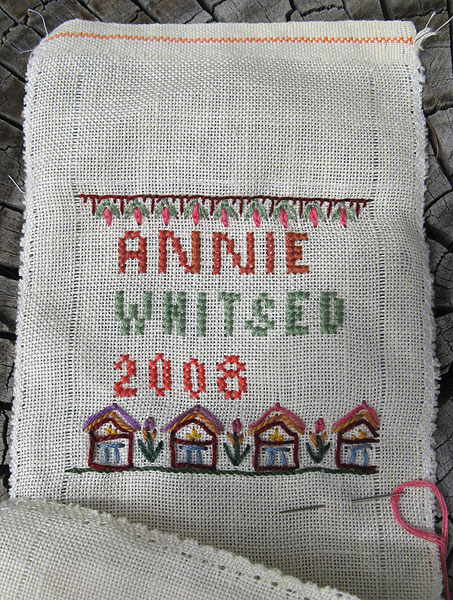 This is my Band Sampler…The fabric is 25 count Linen…The pulled threads to define the edges are 3.5 inches apart…I am using my leftover scrapes of thread so the colours will be random. This is my Band Sampler…The fabric is 25 count Linen…The pulled threads to define the edges are 3.5 inches apart…I am using my leftover scrapes of thread so the colours will be random.
I started it with A header row of Buttonhole stitch (3 strands of stranded cotton thread) which I trimmed with Detached Chain Stitch (green 2 strands of stranded silk, pink 3 strands of stranded cotton)
For my name and the year I used the same cross stitch alphabet as I used on my Stumpwork Sampler, (teracota is 2 strands cotton, green is 2 strands silk and th pink is 2 strands of cotton)… I started my first name in the centre so that it would be centred but had very carfully MISScalculated the centre…oops nothing for it but start the surname and year in a line with it.
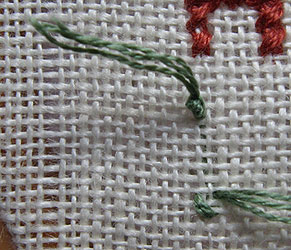
For my first seam sample I have done a row of houses, a stitch from Carol Samplers book ‘Treasury of Crazy Quilt Stitches’
…I had to alter the roof because I hadn’t left enough space, so it is a little bit cramped and after so many years of working on crazy quilt blocks with the extra thickness of the foundation and seams to stitch through I am having a little trouble, even using a hoop, with my stitch tension on the single piece of fabric and the countable threads are a little distracting after doing so many freeform stitching but I am sure I will adjust to both and am thrilled to have it started.
|
 When visiting Sharon yesturday she was stitching her sampler together, Have you seen Sharon’s Sampler? it is worth a look, and we were talking Samplers. When visiting Sharon yesturday she was stitching her sampler together, Have you seen Sharon’s Sampler? it is worth a look, and we were talking Samplers.
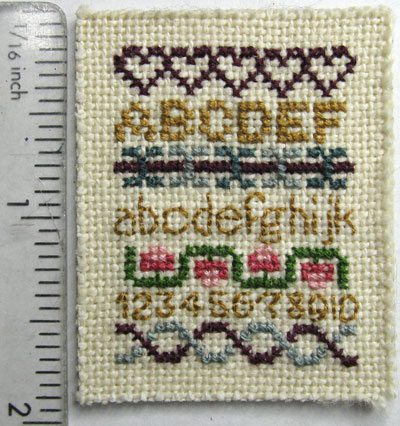
I loved samplers from the first one that I saw and wished that I had learnt on a sampler…The first samplers I saw where cross stitch Alphabet Samplers an I made a miniature one of them in 1995 but it was the long band samplers that I really fell in love with…I have started them before but not got anywhere with them and although I have made a few small samplers over the years unlike Sharon who made all of hers the same width mine are all different widths, and I have done thread samplers like the Spanish Knotted Feather Stitch sample below…
Another difference between Sharon’s and mine is that most of hers are on linen, I had done mine on calico (muslin), it just doesn’t have the same ambiance as linen does…I made my Stumpwork Sampler on a nicer fabric and it is my favourite of what I have done.
The Samplers that I really, really fell in love with when I learnt about them are the 4 inch wide band samplers that where kept in the sewing boxes of days gone by to record new stitches as they were learnt because they had no books/internet to reference…These darling band samplers were not lined so that the backs of the stitches could be seen (being able to see the back can help when working out how the stitch was done)…Wanting to make one with the back showing means that I don’t want to start with knots, I did know how to start with a couple of tiny back stitches but sometimes those stitches can be seen, today Sharon solved that problem for me, she tought me about waste knots, a term I have never even heard before, which work simple by knotting the thread to hold it in place while you stitch the first few stitches, working them over the thread on the back to hold it in place, then the knot can be cut off leaving a neat start to the seam.
By the time I left Sharon’s I had a 4 inch wide lenth of linen with the edges zig zagged and threads pulled on either side to line up the start and finish of the stitches…I have got it started but I am tired and going to bed so it will be tomorrow before I take and edit those photos.
|
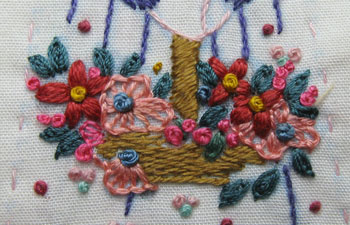
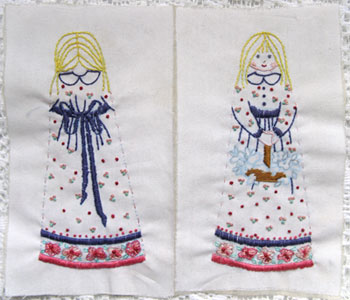 The kit to make this Scissor Keeper was a Freeby on the cover of a needlework magazine, I started it when on holidays a few years ago…I found it in a box the other day, nearly finished, it didn’t take me long to embroider the flowers in the basket and stitch the 2 halves together. The kit to make this Scissor Keeper was a Freeby on the cover of a needlework magazine, I started it when on holidays a few years ago…I found it in a box the other day, nearly finished, it didn’t take me long to embroider the flowers in the basket and stitch the 2 halves together.
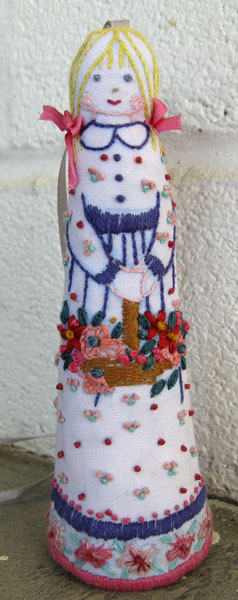
The red flower petals are 8 to 10 straight stitches coming up and going down in the same hole…The pink flowers are buttonhole Stitch…A scattering of French Knots and Berry Stitch Leaves finish the arrangement.
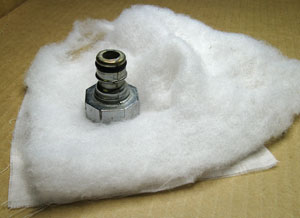
Until I stitched around the edges and turned her right side out this little lady was a Scissor Keeper but I found myself not wanting to Stitch the front to the back across the bottom because I didn’t want to flatten the bottom of her skirt, I was seeing her as a doll rather than a scissor keeper…I went hunting around the house for something round to fit in the bottom to hold the round shape, I tried a cotton reel but the top showed as a ridge on the skirt, small bottles did the same, coins wouldn’t stay in place, the lid of a bottle might work but before I found a lid that fitted I found a metal hose fitting, perfect size and being smaller at the top there was no ridge and it has the added advantage of being heavy enough to stabilize her so that she stands tall, 4 1/2 inches tall to be exact.
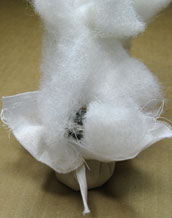
I wrapped the hose fitting in the batting and a square of fabric before inserting it into the base.
|
 “I love a sunburnt country “I love a sunburnt country
A land of sweeping plains,
Of ragged mountain ranges,
of droughts and flooding rains.”
These words, from ‘I Love a Sunsurnt Country’ by Judith Wright, resonate with Australians and never more so than when after years of draught, there are now many towns up north submerged by flooding rains…
The rains in Canberra have been gentle soaking rain, the sort the garden loves and after weeks of high temperatures today is a lovely mid 20s centigrade (approx 80 degrees F) A perfect day to be in the garden….
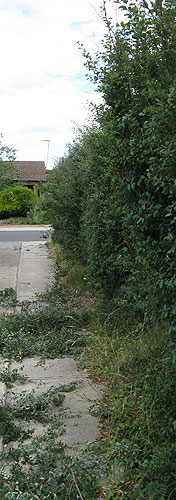
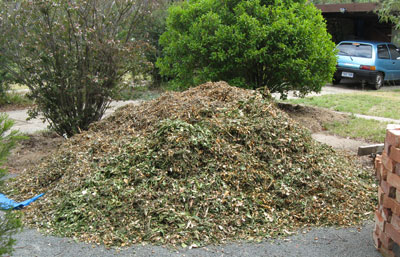
I pruned the hedge down the side of the driveway…and had an unexpected phone call from a friend asking did I want a load of mulch…I would love a load of mulch.
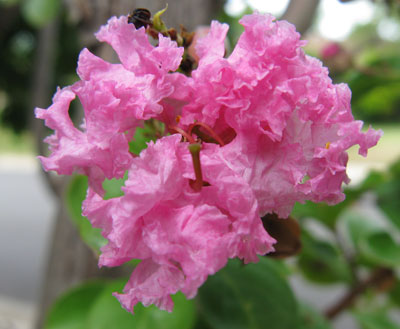
A Lovely day to be in the garden nd the Crepe Myrtle that I thought had died is now blossoming.
|
|
|

