Annies Crazy World


  • About

    This is Annie Whitsed's Crazy World a world where I stitch the joys and chaos of life into beautifull crazy quilts. email annie@loopylace.com
Locations of visitors to this page Subscribe with Bloglines
 
not a good day July 31st, 2007

I got today off to a good start by getting to the shops to buy the backing and batting…but from there the day went downhill, I had asked for 1.1 meters but the lady must have only heard the 1 meter and it was a couple of inches to narrow…I had another piece of batting that was big enough and started tying it through the inner/false back (for details see posts Part 8 – quilt engineering and part 8 continued)…I had the top row tied but found the batting was just to puffy and it required a lot more tyes than I wanted to do and I just didn’t like it and I haven’t put all this work into the top only to not like the finish…I have unpicked it and will deal with it again in the morning, when I will have to make another trip to the shops…..and in the meantime I broke my golden rule when cutting the outer border, the golden rule is calculate the measurement 3 times and measure twice so that you only have to cut once, the miscut is not disasterous just frustrating that I made no forward progress all day

Mum’s block – Details 367 and 368 July 30th, 2007

About a month after I left home to go to college in Canberra I got a phone call from my mum, someone had told her about mature age students, she hopped on the next bus for the 20 mile trip to Lismore and enrolled at the northern rivers college of Advanced Education where she studied for the next 3 years and was awarded a Graduate Diploma in Educational Studies…I have always been proud of her for going back to school when she still had 4 kids at home and I have included a copy of her Diploma to celebrate that achievement…I was going to put it in a frame on the wall but to do that it needed to be smaller and became completly unreadable so I put it across the bottom corner of her block.

A couple of weeks ago I showed you the back of the curtin that I had made for mum’s block…Well I have got to tell you that sometimes I can be to smart for my own good…It is all very well having a real miniature curtin complete with gathering tape but the fact is that the top was very bulky and really not enough gathers to fall nicely…you guessed it I made another one, this time I cut it with a selvedge edge at the top so that I only had to fold it over once further reduceing the bulk so that I could get lets of nice fine gathers…for the curtin tie backI used a loop of silk ribbon with a french knot to attach it to the wall.

And I put the little green frog on the window sill where he can look up at her.

Mum block

aklkasd July 29th, 2007

Fish charm completes the sceneA short post tonight…between the head cold, doing as much stitching as I can so that I am not panicking at the end of the week to get it finished (I have the first border ready to stitch on tomorrow) and staying up late to watch Le tour de France, which did finsih tonight, I have run out of time and energy for preparing any photos tonight so I just have the one I forgot to include last night.

I left stitching the Frying Pan for The fish cooking scene on until last so that I didn’t risk breaking it while sewing the blocks together…I had to drill a couple more holes in the pan to secure it and stop it flopping…and to complete the scene I ‘caught’ a fish, it is one my son painted for me a few years ago.

Finishing Touches – Detail 366 July 28th, 2007

Ideas for memory quilt in Visual Journal As I have worked on this memory quilt I have had a running list of ideas in my visual journal crossing off ideas that I couldn’t make work, adding others as I thought of them or found something that prompted an idea…every so often writing an updated list of what I would still like to include.

I had wanted to have a tent because when we all go home for Christmas the backyard becomes a camping ground…This recent list does not include a tent because I had asigned it to the to hard basket…imagine my delight when I opened one of the packets of mixed buttons that I purchased the other day from the Crafty Frog to discover a little blue tent…The tent is a little more plasticy than I would normally use without painting it but I am running out of time to fiddle about with the paints and besides it is a good tent blue, tents are sort of plasticy and I had to find a place for it just because I had it…..I also found a place for the bicycle button.

Tent Button Bicycle button

And it wouldn’t be a crazy quilt without a Spiders Web for good luck…for a little fun I have stitched it on the book fabric.

Spider and web on books

The Last Join – Details 360 to 365 July 27th, 2007

Last join on mums quilt

This is the last join on mum’s quilt…going across the join are…

Portuguese Stem Stitch

Portuguese Stem Stitch

Comination of single knot, Double knot and Oyster Stitch

Combination of knots

Herringbone on the upper side and a knot combination, see illustration of what I did.

combination of herringbone, coral and buttonhole stitch

how to one How to two

Double Knot Stitch

Double

Elongated Oyster Stitch

Elongated Oyster Stitch.

And on the last section I have done a zig zag chain Stitch

zig zag Chain Stitch

Deadline is approuching – Detail 359 July 26th, 2007

With my deadline approaching (quilt hand in day for the exhibition is Sat week) it is time to decide which Ideas I really want to include and what can be left off…

I do really want a frog for mum’s pet frog that lived in her toilet and I do really want a cow because when we were kids my uncle had a cow and his family had the morning milking and we had the afternoon milking and every afternoon someone had to go around the corner with the billy can to collect the milk, which is how I learnt about centrafugal forces when I could swing the billy around above my head without the milk spilling.

Cow ButtonAs I do really want the frog and cow I did really need to go shopping so that is what I did this morning…and at the Crafty Frog I found A cow and a frog or 2 and an aeroplane that I think I will find a space for to represent mum’s overseas trips and several others that will go into the collection.

The section of the cow button that is covered with thread was half white and half black so I sewed it on with white thread and then painted half of it black.

Buttons and charms from the crafty frog

and that is it for tonight because I have a cold in the head and just want to go to bed…I do beleive that if my deadline wasn’t looming I probably wouldn’t have got any stitching done today…as it is I have almost finished embroidering the last join but have lost concentration for taking and preparing the images which is going to have to wait untill tomorrow

Some Technical Construction Guff July 25th, 2007

In past posts I have explained about freezer paper and how to use it to size blocks when joining rows…When you come to joining multiple rows the pieceing becomes a little more tricky as you need to measure the width of the underside blocks as well as the upper row…I took photos today, as I joined the top and bottom sections of mum’s quilt, to illustrate how I go about joining the bigger units.

I start by ironing a strip of freezer paper to the back of both rows to be joined, I have the freezer paper strips cut longer than the join, the underside piece a little longer than the upper piece so that I can see both when I put the blocks together.

When I put the halves together I put a piece of fabric between them so that embellishments don’t rub together and after pinning the seam I put additional pins on the other side of the freezer paper to help hold the layers together and reduce drag and slippage.
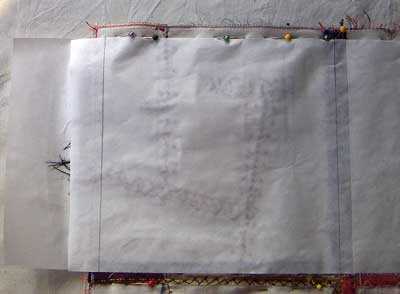
Joining blocks 01

I spear pin through each intersection taking care to put the pin through the seam right next to the paper on the top and the bottom.
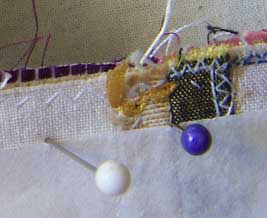
Joining blocks 02 Joining blocks 03

I then pin between the blocks checking with every pin that it is right next to the paper on the underside, weraing glasses makes this a bit difficult, every time I lent forward to check the location of the pin on the back my glasses slipped off.

Joining blocks 04

When I have The seam pinned I Tack the intersections, doing a backstitch around the point where the joins do intersect, before taking the spear pin out…It is also worth tacking any patches of velvet.
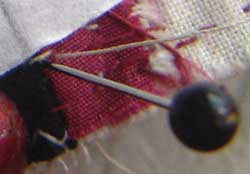
Joining blocks 05

I set my sewing machine up on a small table that is slightly lower than my studio table and put a box behind the machine so that I have a level surface for the quilt to move over.
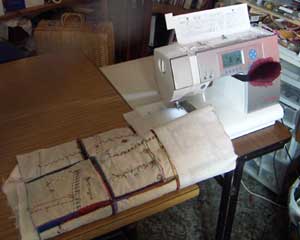
Joining blocks 06

Umm…maybe it is worth tacking the whole seam…because even with all that care in pinning when I checked the back I had some slippage…I unpicked and realigned and restitched these in small sections.

Joining blocks 07

Needle and Thread – Details 352 to 358 July 24th, 2007

Coral Stitch

Across the first intersection of last nights join I have done Coral Stitch with silk Ribbon.

Net and Coral StitchThen going down the join I have done Feather Stitch.

Running Stitch which I have left unfinished with the needle still attached…for safty I have put a tiny drop of glue over the point of the needle and I have embedded a longer needle in the seam on the back to stiffen the fabric behind the needle so that the fabric can’t move back away from the needle on the front…with the needle I have put a scissors charm and a tiny cotton reel (available from craft shops) which I have wound with green thread.

The third section is Feather Stitch done in the opposite direction to the first section.

To add some variety to these narrow join seams I have mixed several knot stitches, alternating Single knot stitch, Double knot Stitch and Oyster Stitch which all make different sized knots.

For the 5th section, which is on an intersection of blocks I have used the net from the fishing line seam with a rock looking seed behind it and close together Coral Stitch done with a thin green thread to look like the sea weed that we called mermaids necklace because it looked like a string of beads, and when you used 2 fingers to put pressure between the beads the end one would pop off.

The last section is Double Knot Stitch.

Feather Stitch Running Stitch, thread and scissors feather stitch single knot, double knot and oyster stitch Double knot

Penultimate Join July 23rd, 2007

With this join I have the top half of the quilt together and I have embroidered most of the seams but I forgot I was going out tonight and didn’t allow time for photographing and preparing the images and I am now to tired to think straight so they will have to wait untill tomorrow because I am going to bed.

join 28

Recycling – Detail 349 to 351 July 22nd, 2007

Coral Stitch

The seams on the rest of yesturdays join are Coarl Stitch done with silk ribbon.

Yo Yoback of framed photoA Yo Yo…The string of the Yo Yo will carry on over to the next block.

I used the section in the middle, where 2 patches of the same fabric came together, to add a print of the Family Home. To make it look like it was framed I stretched the print over a piece of stiff interfaceing.

Framed Print of Family Home

I have recycled a print I did for a college project 10 years ago…it is an image of the Family Home that I drew and then screen printed …I Framed one of the prints with photos of the family and pets that had been taken in the backyard…The cat at the bottom has on his back a tawny frogmouth that my brother had rescued when its mother had been killed, My brother tought Tawny to fly and we watched it grow from a fluffy chick to a sleek adult who also shared the cat’s food bowl and was a special bird.

Family Home