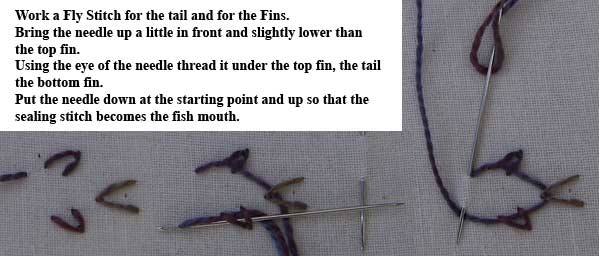
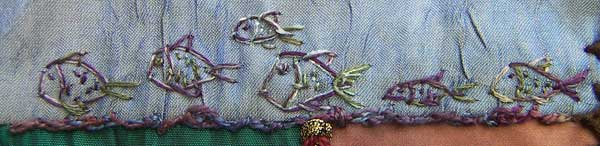
 Add an almost straight fly stitch to divide the head from the body and a spot for an eye. Add an almost straight fly stitch to divide the head from the body and a spot for an eye.
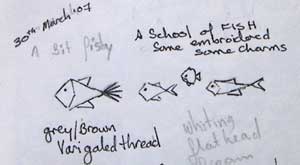
The positions of the Fly stitch for the tail and fins will determine the size and shape of your fish and the great thing about doing it this way is that fish come so many shapes.
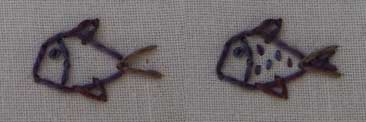
Depending on the size of your fish, additional detail can be added with a few straight stitches to fill in the tail and tiny straight stitches that look like scales…The varigated thread that I used gave surprise colouring on the fish.
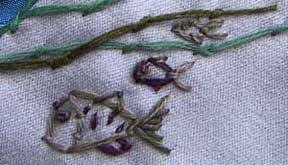
I was going to have just the school of fish swimming along above the seam but because the thread I chose for the fish blends a little with the watery background the colour didn’t work to frame the image at the top…my solution was to add the riverbed which I created with a haphazard line of mixed coral stitch and oyster stitch to get different sized lumps and then a second row to intersperse the colours on the varigated thread the second row is mostly threaded along the first with just a few extra knots to fill in along the seam.
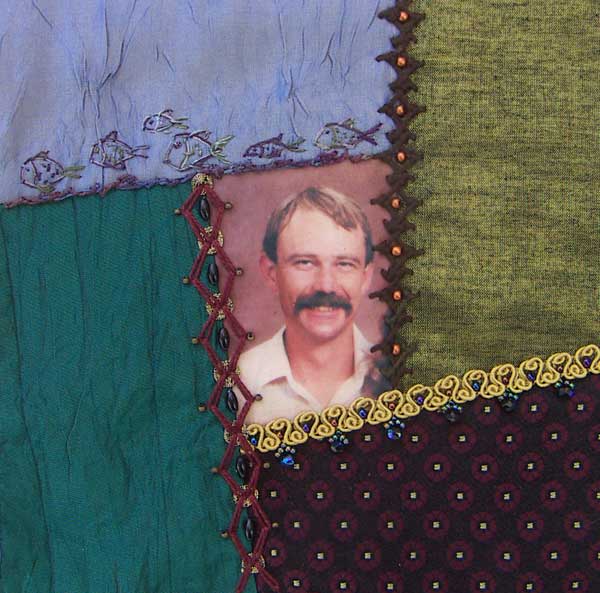
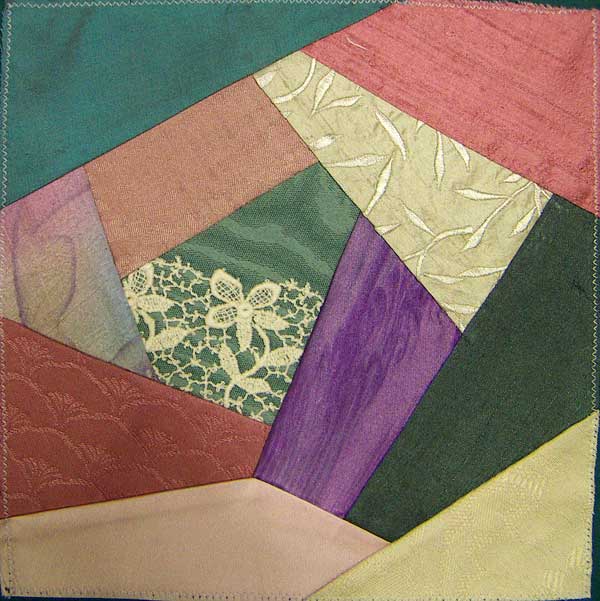
Progress has been made…When I kick started this UFO I had 9 blocks made in 1994…I have now matched that with 9 made in 2007… below is the 18th block.
|
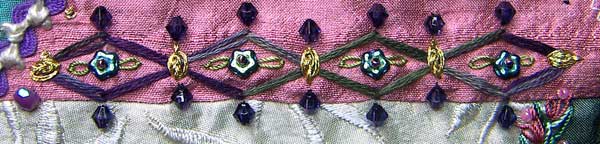
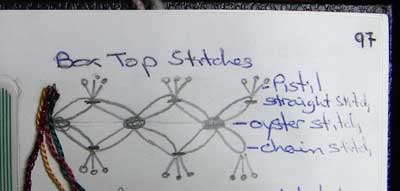 I had an old visual journal out to look up some notes and while flipping through it, this sketch that I had made as an idea for a seam on my Box Top, jumped off the page, it is dated 9 may 2002, a combination of 2 rows of long zig zag chain stitch, Oyster Stitch, straight stitch and pistol stitch…The first seam below is how I interpreted it on my box top. I had an old visual journal out to look up some notes and while flipping through it, this sketch that I had made as an idea for a seam on my Box Top, jumped off the page, it is dated 9 may 2002, a combination of 2 rows of long zig zag chain stitch, Oyster Stitch, straight stitch and pistol stitch…The first seam below is how I interpreted it on my box top.
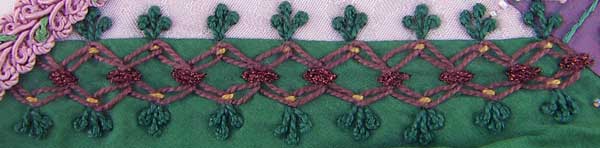
On the Birthday block I did the oyster stitch across instead of along the intersection, added beads along the edges and a flower bead with detached chain stitch leaves in the centres of the diamonds.
On mum’s memory quilt I located the zig zag chains across the seam and replaced the oyster stitch with coils formed by wrapping metalic thread around the anchor stitches at the intersections, black rice beads in the diamonds and seed beads on the points along the edge finish this seam.

|
 This seam is 2 overlapped rows of Feather stitch from TAST week 7…I think that it has become a favourite stitch as I did This seam is 2 overlapped rows of Feather stitch from TAST week 7…I think that it has become a favourite stitch as I did
3 variations in week 7 and now I am doing it again…This time I have used a soft varigated green thread for the feather stitch and added pretty pink detached chain stitch and beads.
|
I think I like Knotted Cretan Stitch…As Sharon said it is little different from cretan stitch but that little knot gives it a lot of extra texture…It is hard to draw but that is not a problem because it will work with the sketchs that I have already done for cretan stitch and in the seam above I have married it with the TAST week 12 stitch by using it to couch the rick rack braid.
Tip: before diciding to do a seam with a thick thread needle test the fabrics, that is stick a needle through the fabric and see how easily it goes through…If I had needle tested my fabrics this seam would have been done with a very fine thread because the top fabric was Very difficult to pull the needle through, I persisted to the end of the seam but couldn’t face going along again to add the pistal stitches that I had intended…I was stitching it while visiting with Sharon and she came to my rescue by supplying me with the beads which are just the perfect colour to balance the mauve patch on the block.
Not put of by how difficult the above seam was to stitch, tonight I have done a seam using 2 rows of knotted cretan partially overlapped in the same way as detail 118 and detail 176.
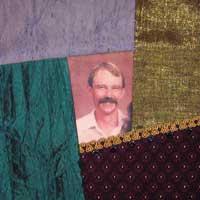
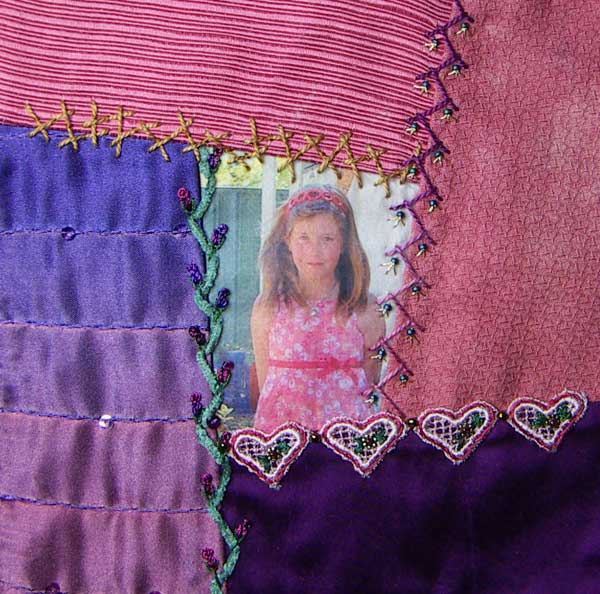
What is interesting to note here is that the seam above is dainty and looks pretty on the birthday block the seam below is the opposite it is bulky and geometric which makes it look good as part of the frame for a man’s image.

|
 Today I finished the block that only had 2 fabrics on it when I stitched yesturdays seam. Today I finished the block that only had 2 fabrics on it when I stitched yesturdays seam.
I have also pieced an 8 inch block for a friends birthday and done a seam using knotted cretan the TAST week 13 stitch.

|
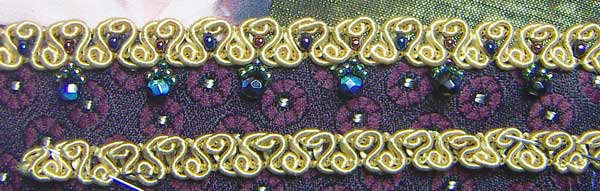
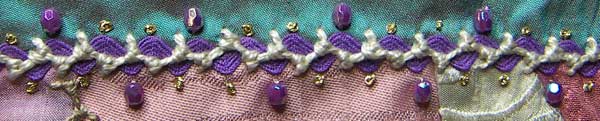
 Even the simplest Braid can be made into a stunning seam treatment with the additon of beads…The beads can be used to stitch the braid on but I find it easier to mange if I start by tacking the braid in place with a matching thread and then stitching the beads on. Even the simplest Braid can be made into a stunning seam treatment with the additon of beads…The beads can be used to stitch the braid on but I find it easier to mange if I start by tacking the braid in place with a matching thread and then stitching the beads on.
I have put the dangling beads on every second pattern of the braid because I thought that the hanging beads would look to congested if I put the them on every space, I then to make them look integrated with the pattern I used different beads in the alternating part of the pattern.
To stitch the hanging beads under the briad bring the thread up at the top of the dangle…put 3 seed beads, I larger bead and 2 more seed beads onto the thread…put the needle back through the first seed bead and back down the same hole that you started.
|
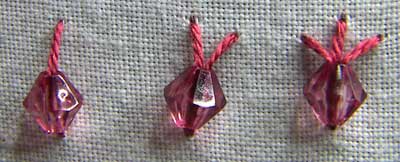
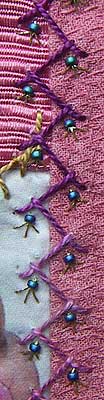  Along the lower edge of the curve in Detail 204 there are some beads stitched on with the thread fanning out below them, I didn’t draw attention to them when I posted because I didn’t have a sample of how to do them…so I have done another seam that shows them off a little more and I have done a sample to illustrate the how to. Along the lower edge of the curve in Detail 204 there are some beads stitched on with the thread fanning out below them, I didn’t draw attention to them when I posted because I didn’t have a sample of how to do them…so I have done another seam that shows them off a little more and I have done a sample to illustrate the how to.
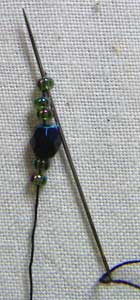
You need beads that you can pass the needle and thread through 3 times…Make the middle stitch through the bead first, come up in the same hole and make a second stitch to one side pulling the stitch tight enough to pull the bead to that side, then come up in the same hole again and make the third stitch to the other side tightening the stitch until the bead is again in the centre this locks the beads at one end of the threads.
And below is the 17th finished block for mums quilt
|
Having done a couple of story seams I need to do a few more so that they blend in and look as if they belong…I was having trouble coming up with ideas because I was overly influenced by my memories so today I rang mum got her to have a look at the ones that I have done and explained to her what sort of ideas I was needing, at first she said that her memory isn’t what it used to be but as we chatted memories started coming to the surface and I with pencil in hand scribbled them down in my visual journal so that I now have a page of ideas that I can think about and process how I could interpret them as a story seam.

|
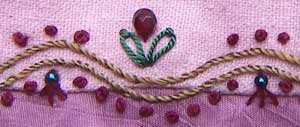
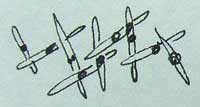 This Visual Journal sketch is another idea from a seam in The Magic of Crazy Quilting by J Marsha Michler…whilst flipping through looking for an idea for a seam today, I looked at it and saw Bamboo which reminded me of last nights outing to Varekai by the Cirque Du Soleil which had long bamboo poles as part of the stage props…figuring that to be as good a reason as any to do a seam, I produced the seam below which is straight stitches in a very rough herringbone layout with each stitch couched in the centre. This Visual Journal sketch is another idea from a seam in The Magic of Crazy Quilting by J Marsha Michler…whilst flipping through looking for an idea for a seam today, I looked at it and saw Bamboo which reminded me of last nights outing to Varekai by the Cirque Du Soleil which had long bamboo poles as part of the stage props…figuring that to be as good a reason as any to do a seam, I produced the seam below which is straight stitches in a very rough herringbone layout with each stitch couched in the centre.

|
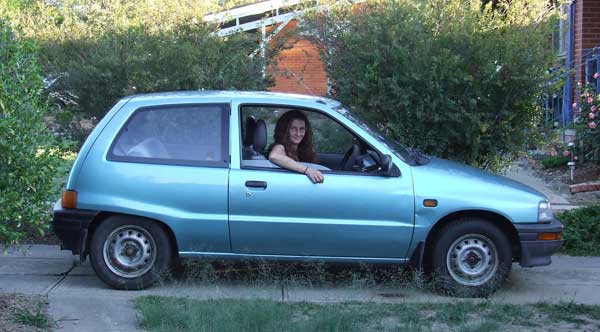
I havn’t had a car since mid Dec, which has been difficult living in a city where it is hard to get anywhere without a car, so it was with a little trepidation that I set out this afternoon to visit the car yards hoping that there would be a nice little car, that I could afford with my meagre budget, just waiting for me…and it was with great excitement that I drove home my new, 14 year old, blue Daihatsu Charade.
|


