 Another pair of blocks joined. Another pair of blocks joined.
The Stitches down this join are Loop Stitch,

Cretan Stitch,

The third stitch is Portugese Stem Stitch done with a tubular nylon floss and misstitched in that I didn’t do the wraps aroung the right part of the stitch…misstitching is an easy way to discover new stitch variations.

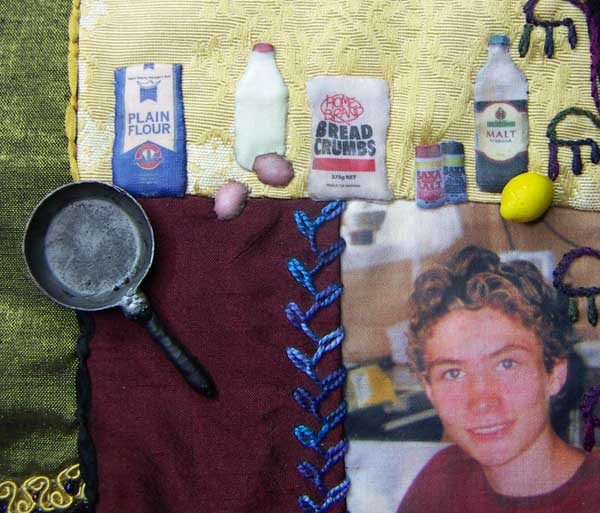
Next…When I did the Fish for Dinner Scene I was asked if I was going to put a frying pan on it, too? my answer at the time was Yes….No…Maybe…When I join the blocks there is room for one on the left hand side…I do Have one in my dolls house…but the one I have is plastic and the handle would be at risk of breaking so there may be technical problems in attaching it.
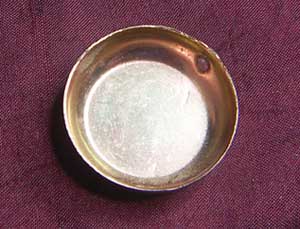
Today when looking through some boxes I found a miniature copper frying pan…pity the handle had been broken off
Could I add a handle…wire is the only thing that I could think of that would be strong enough…I drilled a couple of extra holes in the pan and used a stiff wire to form the base of the handle
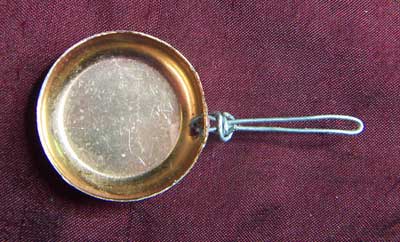
I then used a fine beading wire build up the structure of the handle.
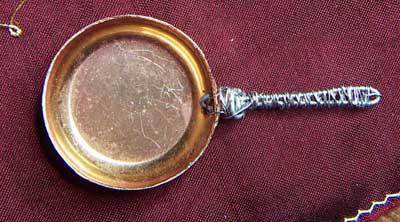
At this stage I was thinking that I would wrap the handle with thread held in place with PVA White wood Glue but before doing that I did a mental wish list of what would work well if only I had the materials/skillsm some sort of resin to mould the handle is what came to mind and then I remembered that I had just what I needed….I used My Acrylic fingernail resin to mould a handle around the wire.
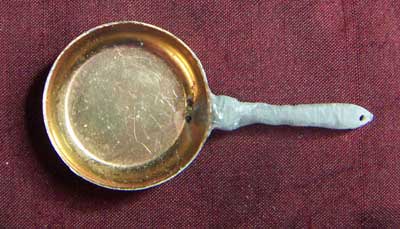
Then it was just a matter of painting the frying pan, The bottom of the pan won’t even be seen once I sew it on but I still felt compelled to paint it.

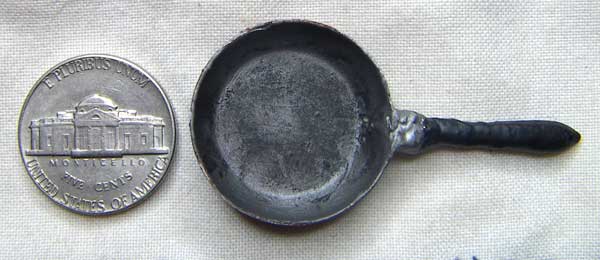
And the top of the Frying Pan, photographed with a coin to show the size.
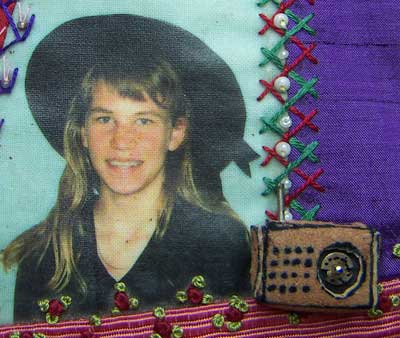
At the bottom of the same Fish for Dinner Post I commented that I would have to go shopping to try and find a lemon button…The next Day Kathy M contacted me and said that she had some lemon beads that she would love to send me…They arrived today together with some adorable kangaroo buttons.
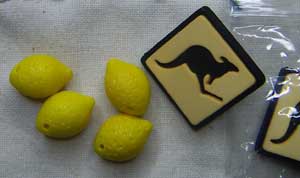
…I hadn’t dared hope that they would actually be exactly what I wanted…I did a happy dance when I opened the package to find that they are just that the exact size perfect little lemons for my scene…
…And the little lemon is even more perfect because most of our lemons came from the neighbours tree and now the lemon for my quilt has come from a cyber Neighbour…Just Perfect.
|


 A couple of years after we decorated our
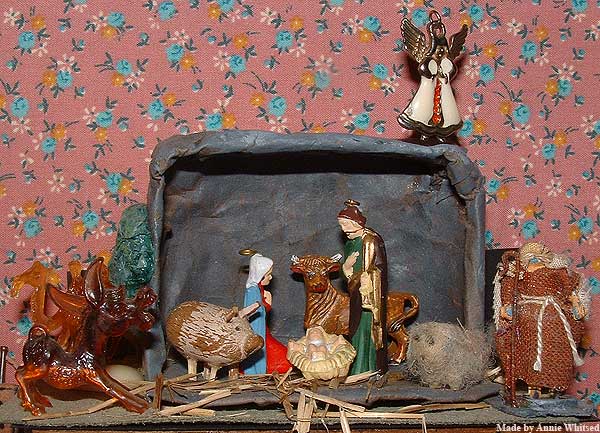
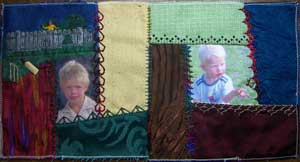
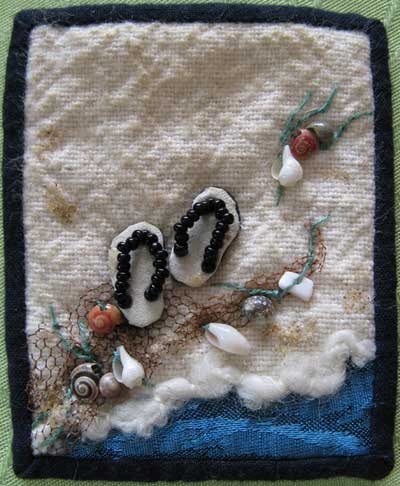 I made this miniature quilt (1.5 x 1.8 inches) for my son in 2002 when he was traveling overseas and I wanted to make him something, small enough to carry easily, that would remind him of home.
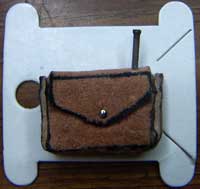
 I decided to stitch some miniature thongs for the English backpackers and Sam’s flat mate K…Having decided that I would like to stitch the miniature thongs I went looking for something to stitch the thongs onto, I found in my buzy box a business card sized piece of tymtax (sp?? thick, stiff interfacing), I cut it into 3 pieces and stitched safty pins onto the back, I originally intended to do just the thongs but the white background looked boring so K painted the backgrounds while I cut the rubber from the side of a thong…
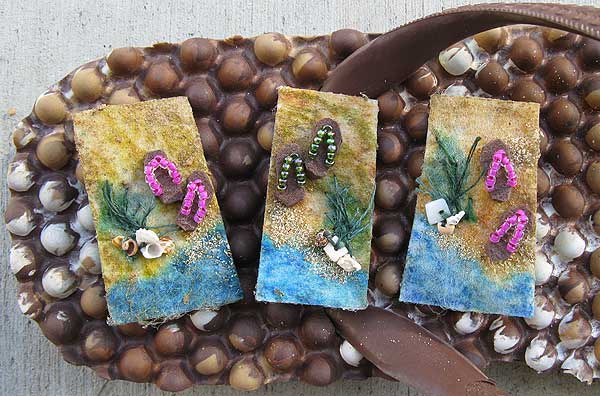
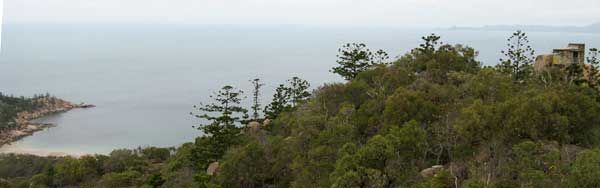
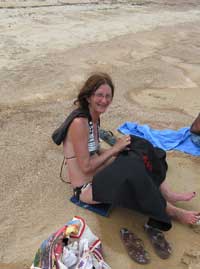
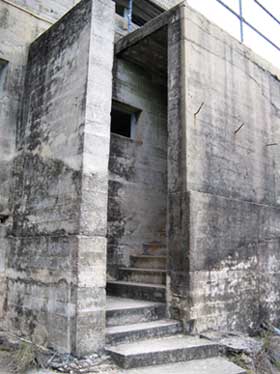 This afternoon while Sam and K where at work I went on a 2 hour walk, with the English girls, up the hill to the old Forts, the photo above is the view from one of the forts with the other fort on the left…the photo on the right is a detail of the corner of one of the forts…
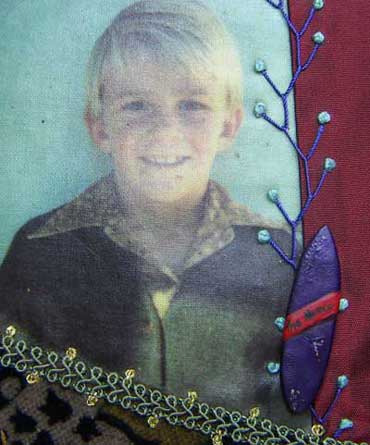
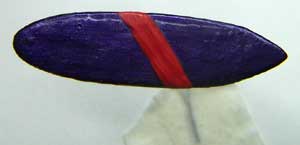 I used purple nail polish to paint the surfboard, I had all sorts of difficulties with the nail polish not going on smoothly, I think mostly impatience not waiting for the first coat to dry properly, and then putting it to close to the heater which caused bubbles to form…However both these problems will add to the finished surfboard, as the lumpy bits look somewhat like a build up of wax and I will sprinkle a little sand over the bubbles when I do the clear top coat (which I am resisting doing until tomorrow when the nailpolish has had the 24 hours it needs to cure properly)….I have often found that mistakes/mess ups can actually add a lot of reality and character miniatures.
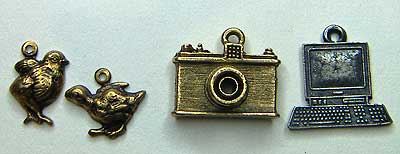 I am looking for a few charms so on the way home from picking my neice up from school today we called into
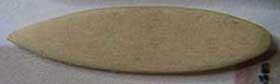
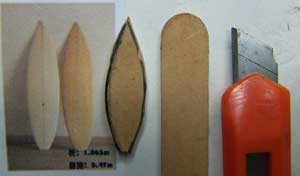 They did have a surf board which was on my list but it was bigger than I wanted…when I got home and thought about it, I decided that I could make one myself…I found an image of a surfboard, drew the shape onto an icypole stick and used a craft knife to cut the rough shape and then used an emery board to file it to shape…before painting it I will ring my brother tomorrow and ask him what colour and design I should paint it.