 Elizabeth commented that detail 122 had her thinking about what other ways it could be turned, which got me thinking about how this stitch had evolved… Elizabeth commented that detail 122 had her thinking about what other ways it could be turned, which got me thinking about how this stitch had evolved…
…I said that it was a variation of Buttonhole Stitch and indeed it is close to being a half Buttonhole wheel But from its origin it is actually a variation of Double Feather Stitch…I have looked over my crazy quilts and chosen samples that show how this stitch has evolved over the 20 years since Jan 1987 when I was teaching just my second crazy patchwork class, I had shown Julie M how to do Double Feather Stitch…
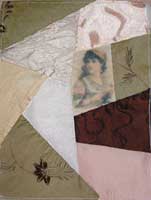
Julie came back the next week and showed me the mess that she had made with it…but I didn’t see a mess I saw a new stitch and replied with ‘OOOh can I copy what you have done?’…It looked something like this

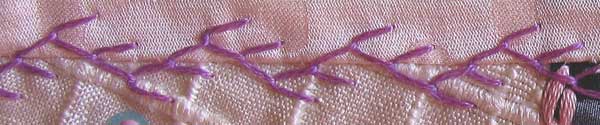
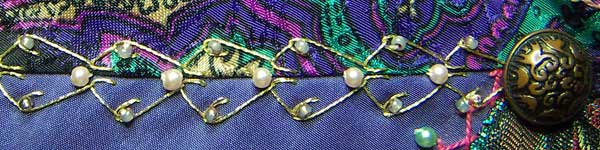
The detail above has the stitch on both sides of the seam but pointing in opposit directions…On the next detail I changed the angles to create a more open stitch and mirrored the stitch on the second side.
On the next detail I have changed the angle of my stitches and the ends of both stitches finish on the seam line.

The next seam is very similar to the one above but not the ends of the stitches in the middle go down at nearly the same point.

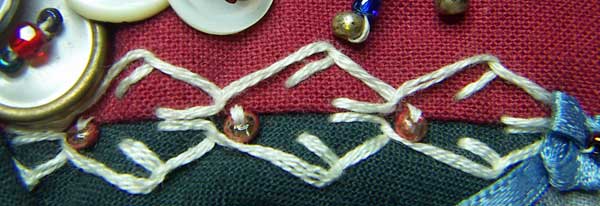
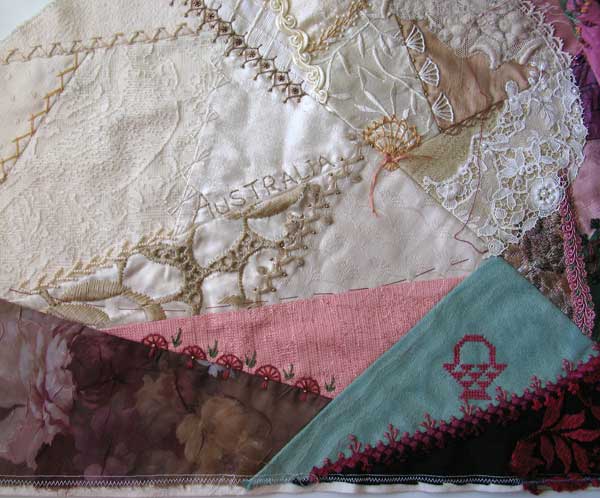
The stitches above are from My first crazy quilt which I finished in Jan 1988…The next 2 stitches are from My second crazy quilt which I finished in June 1992.

On this his next detail I have added an extra tie down sitch to change the shape of the stitch, I have also added a Colonial knot…On this detail it is also worth noteing that each pattern repeat is a little bigger than the last making quite a difference in size from one end to the other, it was probably accidental but is the sort of thing that I sometimes do on purpose and is the reason I tell beginners to concentrate on learning the mechanics of stitches and not to worry about the size of there stitches because more often than not the change in size is a very gradual increase of decrease in the size of the stitch which I think gives a visually pleasing effect.

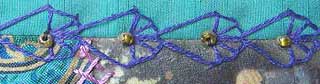
The next seam is on a Purse I made in 1992 which appears to be when I started adding beads to this Stitch.
The next seam is on my Tea pot Cozy made 1994…not how the different threads sit differently contributing to the different look of the stitch.
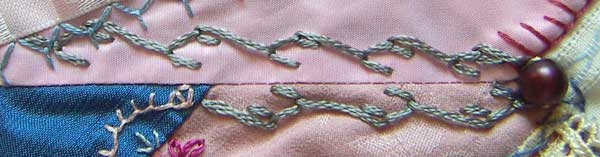
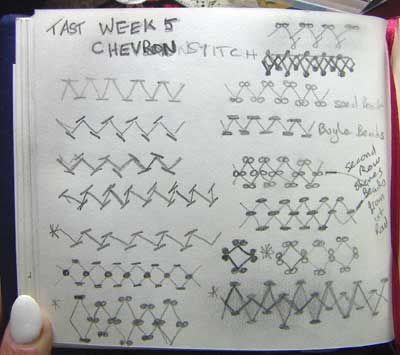
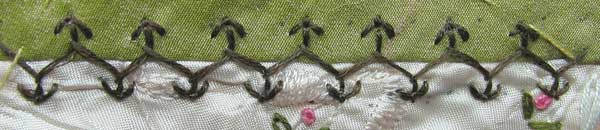
Until this point there had only been 2 stitches in each pattern repeat…in the next detail, on a block for my third crazy quilt cica 1993, all the stitches go down the same hole in the centre and a third spoke appears creating its likness to buttonhole stitch.

 As well as the evolution of this stitch these details show how you can experiment with changes in, the angle of the stitch, the size of the stitch and the thread that you use, to create your own visually pleasing stitches…warning don’t be dissappointed if you later find that the stitch you have discovered has actually been discovered by others and already has a name because with embroidery the discovering for yoursself is the fun part…enjoy the journey. As well as the evolution of this stitch these details show how you can experiment with changes in, the angle of the stitch, the size of the stitch and the thread that you use, to create your own visually pleasing stitches…warning don’t be dissappointed if you later find that the stitch you have discovered has actually been discovered by others and already has a name because with embroidery the discovering for yoursself is the fun part…enjoy the journey.
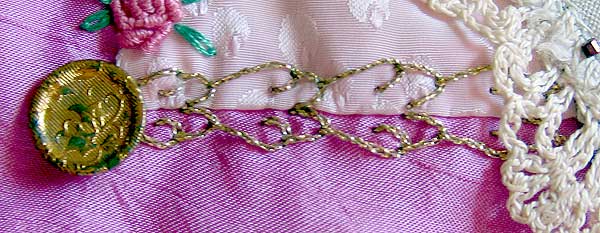
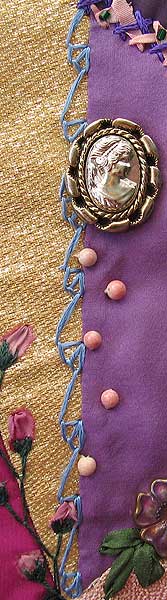
The other way to create variety is by combining your stitches with beads, in the details above there is a few examples of where beads can be put and in the detail on the left the stitch forms a background setting for a button and a random scattering of beads.
Colating these stitches has been a lovely trip down memory lane for me and as a bonus I have found a few stitches that I really like but havn’t done for a long time.
|


 This morning when I woke up I checked what this weeks
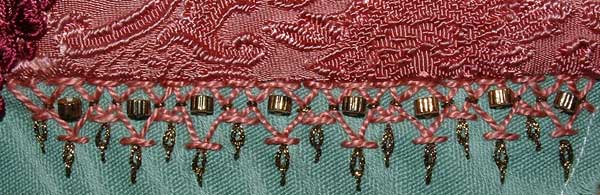


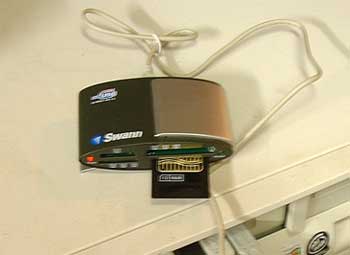 This little device is a Card Reader, cost me $50 but worth it because it means that my camera can talk to my computer again and even though I have had the borrowed camera, it is wonderful to have the use of mine, the one I know how to use, back again…
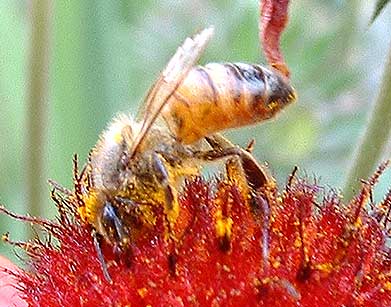 This photo is one that I was wanting to transfer to my computer when I discovered that the usb socket was broken…this Bee had so much pollen covering his legs and head that he could hardly fly still gathering more, he was moving so slowly that he was easier than most to photograph.
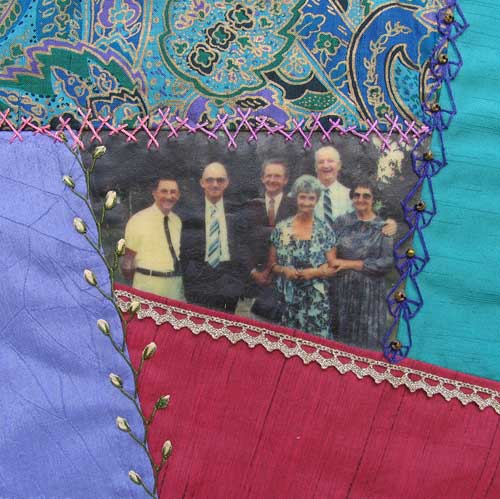
 I am nearly finished the seams on the
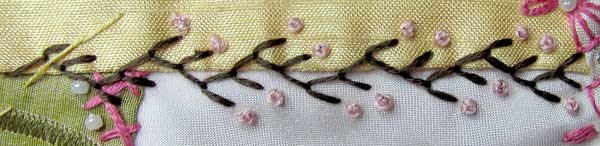


