For the binding I used a straight grain double binding with mitred corners…don’t be afraid of the word mitre, if you follow the instructions step by step they are really quite easy and very neat and satisfying to do.
The bindings are 3/8 of an inch wide for which I cut the strips 2 1/2 inch wide (being 6 times the finished width plus 1/4 allowance for the thichness of the quilt)…
The binding needs to be as long as the total of the 4 edges of the quilt plus about 6″ which means joining a few strips together.
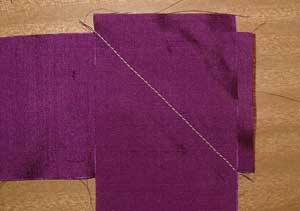
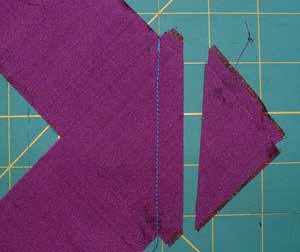
I joined the binding strips with mitred joins because they are far less bulky than straight joins. Place the two ends to be joined at right angles with the ends overlapping each other by a 1/4″….Stitch across the diagonal as per photo, mark the line with pencil if needed to get a straight seam.
Trim the seam back to a 1/4″.
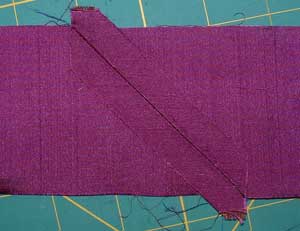
Iron the seam open
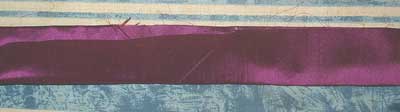
Iron binding strip in half lengthwise.
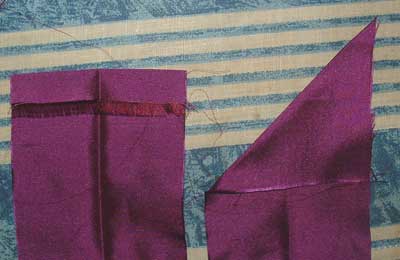
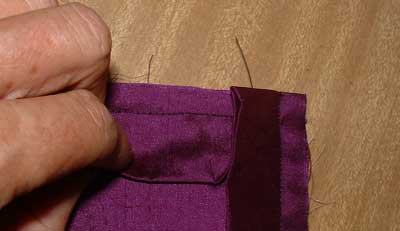
I start stitching the binding on about 2/3rds the way across the bottom of the quilt, I usually start by turning the straight end of the binding in before folding it in half as per sample on the left of the photo…For this quilt I decided to be smart and do a mitred join as per the sample on the right of the photo.
And guess what it will be mitred joins I do from now on…not only does it look more impressive being mitred, the mitre makes the join much less bulking making it far easier to stitch the join and turn it to the back neatly.
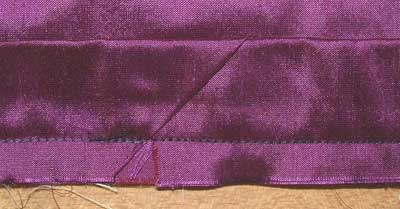
When the border was stitched on and I was back to the starting point I cut the end of the binding (see photo) so that it could be poked in neatly under the diagonal fold that I started with.
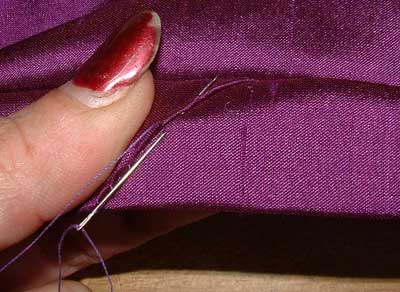
Hand stitch the join before turning the binding over to the back.
I got ahead of myself a little there so that I could explain the beginning and end of the binding together…I will now go back and explain how to put the binding on between the start and end point.
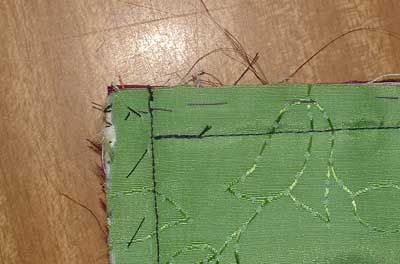
Match up the raw edges if the binding and the quilt and stitch the seam the width the finished binding will be…when you come to the corner stop the width of the binding from the corner of the quilt…it is OK to stop a few stitches short of that point but if you stitch to far your mitred corner will not work…
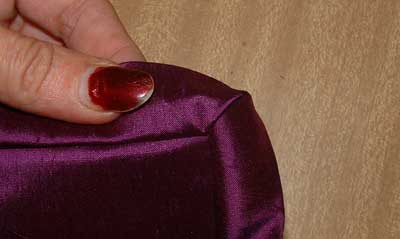
To Make the mitre fold the binding upso that it forms a straight line with the next edge of the uilt, the diagonal fold should start at the very corner of the quilt and go down at 45 degrees.
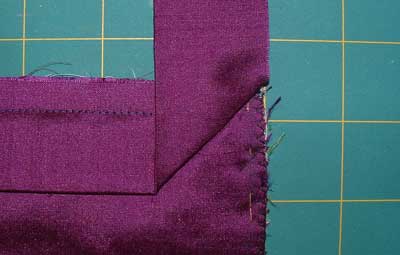
Now fold the binding down, the top fold should be level with the top raw edges of the quilt…If you don’t fold it down far enough your mitred corner will be pointy…If you fold it down to much then your mitre will be rounded…If you have never done one of these mitered corners it worth doing a sample corner before doing them on a big quilt.
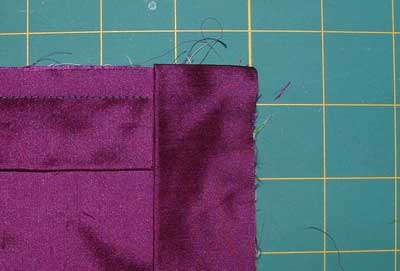
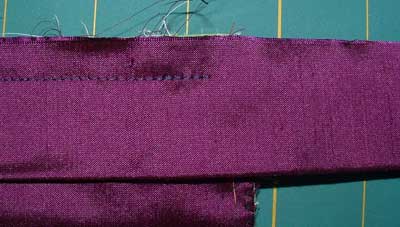
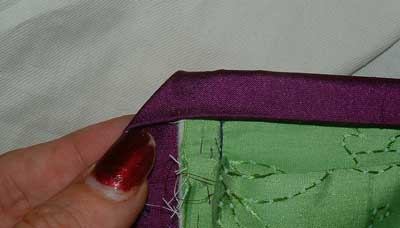
Stitch from the top down to the next corner and repeat…the following photo shows how the seams should look on the back.
To turn the mitred corners to the back hold the edge that has the bulk from the fold in the corner.
flip binding to the back
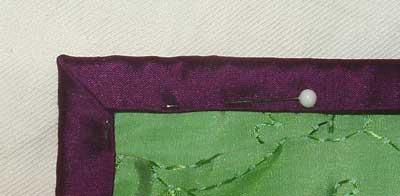
Fold the bulky edge that you are holding in first.
Then when you fold the second edge to the back the bulk of it will even out the corner…
There are a few different stitches that can be used to hand stitch a binding any of are suitable.
The stitch that I describe below is my favourite stitch…I like it because each stitch travels nearly 1/2 an inch making it quick to do and I particularly like the way it pops into the fabric and disappears so that I don’t have to match the thread to the binding…I do usually stitch light colours with a light thread and dark colours with a dark thread…I have used a dark thread for the following instructions so that it would photograph clearly.
Put the needle into the lining One thread behind where the thread comes out of the fold of the binding…that one thread is the secret to this stitch.
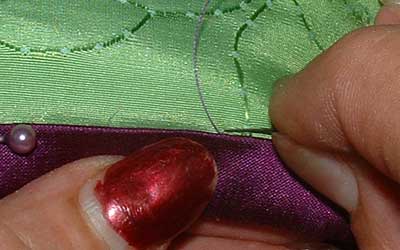
Take a 1/4″ stitch under the Lining…As soon as the tip of the needle comes out of the lining pop it into the fold of the binding.
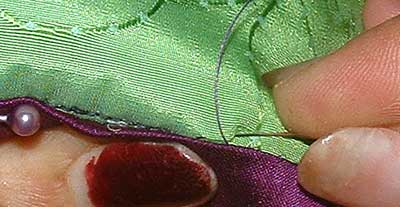
Push the needle through the fold of the binding for about a 1/4″.
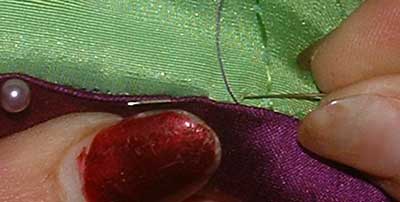
When you pull the thread through give the last bit of thread a tug and watch the stitch disappear….If you can see the stitch then you need to go back a tad further….If the binding puckers and doesn’t sit flat then you are going back to far..it literally is only a thread behind that is needed to make the stitch pop.

I did only stitch enough of the binding down to demonstrate the how to, once I had the photos that I needed I delivered All that Jazz to Anne Eccleston, my friend and fellow Canberra Crazy Quilter, she is delighted to be a part of this wonderful quilt and I left her contendly stitching the bindings down.
My next Project – The Competitors all that Jazz blocks.
Leave a Reply
|


August 16th, 2006 at 4:45 am
I’d like to know what to do for the final stiches of the binding of quilt. How do I hide end of
thread?
October 7th, 2007 at 3:42 am
I just make a stich into the binding itself, and run it an inch or so , then with a little fold in the fabric, bring the needle out, snip the thread and pull the fold out of the fabric and the end of the thread will just go into the binding. You do this, of course, after making a nice lock stitch to be sure the binding wont come loose later.
March 2nd, 2008 at 4:41 am
What amazingly clear instructions. Thank you so much. I’m just finishing a wall hanging for an exhibition and have mitered the borders so thought I ought to do the same for the binding but wasn’t sure how. I shall go and have a practise.
September 7th, 2008 at 12:04 pm
Loved loved loved these instructions, thank you so much for making them so easy to follow. Am finishing a baby quilt for my new grandaughter and this will be wonderful. Clearest instructions I have ever seen.