| |
About
This is Annie Whitsed's Crazy World a world where I stitch the joys and chaos of life into beautifull crazy quilts. email annie@loopylace.com
All That Jazz
Annie\'s Website
Bags-of-Fun
Blogroll
Websites


|
|
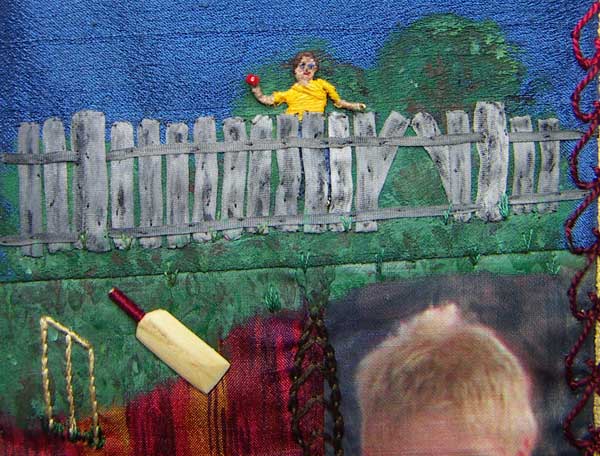
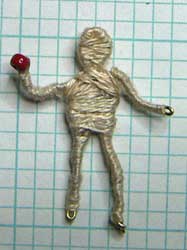
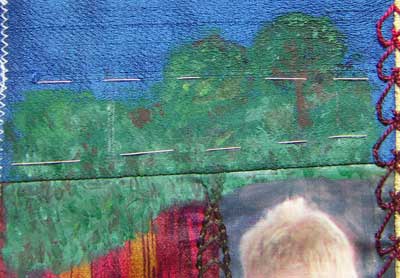
I did use the the wire guy, he was flat enough not to distort the fence which was what I thought might happen…I painted the silk ribbon for the fence adding extra flexs of black after stitching it…just a few stitches of green add texture to the grass…
and I was going to make wooden stumps but when it came to it I thought the simplisity of embroidering them would suit the scene better letting the focus be on the bat and bowler…So Howzat!!!
That’s 26 Blocks Done…4 to go
For those that may like to know more about cricket Here is an explanation of the game.
And I will leave you with a Humours description of Cricket You have two sides, one out in the field and one in. Each man that’s in the side that’s in goes out, and when he’s out he comes in and the next man goes in until he’s out. When they are all out, the side that’s out comes in and the side thats been in goes out and tries to get those coming in, out. Sometimes you get men still in and not out.
When a man goes out to go in, the men who are out try to get him out, and when he is out he goes in and the next man in goes out and goes in. There are two men called umpires who stay all out all the time and they decide when the men who are in are out. When both sides have been in and all the men have out, and both sides have been out twice after all the men have been in, including those who are not out, that is the end of the game!
|
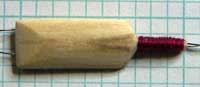
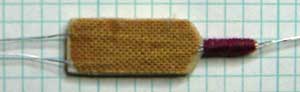
The setback, I have lost/misplaced the cricket bat, I have not doubt that it will turn up but there is no knowing when…I started looking for it but decided that it would be quicker to make another one…At least time I gave some thought to how I was going to attach it to the quilt and glued wires onto the back held on by the red thread wrapped around the handle and a piece if fabric.
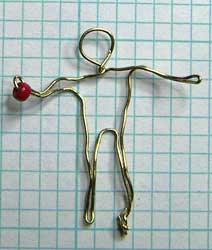
My experiment was to use the technique for making Stumpwork Hands to make a boy…I twisted the wire into a rough body shape, wrapped it with threads and painted hair, face a cloths, I don’t know wether I will use him or not but although somewhat flat he is kinda cute.
I have also started to embroider the fence but the camera batteries went flat before I photographed it…below is a photo of the fence that I am representing.

|
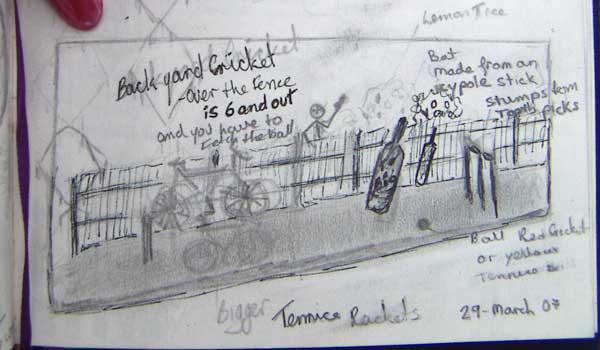
Above is my first visual journal sketch for a backyard cricket scene seam…you will notice that there is a lot more detail in this sketch than what my finished seam will have, the purpose of this sketch was to explore and play with ideas.
I made a cricket bat in preporation for this seam but then I lost my way, The only other detail from my sketch that I felt I had to have in the scene is the fence, because the only rule that I remember is that ‘Over the fence was six and OUT’ (to discourage big hits which had the potential of breaking the neighbours windows) but every way that I could think of doing the fence was going to take a lot of fiddley work (OK I can hear you all laughing at me but there is fiddly and then there is fiddley) which was putting me off…and then I received a comment for the knitting scene seam which simply read ‘The result is really worth the work’(Thank your Vero), it was a really timely reminder of why I put the work into creating what I want because the results are worth the work, Vero’s comment sent me running to collect fabric, paints silk ribbon and threads…
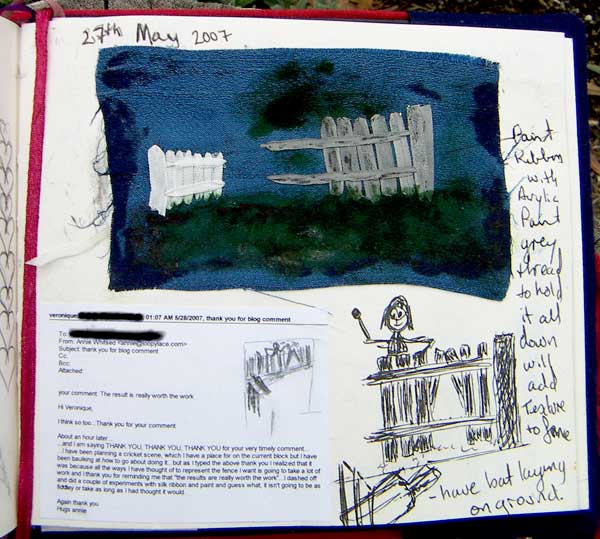
The silly thing is that its not going to be as fiddley to stitch the fence as I thought that it was going to be…
The first thing to be done on the block for this seam is to paint the background…I use Chromacryl Acrylic paints and start with a wash of colour covering the area I want painted.
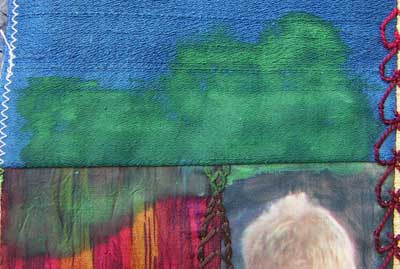
When the first coat of paint is dry it forms a base on which I add more detail, for this one I have done patches of different greens, with a touch of brown and I have added a trunk to make a tree in the background.
And that is as far as I got today…
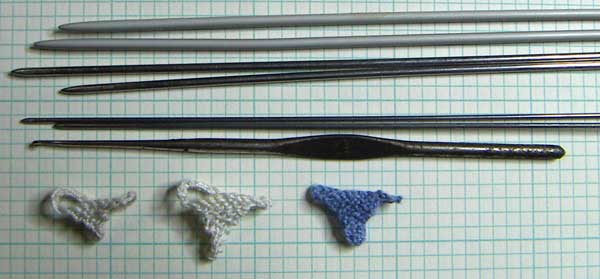
…Because last night a friend lent me a pair of sock knitting needles, they are so skinny and I just couldn’t resisttrying them out…I have photographed them, on inch graph paper together with the size 14 needles that Sharon lent me, the ones I made from stiff wire, the size 4 crochet hook (inherited from my Nana) that I use and I will explain the items that I made when one of them appears on the Cloths Line…by now some of you will really be laughing, all I can say is that these are the first kind of fiddley, the kind I actually revel in).
|

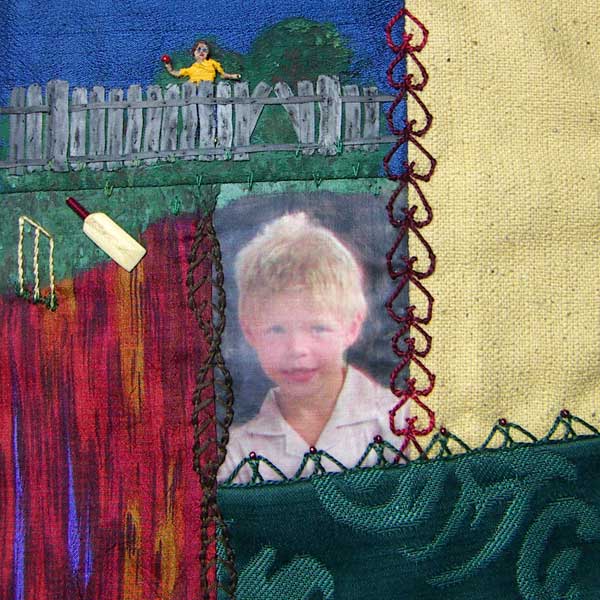
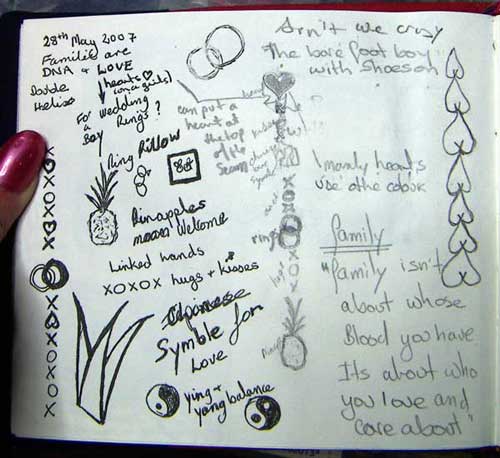
I used my Double Helix seam on this block because the young lad on the block is my brothers step son and I wanted the stitches to say that our genetics are only a part of family the other part is love…I then got my thoughts twisted up because the obvious symble of love is hearts but I couldn’t see hearts on a boys block…I played around with other ideas in my visual journal, the best I had come up with was rings combined with O and X for hugs and kisses, when I talked it over with my sister she looked at the line of upside down hearts on the right of the page and said this is nice, I had rejected it after doing it because when I looked at it I saw ‘bums’, as I told her what I saw I thought well thats sort of OK because a kid would probably find that funny anyway and with that thought I came full circle, I could put hearts on a boys block.
The funny thing is that I am the only one that saw the Double Helix in the first seam, when I asked my sister and some quilting friends at a meeting tonight what they saw they all answered with either fish or gum leaves.
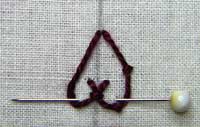 The Hearts are Up and Down Buttonhole Stitch based on detail 255 which had been inspired by one of Elizabeth’s stitches, When Elizabeth saw what I did with her stitch she commented that it wouldn’t take much to make it into a heart…well it was easy all I needed to do was put the pin lower (so that it was under the up an down bit) and do an extra stitch on each side to hold the shape. The Hearts are Up and Down Buttonhole Stitch based on detail 255 which had been inspired by one of Elizabeth’s stitches, When Elizabeth saw what I did with her stitch she commented that it wouldn’t take much to make it into a heart…well it was easy all I needed to do was put the pin lower (so that it was under the up an down bit) and do an extra stitch on each side to hold the shape.
|
This Stitch is one of the Visual Journal sketches that I did for Barred Chain stitch which was the TAST week 10 stitch…It reminds me of a Double Helix.

|
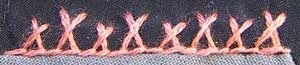
I started with a short seam of Crossed Button Hole Stitch on my sampler block.
A couple of quick sketches in my visual journal…
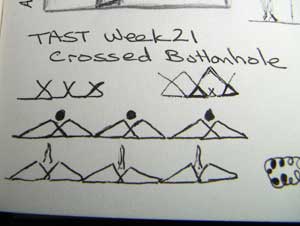
After piecing the another block for mum’s quilt I tried the stitch I had sketched…I only crossed every second pair of stitch, the alternate pairs of stitches are splayed out to meet the top of the crossed stitches…I am not sure that I really like it and may have unpiked it except that it would have left big holes in the slightly plasticed surface of the T shirt transfer that the image is on…when I looked back at the Visual Journal I realized that when sketching I must have been seeing volcanoes in it, evidenced by the puffs of smoke on the bottom line.

|
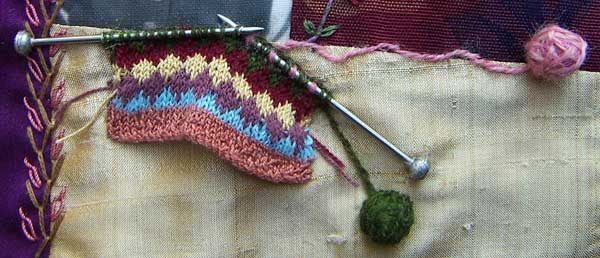
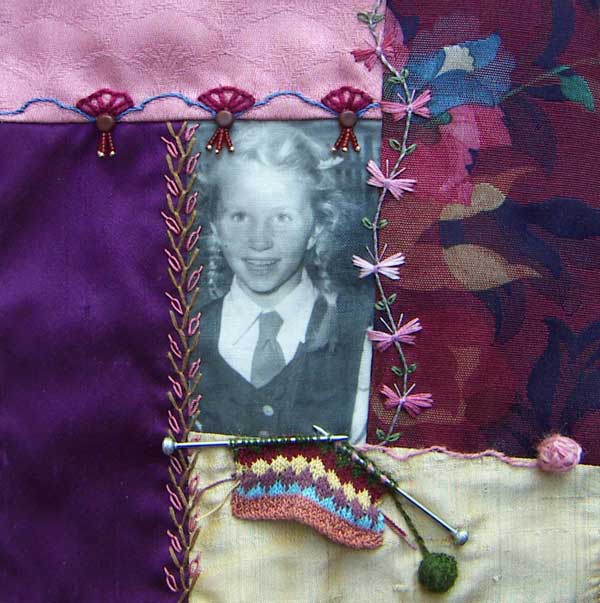
A couple of weeks ago Here and Here and Here I showed the designs and miniature knitting I did in preparation for this seam.
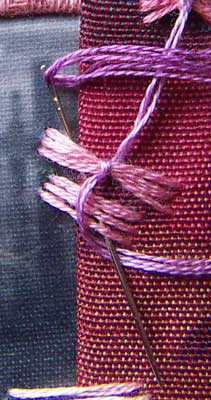
The knitting needles are made from a 2 inch lengths of stiff wire which I sharpened at one end and glued a bead onto the other end, To hold them in place I put glue along the back of the stitches on the needles and uses a silver maetalic thread to put stitches over the knitting needles where they cross, at the end of the knitting and on the ends, I also glued 2 stitches around the beads on the end, the stitches I glued on will not only prevent the needles from being pulled out but improved the look of the knitting needles because before I added those stitches the knitting needles looked more like nails.
I had made balls of wool for each colour in the knitting but they made the seam look clutttered so I went with just the 2 colours that I had on the knitting needles.
I now have 25 blocks made which leaves 5 to go.
|

For this seam I have chosen a low key stitch for a couple of reasons…firstly because I need a few basic stitches to tie the new blocks together with those I did nearly 14 years ago…the other reason is that the over the top showy seams need some less showy seams to balance them and avoid competition… the seam I have done is Feather stitch with detached chain stitches
|
No prizes for guessing that this seam idea came from the pattern in the fabric…
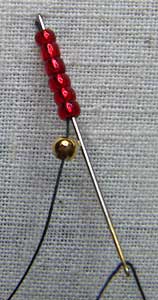
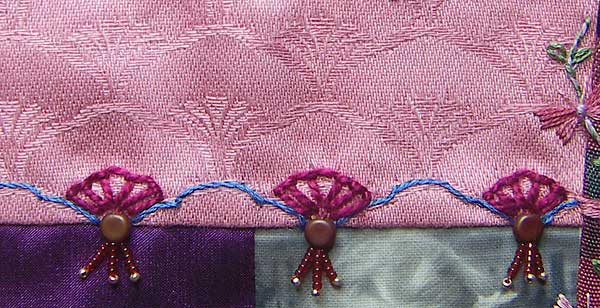
The dangling beads are done by threading beads to desired length of dangle, select the end bead and go through it only once before putting the needle back through the rest of the beads in the dangle and through to the back of the fabric…leave thread a bit loose when securing thread on the back, if thread is to tight the dangle will stick up instead of dangling
|
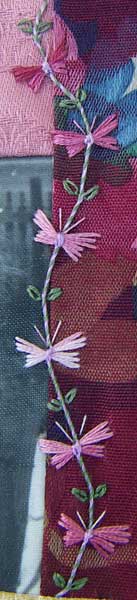 More often than not when a repeat a seam treatment it will look quite different the second time…This one surprised me at just how much the same as the first one, that this one looks…I just love how delicate this seam looks. More often than not when a repeat a seam treatment it will look quite different the second time…This one surprised me at just how much the same as the first one, that this one looks…I just love how delicate this seam looks.
I refined it a little more the second time by doing the second twisted chain on each butterfly over all 6 of the foundation stitches, by doint this I was able to get the body of the butterfly looking much tighter and neater…and then I couldn’t resist adding straingt stitch antenna.
|
|
|

