| |
About
This is Annie Whitsed's Crazy World a world where I stitch the joys and chaos of life into beautifull crazy quilts. email annie@loopylace.com
September 2024
| M |
T |
W |
T |
F |
S |
S |
| « Nov |
|
|
| | 1 |
| 2 | 3 | 4 | 5 | 6 | 7 | 8 |
| 9 | 10 | 11 | 12 | 13 | 14 | 15 |
| 16 | 17 | 18 | 19 | 20 | 21 | 22 |
| 23 | 24 | 25 | 26 | 27 | 28 | 29 |
| 30 |
|
All That Jazz
Annie\'s Website
Bags-of-Fun
Blogroll
Websites


|
|
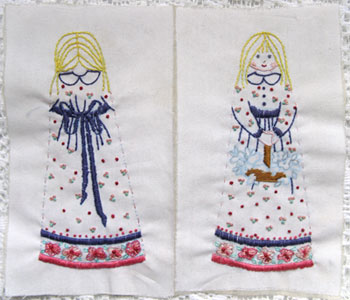 The kit to make this Scissor Keeper was a Freeby on the cover of a needlework magazine, I started it when on holidays a few years ago…I found it in a box the other day, nearly finished, it didn’t take me long to embroider the flowers in the basket and stitch the 2 halves together. The kit to make this Scissor Keeper was a Freeby on the cover of a needlework magazine, I started it when on holidays a few years ago…I found it in a box the other day, nearly finished, it didn’t take me long to embroider the flowers in the basket and stitch the 2 halves together.
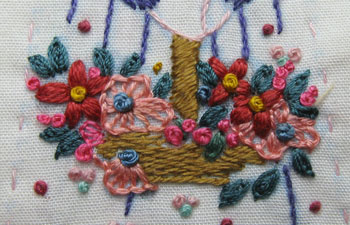
The red flower petals are 8 to 10 straight stitches coming up and going down in the same hole…The pink flowers are buttonhole Stitch…A scattering of French Knots and Berry Stitch Leaves finish the arrangement.
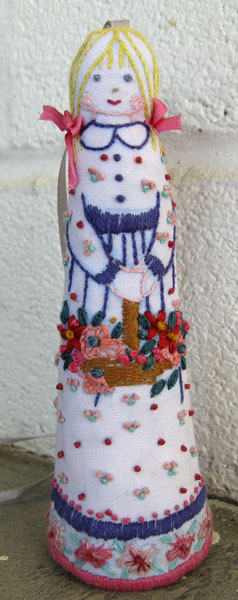
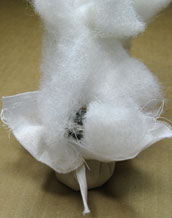
Until I stitched around the edges and turned her right side out this little lady was a Scissor Keeper but I found myself not wanting to Stitch the front to the back across the bottom because I didn’t want to flatten the bottom of her skirt, I was seeing her as a doll rather than a scissor keeper…I went hunting around the house for something round to fit in the bottom to hold the round shape, I tried a cotton reel but the top showed as a ridge on the skirt, small bottles did the same, coins wouldn’t stay in place, the lid of a bottle might work but before I found a lid that fitted I found a metal hose fitting, perfect size and being smaller at the top there was no ridge and it has the added advantage of being heavy enough to stabilize her so that she stands tall, 4 1/2 inches tall to be exact.
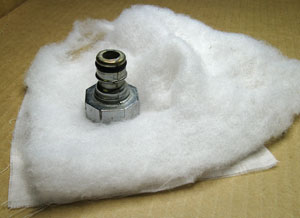
I wrapped the hose fitting in the batting and a square of fabric before inserting it into the base.
|
 “I love a sunburnt country “I love a sunburnt country
A land of sweeping plains,
Of ragged mountain ranges,
of droughts and flooding rains.”
These words, from ‘I Love a Sunsurnt Country’ by Judith Wright, resonate with Australians and never more so than when after years of draught, there are now many towns up north submerged by flooding rains…
The rains in Canberra have been gentle soaking rain, the sort the garden loves and after weeks of high temperatures today is a lovely mid 20s centigrade (approx 80 degrees F) A perfect day to be in the garden….
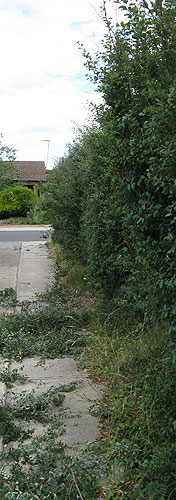
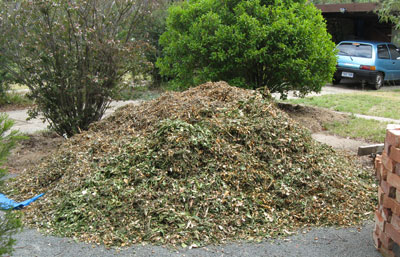
I pruned the hedge down the side of the driveway…and had an unexpected phone call from a friend asking did I want a load of mulch…I would love a load of mulch.
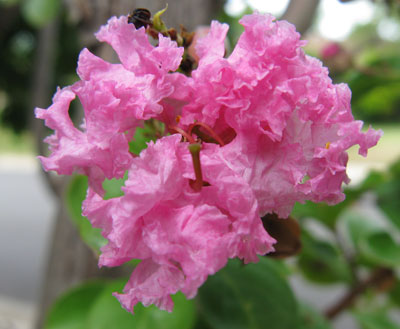
A Lovely day to be in the garden nd the Crepe Myrtle that I thought had died is now blossoming.
|
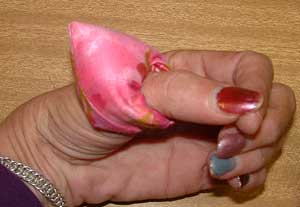
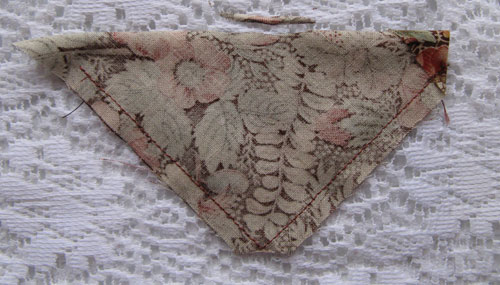
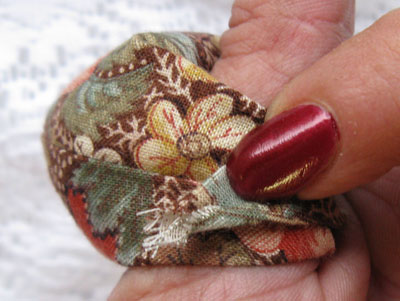
I made the pink thumb pin cushion at Nowra Crazy Quilt Retreat and have had a couple of requests for the pattern, today I have got around to writing the instructions… I had to remember/work out how to make it and got the size of the square wrong on my first attempt, the gold one, and it is on the tight fit side…
 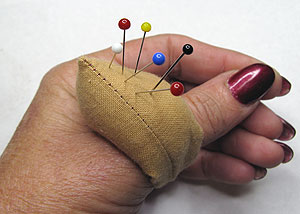
I also realized that to illustrate it clearly I needed a fabric with a right and wrong side, that is when I chose the fabric that matches the work box I showed last night.
To make your own start with a 4 inch square of an even weave fabric.
Turn one corner to the wrong side as per the photo.
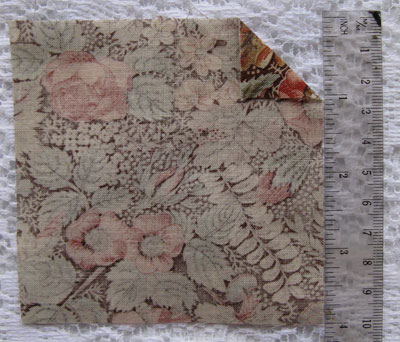
Fold the square, right sides together, diagonally with the turned under corner at one end.
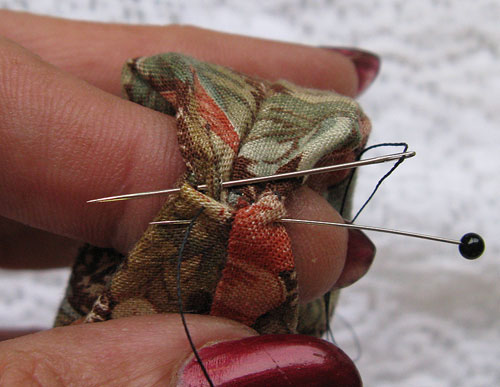
Starting at the turned under corner, use a 1/4 inch seam to stitch 2 edges of the triangle, stopping a 1/2 inch before the end.
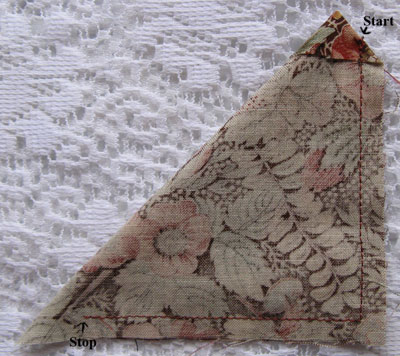
Clip the point to reduce bulk.
In the middle of the fold cut a 1 inch slit along the fold.
Turn right side out through the hole, pushing the unturned corner all the way through.
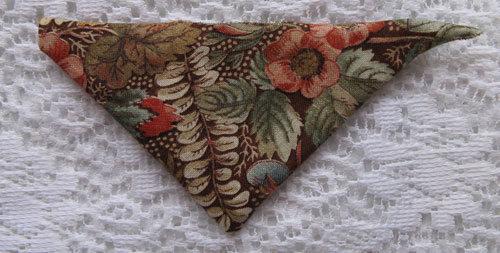
Stuff the central portion until it is firm.
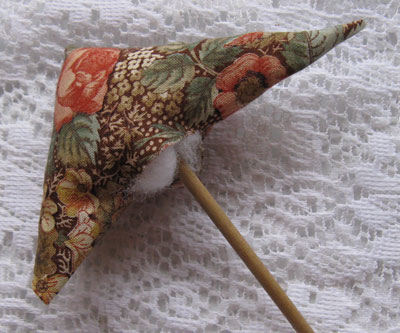
Turn the edges of the slit in and whip stitch to close the hole… This is a little finddly and you may find that it puckers a bit as you stith it, Don’t stress if is not real neat as this seam is on the inside of the finished ring.
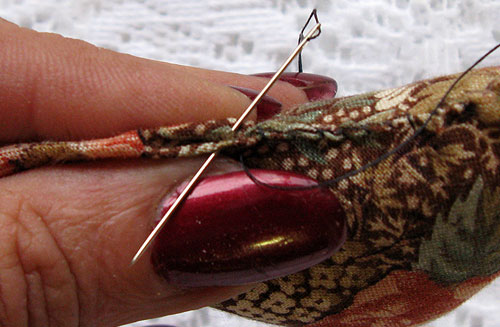
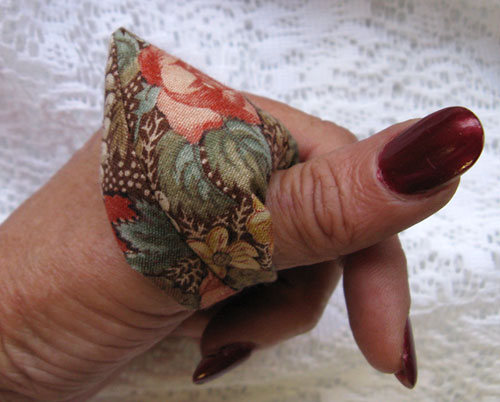
Wrap the long points around your thumb and use a pin to mark the overlap.
Poke the raw point into the turned under corner pin and test size…adjust until it is a comfortable fit…Stitch the ends together.
Happy Stitching.
|
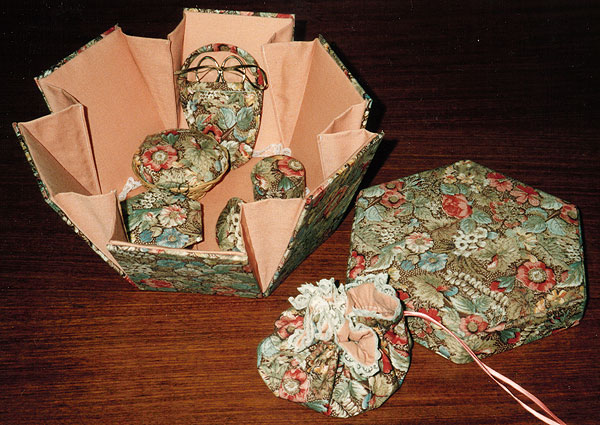
This is a Work Box and Accessories that I made as a gift in 1987…I have picked it to show tonight because it has a follow up in tomorrow nights post.
|
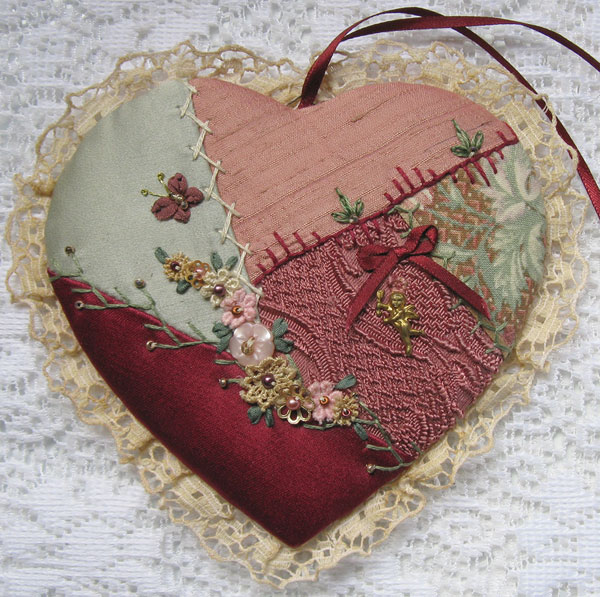
This year I am aiming at cleaning up and putting everything I have used for a project away before pulling out another…I am also looking for the next pattern I want which requires excursions into unsorted boxes from the past…while I am working towards this aim I will take the opportunity to share another heart from the past, this one made in 1997 is 5.5 inches wide and keeps the embroidery very simple so that it forms a nice background for the featured flower trail and silk ribbon butterfly.
|

This is the finished Pink Album Cover.
Instructions for making removeable book covers are available as internet lessons, contact me for details email annie@loopylace.com
|
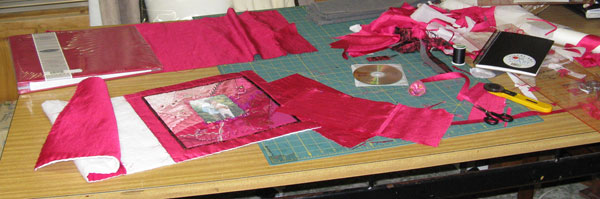
The pink fabric I am useing for the Album cover is more slippery than I had expected, and after having to unpick and baste before restitching the first couple of seams I have basted all the others before taking it near the sewing machine and although I feel as if I have spent half my day basting it is worth the time and trouble because it helps make for a neat finish…I now have it ready to stitch the lining on.
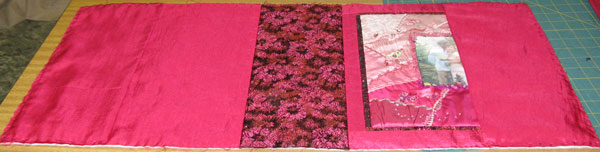
 Tonight I went to a crazy quilters meeting and it was lovely to catch up with everyone after the christmas break….the fabrics on the right are from the grab bag, I don’t need anymore fabric but sometimes they just jump out of the bag into my hands. Tonight I went to a crazy quilters meeting and it was lovely to catch up with everyone after the christmas break….the fabrics on the right are from the grab bag, I don’t need anymore fabric but sometimes they just jump out of the bag into my hands.
|
A couple of weeks ago a friend told me I was brave for making the Pink block before I had purchased the album..Not brave I replied, I now what size the albums are, the first border will be an inch wide and the second border will be as wide as it needs to be…
Not brave, more like st****, I didn’t now what size the albums were, I thought that they where 14 inches square, It IS 14 inches wide but only 12.75 inches high which means that the top and bottom borders would be to narrow…A change of plan needed…what it I make the first border a 1/4 wide, a shame not to show off what a beautiful fabric that I have and the side borders will be much wider than the top and bottom borders…If I move the block off centre so that the right side border is the same as the top and bottom and make the pink border on the left the same, I can then use the first pink border fabric for the spine where the pattern in the fabric will be shown off and I think the the darker spine will give it a nice old fashion photo album look, that will work but…
Narrow borders are hard to get even at the best of times, almost impossible with slippery fabric, I have been procrastinating about stitching the borders on because both the border fabrics are slippery…light bulb moment, I used light weight iron on interfacing to stabalize the fabrics and the borders are stitched on.
Next problem…the pink fabric was a dress, bought at a thrift shop because it was the right colour for this album…Unfortunatly it was also the right colour for a cartoon character costum that my nephew wanted, we made the costume and now I don’t have enough fabric and have been joining smaller pieces together to make the lining and inside flaps.
|
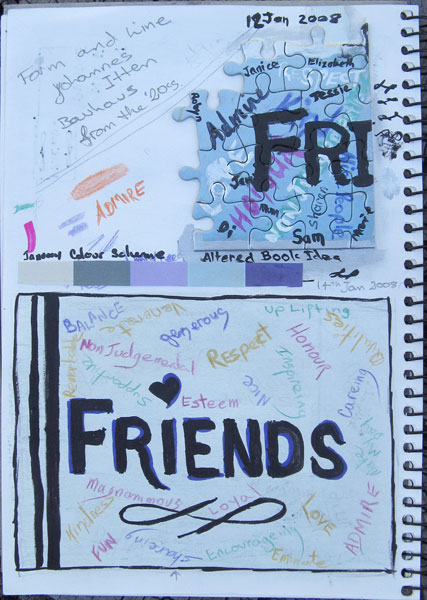 I have now refined my Design…To Link my post cards I need something that I can blend into each design without it controling or distracting from the designs, I have decided on 2 black lines, one wider than the other, running down the left hand side. I have now refined my Design…To Link my post cards I need something that I can blend into each design without it controling or distracting from the designs, I have decided on 2 black lines, one wider than the other, running down the left hand side.
To finish my design I need a colour scheme…intially I rejected sharon’s suggested colours for January because they are not ‘My Colours’ but when I came to add colour to my design it seemed obvious to me that I should take the challenge and use the January colours…So my feature word ‘Friends’ will be written in Black with the background being the lightest of the 5 colours with the other 4 colours used to write the qualities that I admire.
|
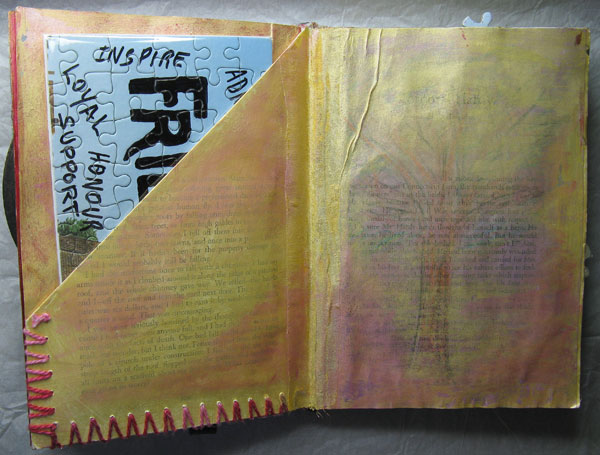
Probably influenced by having done a jigsaw puzzle, that a friend lent me recently, I started thinking of how life is like a jigsaw puzzle, that nomatter how oddly shaped the pieces are they do fit and the puzzle needs them all, also thinking along the lines that each piece could represent a friend.
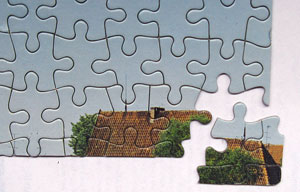 Time for some quick experiments…I have some jig saw puzzle pieces left over from an old puzzle I used for an altered book page…I put together a corner of the puzzle that was mostly sky background and cut out a post card sized piece, along the cut edges I glued the smaller pieces around the edges to the nearest full piece to make new edge pieces. Time for some quick experiments…I have some jig saw puzzle pieces left over from an old puzzle I used for an altered book page…I put together a corner of the puzzle that was mostly sky background and cut out a post card sized piece, along the cut edges I glued the smaller pieces around the edges to the nearest full piece to make new edge pieces.
Next I glued a small section of joined pieces into my visual journal and gathered together a variety of pens and paint to see how they would mark the surface of the puzzle.
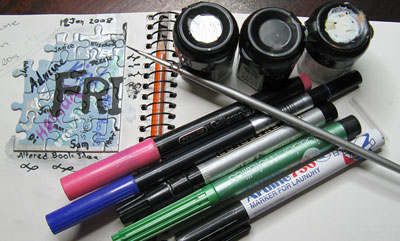
I was happy with how well the pens drew on the puzzle but when I came to the actual altered jig saw puzzle I opted to stick with black for the writing because at this size it is an easy jigsaw puzzle and if all the smaller words were done in different colours matching them up would make it even easier, making them all black means some thought has to be put into doing the puzzle.
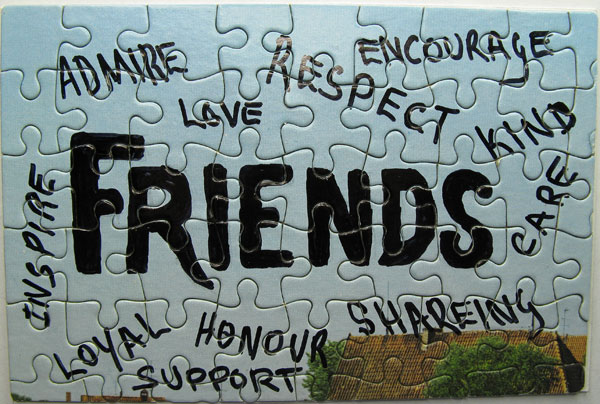
I am not going to use this as my January post card but It will go in my altered book, making another interactive page which also links to “>other pages in the book…I put the puzzle on a cardboard back in a cellephane bag which slips into a pocket made from pages sewen together in the book.
|
|
|

