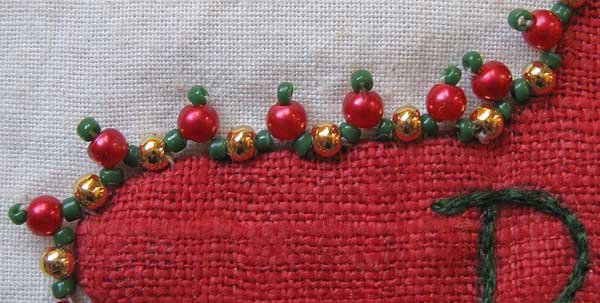
For this edge I stitched the gold beads on first, I stitched them a little further apart than I did on the edge I showed yesturday and it has helped the beads to sit better, It is also a more delicate edge…To form the pattern I went through a gold bead then picked up a green, a gold and a green bead, I then went back through the red bead and picked up another green bead before going through the next gold.
 Ho to prepare the pocket Ho to prepare the pocket
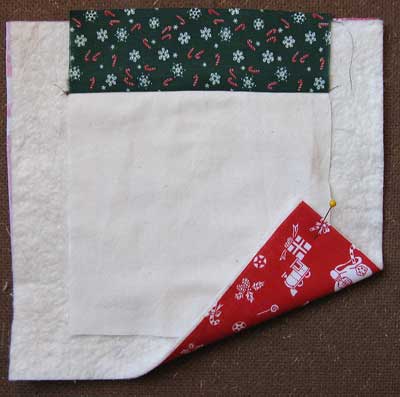
Cut the front and lining for the pocket 6 inches square…place pocket and lining right sides together and stitch a 1/4 inch seam across the top…turn right side out and iron seam across the top.
How to Assemble the Santa Pocket
Cut backing 8 inchs square and place right side down on the table, place batting on top of it and place a 6 inch square (will be the back of the pocket)…
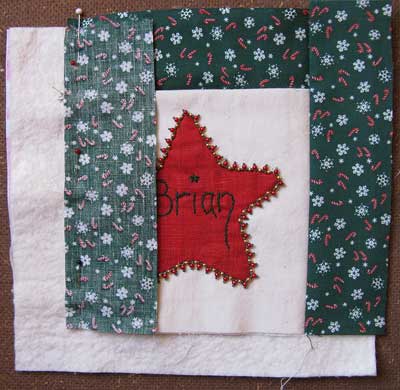
Stitch the first border at the top of the centre square, when stitching you are sewing through all the layers so that it self quilts the wall hanging as you go.
Place the pre prepared pocket in the centre so that the top of the pocket lines up with the seam sewing the top border on…
Sew on side borders and then bottom border.
To finish the Santa pocket bind the edges (Instructions for one method of binding can be found here) and add a ribbon hanger.
|
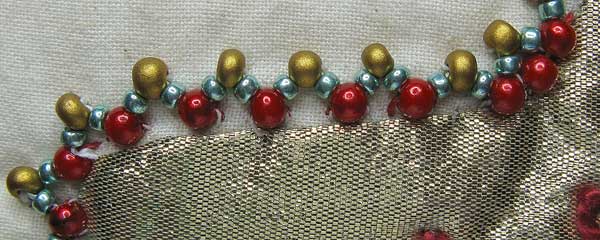
To do this beaded edge I stitched the red beads on first and then went around again putting the needle through a red bead and then picking up a green a gold and a green bead before putting the needle through the next red bead…I then, because the beads were flopping all over the place and wouldn’t sit flat, I went around again and stitched the gold beads to the backing.
I only had to stitch the hanger onto the back of this Santa pocket to finish it.
|
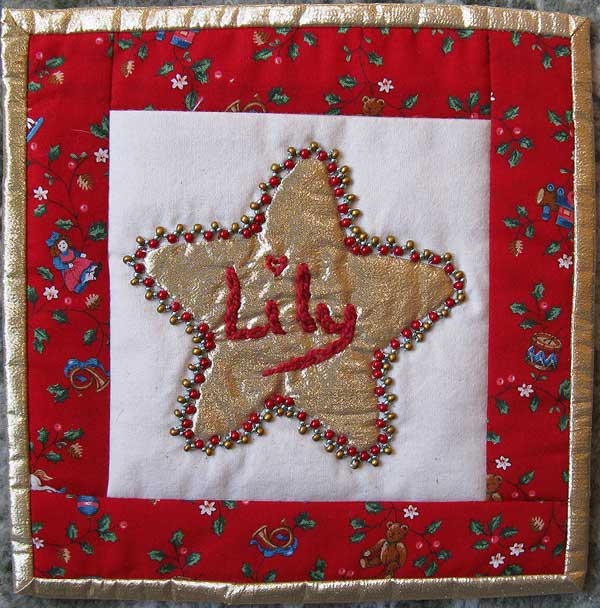
A few years ago I had an idea to make Santa Pockets for my neices and nephews….A Santa Pocket is a small (8″ square) wall hanging, that can be hung on a door or above a bed, with the childs name embroidered on a pocket that they can put a letter to Santa in.
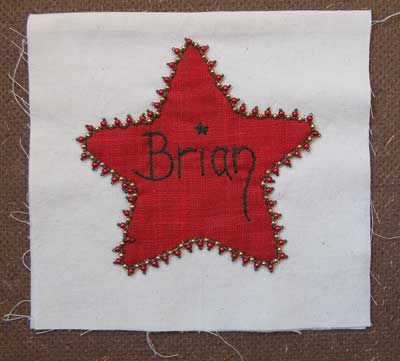
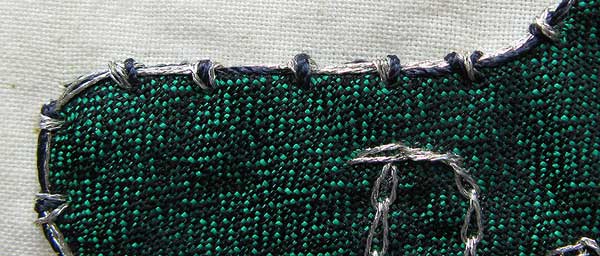
I have 5 in various stages of constructionfrom just started through to nearly finished…On the right is an appliqued star…below is a detail of the Chain Stitch that I wrote the name in and the embellishment around the star which is Coral Stitch done with 2 strands of silver metalic stitch and a strand of black perle.
|

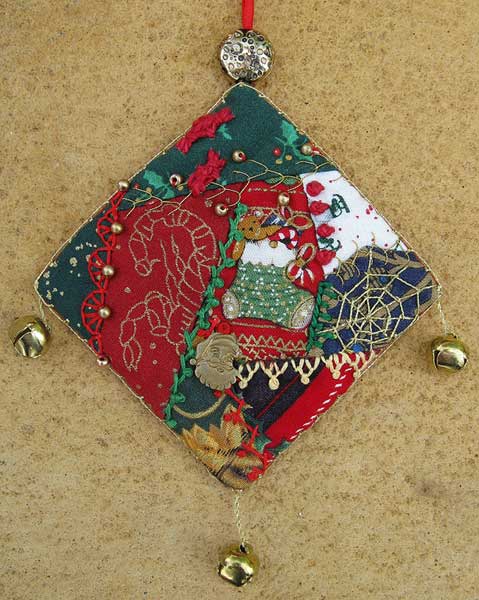 To finish this little christmas decoration I added a Santa Charm to the crazy. To finish this little christmas decoration I added a Santa Charm to the crazy.
After stitching the square right sides together with a backing and with the hanging ribbon inserted into the seam and turning it right side out through a gap in the seam, I used Gold Metalic thread, stitched so that it formed little loops, around the edge.
A big gold bead threaded onto the hanging ribbon and a bell on each corner complete the decoration which I will give to a young friend for christmas.
|
 Large parts of Australia have been in draught for years, The dams are low and we are on permanent stage 3 water restrictions…Some water saving habits, such as shorter showers, are obvious, but I found it amazing just how much water simple changes of habit can save like when I come in from the garden I used to wash my hands in hot soapy water, now I rinse my hands in cold water only using soap if it is something other that soil on my hands…Stage 3 water restrictions mean that we can only water the garden between 7 and 10 am and 7 and 10 pm on alternate days of the week which is worked on an odds and evens system, I have an even house number so I can only water on the even dates. Large parts of Australia have been in draught for years, The dams are low and we are on permanent stage 3 water restrictions…Some water saving habits, such as shorter showers, are obvious, but I found it amazing just how much water simple changes of habit can save like when I come in from the garden I used to wash my hands in hot soapy water, now I rinse my hands in cold water only using soap if it is something other that soil on my hands…Stage 3 water restrictions mean that we can only water the garden between 7 and 10 am and 7 and 10 pm on alternate days of the week which is worked on an odds and evens system, I have an even house number so I can only water on the even dates.
The watering times are fine for the established plants in the garden but it can get difficult with the seedlings which start to wilt if I go out or miss my watering day for any reason…to help I have a dish in the shower and use milk bottles to catch the water that comes through before the hot water…When we did start getting some rain last month a friend, who drinks a lot of milk, started saving the bottles for me and I collected extra water in buckets left out in the rain so that I have a small supply to rescue plants that need a drink on my off watering days.
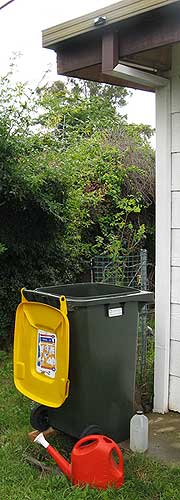
When it kept on raining every few days I was catching more water than I could bottle but I still caught as much as I could in buckets and watering cans which I used on the garden in the days following the rain…I had, half jokingly, eyed my garbage bins off for their potential to hold water and when after a few weeks it continued to rain I did wash out my recycle bin (the photo of which started this post) and put it under the hole in the guttering, it holds 300 litres of water which has meant that I havn’t had to turn on the outside tap to water the garden…and I don’t even mind carting the water around, I carry it small amounts at a time so that I don’t hurt my back lifting it and the walking is all good exercise…When I need the bin to put the recycling out I put whatever water is in the bin under the trees and bushes where it can soak deeper into the soil.
|

 These candys are 3 straight stitches with holding stitches on each side of the middle to hold the sides out and a holding stitch over all 3 threads a little in from each end to form the candy shape. These candys are 3 straight stitches with holding stitches on each side of the middle to hold the sides out and a holding stitch over all 3 threads a little in from each end to form the candy shape.
They are a copy of the little candy that I found on this 3 inch square that a stitched several years ago and is all done except for sewing it into a christmas tree decoration.
|
 I have finished the stocking that I was working on last week. I have finished the stocking that I was working on last week.
When it came to the embellishments I liked the way the Santa Button looked and a bit out of character for me who likes lots of embellishments I thought that the Santa Button was all this one needed.
See this post of how to construct a christmas stocking.
Keeping with the simplisity of useing minimal embellishment instead of putting lace around the top I have used a few stars and beads to hold the lining in place so that it doesn’t creep out over the top.
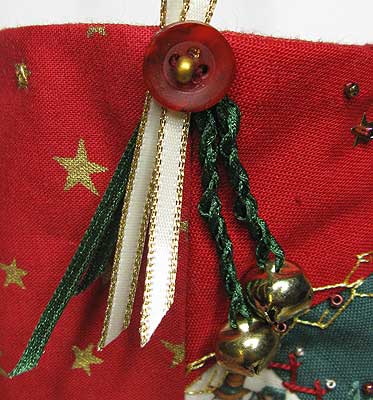
Still keeping the embellishments simple I attached the bells and hanger with a single red button and gold bead.

|
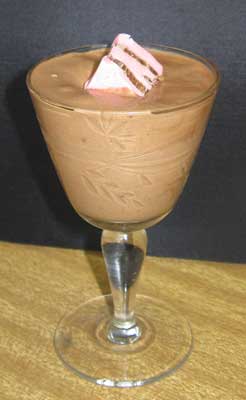
Tonight I had a quilting friendship christmas party, one where we all take a plate and have a wonderful meal.
I decided to do a Chocolate Mousse, this is a small portion that I left at home for my Daughter.
We call ourselves the Allsorts and usually have Liquice Allsorts at our monthly meeting, I decided to have a little bit of fun and used premade icing and melted chocolate to make Chocolate Allsorts to go on top of the Mousse…
|
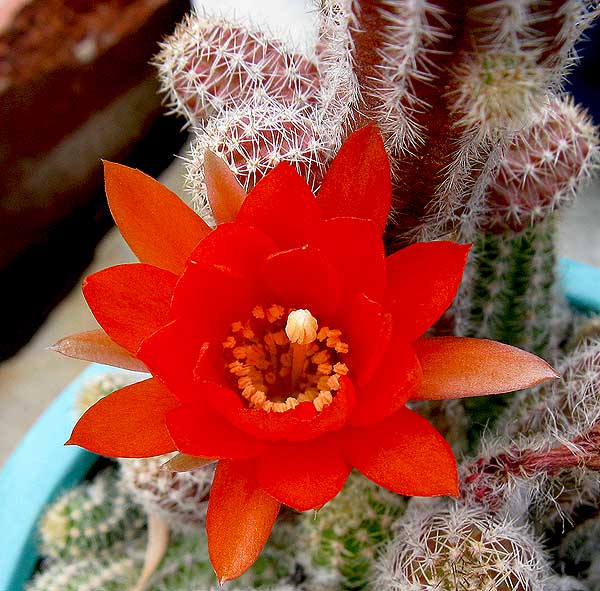
The flowers on My sister’s Cactus were a delicate pink colour…This one, on a Cactus plant that my son left here when he moved, has the same delicate structure but is a vibrant orange colour.
|
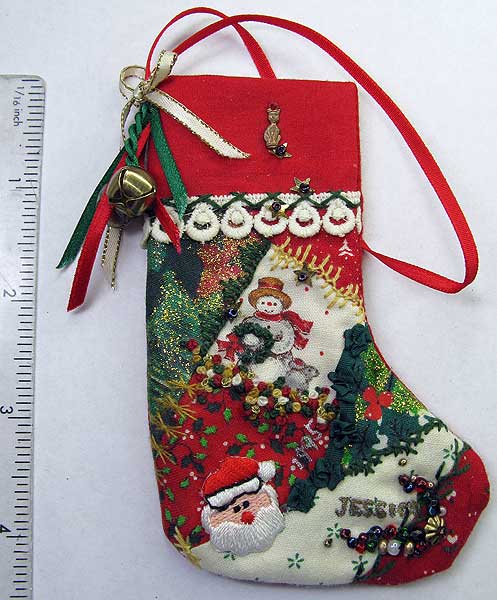
In 1995 I made tiny Christmas Stockings for my kids, neices and nephew. I blogged my Son’s tiny Stocking last year and tonight I found my daughters.
|


