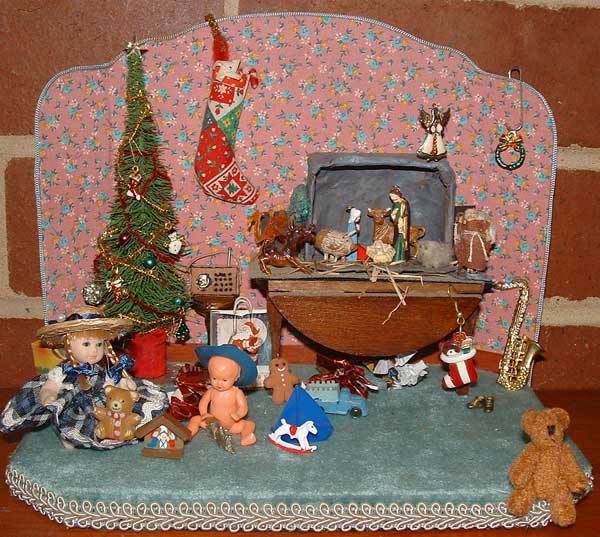
I put the Miniature Nativity Scene on a miniature table and put it together with the miniature Christmas Tree on a display stand that I made when I was a member of the Brisbane Miniature Enthusiasts in the early 1990’s and in subsequent years I have added miniature bits as I have found them…With the extrabits, the dolls surrounded by toys and bits of wrapping paper I have created a Christmas Morning Diorama.
|
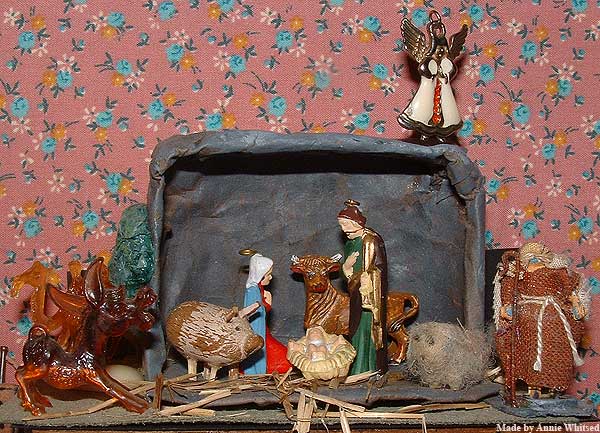
 A couple of years after we decorated our Miniature Christmmas Tree I found a christmas tree decoration which was a string of tiny charms of Mary, Joseph and baby Jesus…Just the perfect size to make a miniature nativity scene. A couple of years after we decorated our Miniature Christmmas Tree I found a christmas tree decoration which was a string of tiny charms of Mary, Joseph and baby Jesus…Just the perfect size to make a miniature nativity scene.
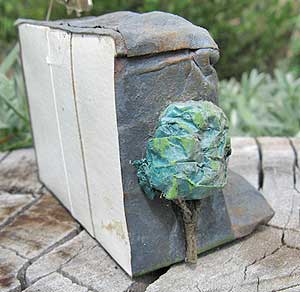
To form the base of a stable I used 2 matchbox trays with one side of each broken out and overlapped and the end flaps folded out to widen the floor area. I covered the base with grey paper and made a tree from a twig and scrunched up tissue paper.
The angel was an earing, the camel, donkey and cow (which I painted) where on the glass rim of cocktails in the 1970’s.
The pig was in a bag of second hand toys that I got in the early 1980’s, he must have been a part of an old farm yard set, he must have had a hard life because he had lost half his paint and was missing 3 legs (replaced with match stick legs), I kept him all these years because there was something appealing in his character and he found a lovely home here.
The sheep is a felted lump of fleece and for the shepard I redressed a guacamole worry dolls.
A sattering of straw completes the scene.
|
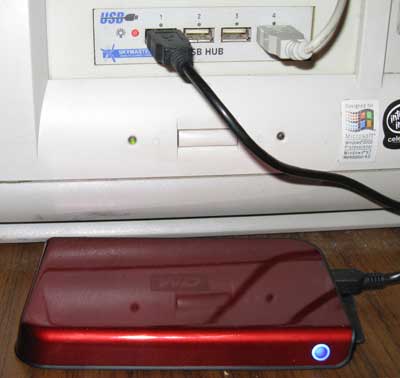 When I bought my new camera I knew that it would put pressure on my computer system as the image file size is much bigger than my old camera and my computer resources have been low for a long time, today my hard drive reached capacity…fortunaly for me a friend, who knows more than I do about computers, was staying and knew exactly what I needed…If I had known that it was as simple as purchaseing USB Portable harddrive I would have got one months ago, as it is we went shoping and I purchased one that has 4 times the capacity of my internal hard drive so I have space for a good many more images..and I love the racey red colour of my new storage disk. When I bought my new camera I knew that it would put pressure on my computer system as the image file size is much bigger than my old camera and my computer resources have been low for a long time, today my hard drive reached capacity…fortunaly for me a friend, who knows more than I do about computers, was staying and knew exactly what I needed…If I had known that it was as simple as purchaseing USB Portable harddrive I would have got one months ago, as it is we went shoping and I purchased one that has 4 times the capacity of my internal hard drive so I have space for a good many more images..and I love the racey red colour of my new storage disk.
|
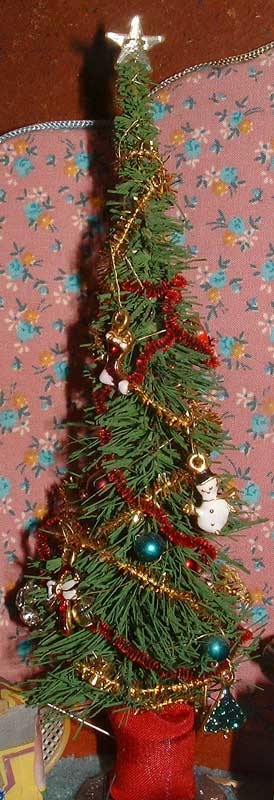
About 6 years ago when I left it to late to buy a Christmas Tree and the real trees were sold out…I don’t like artificial trees and would rather use the branch of a tree which I have done before but when we got home I showed my son a 6 inch high miniature tree that I had and we decided to decorate it for our Christmas tree.
As well as the miniature tree I had a length of miniature gold tinsel other than that it is very much a crazy quilt tree as the red tinsel is a piece of chenille thread and the decorations including the star on the top are beads and charms from my stash.
It took us 3 times as long than a full sized tree takes to decorate but we had a lovely creative evening together…
|
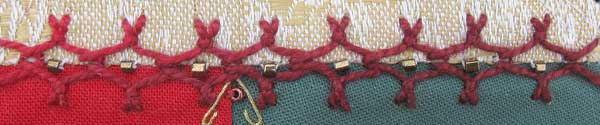
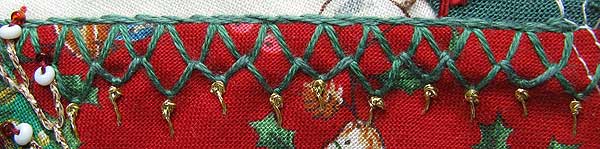
Combined Up and Down Buttonhole Stitch with Herringobone Stitch and done two rows matching the herringbone Stitch down the centre.
|
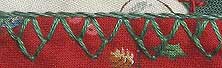
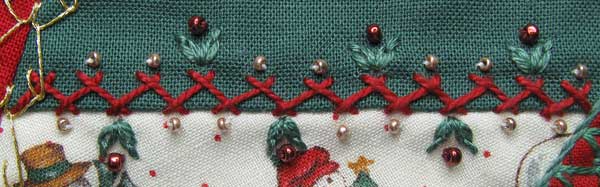
This Seam is 2 rows of a Feather Stitch Variation which is worked all on one side and then mirrored on the other side of the seam.
I didn’t really need to add beads to this seam because it does stand alone but as I have beaded every other seam on this stocking I added a single bead in each section the stitch forms.
|
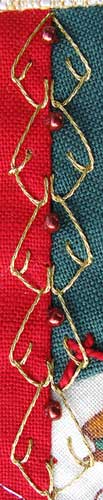
 This seam treatment is done with Fly Stitches topped with a row of Stem Stitch. When I originally did the seam I did the fly stitches in groups of 3… This seam treatment is done with Fly Stitches topped with a row of Stem Stitch. When I originally did the seam I did the fly stitches in groups of 3…
I have now conected the groups with additional fly Stitches and then used gold metalic thread to add a Pistil Stitch (which is the week 49 TAST Stitch), to each point to give it a fringe like edge.
I wanted to do more to this seam then just add a bead to each of Herringbone Stitch but the stitches where to close together so I have just put a bead on most of the stitches but have added interest by alternating them with the Detached Chain Stitches and red beads.
|
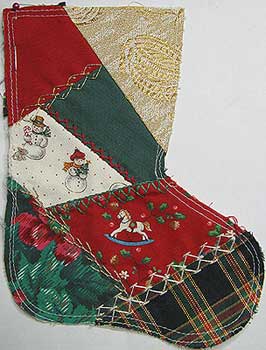 I have been reminded that Christmas is approaching fast and that maybe it is time to start thinking about it… I have been reminded that Christmas is approaching fast and that maybe it is time to start thinking about it…
To get in the mood I have pulled out a 6 inch christmas stocking that I pieced and started to embroider 5 or 6 years ago and added beads to 2 of the seams.
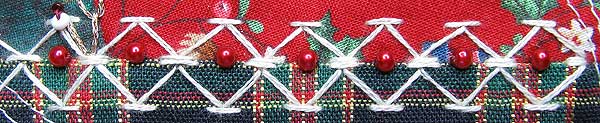
The first seam is 2 rows of Chevron Stitch to which I added red beads
The second seam is Double Feather Stitch, I added a white seed bead and a petit red bead to the end of each stitch.

|
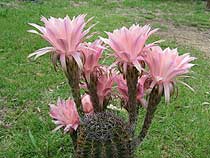
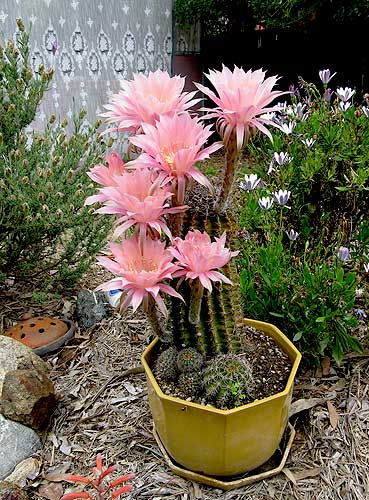 This morning I received a phone call from my sister to say that she needed me and my Camera. This morning I received a phone call from my sister to say that she needed me and my Camera.
She has had a Cactus for 20 odd years…it doesn’t flower every year but has had individual flowers which last about 24 hours…
This year 8 flowers have blossomed on the same night and she needed me and my camera to get a photo of it and being a lightly overcast day the lighting was in favour of getting good photos.
After I had taken the photos she told me I could blog them if I liked because the flowers are so beautiful they should be shared.
|
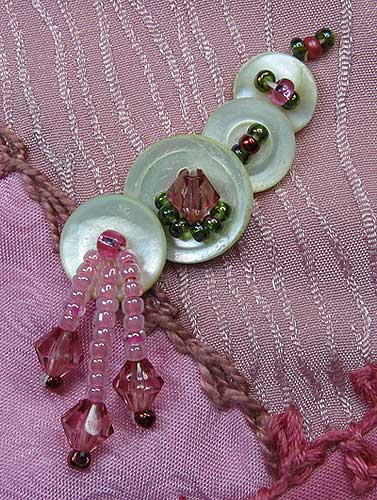
On the left side of the Photo I have put a Button Cluster.
I have used MOP (Mother of Pearl) Buttons and used beads to give them Sparkle.
On 4 holed button I used a pink crystal with green seed beads to match those I did on top of the pink ric rac.
The dangling beads are done by comming up through a hole in the button, thread on desired length of beads, select the end bead and go through it only once before putting the needle back through the rest of the beads in the dangle and the same hole in the button…leave thread a bit loose when securing thread on the back, if thread is to tight the dangle will stick up instead of dangling.
|


