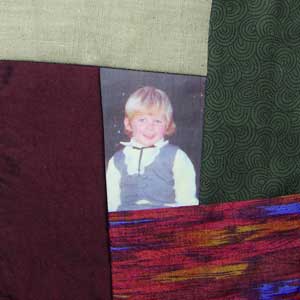
 Today I found a photo of a nephew that I have been trying to find for the last couple of months only to find that the image was just to small for what I need…The other place that I might have a better quality photo of him was from when he was page boy at my wedding, it only took me a couple of hours to find that lot of photos and I was rewarded for the search with a lovely image so I was able to get another block pieced today. Today I found a photo of a nephew that I have been trying to find for the last couple of months only to find that the image was just to small for what I need…The other place that I might have a better quality photo of him was from when he was page boy at my wedding, it only took me a couple of hours to find that lot of photos and I was rewarded for the search with a lovely image so I was able to get another block pieced today.
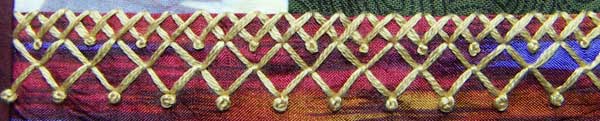
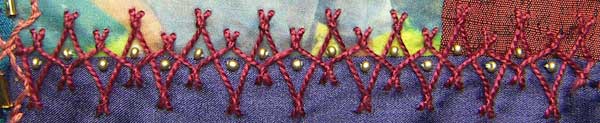
When I had the block pieced I felt that the bottom right fabric was a bit bright and that it would need a wide stitch in a neutral colour to tone it down a bit, this Cross Stitch from TAST week 9 worked to do just that.
|

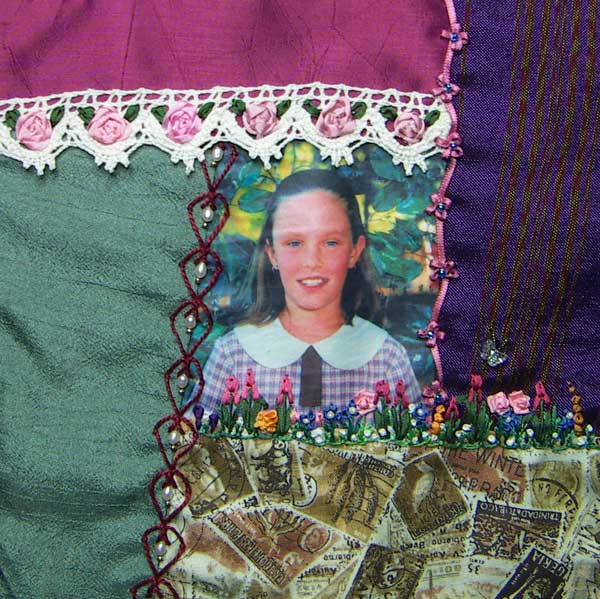
I decided to put lace on this seam and while I was looking at the laces and thinking about what embroidery I could do on them I realized that this lace had webs on it that reminded me of this weeks TAST stitch woven wheels…
I had to add an extra spoke because the weaving needs an odd number of spokes and a colonial knot to fill the centre.
And that finishes block 22 for mum’s memory quilt.
|
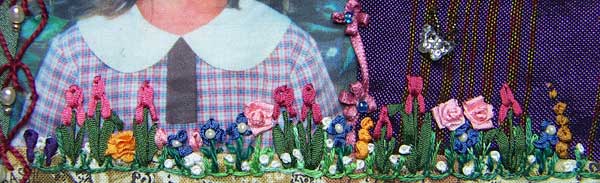
This seam started with the flowers in details 246 and 247 and grew in the haphazard way that my real garden dose…I added a small butterfly bead for interest…Tip: seams like this are a great way to use short lengths of thread and silk ribbon.
|

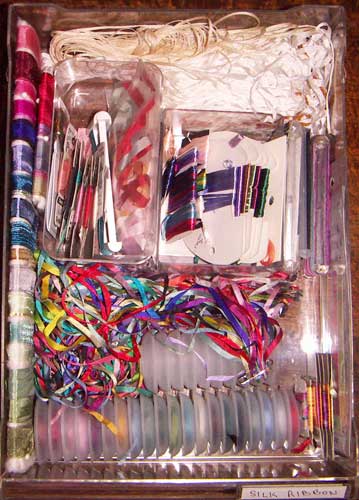
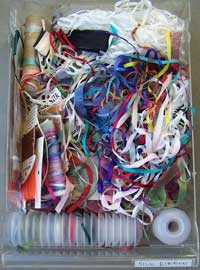 This is as far as I got on my seam today because when I opened the draw of silk ribbons I decided it was past time to get it organized. This is as far as I got on my seam today because when I opened the draw of silk ribbons I decided it was past time to get it organized.
I started by seperating the organza ribbons, floss and wider silk ribbons into seperate piles…This is a bit of a hard draw to organize because some ot the ribbons are purchased loose while others come on different sized cards…The organza ribbons I wound onto a piece of cardboard covered with cotton batting, the flosses and wider silk ribbons I put into small containers.
Of the narrower silk ribbons I generally like them stored loose in the draw because I hate the crinkles in the ribbon from being wound onto cards but it only works for shorter lengths (under a metre) of ribbon so what I have ended up doing is leaving what is on cards on the card, longer lengths are wound onto the funny stackable plastic bobbins that I purchased many years ago, the shorter lengths are threaded onto a safty pin as I did for the satin ribbons so that they can sit loose in the draw but by holding the pin up I can see every ribbon that is there.
The white ribbon at the back of the draw is waiting to be dyed.
|
When I did my stitch Yesturday I thought that I was doing it similar to what Elizabeth had but it turns out that I was so focused on the tear drop shape that I didn’t see the rest of her design and was actually doing something different…the interesting thing is that if I hadn’t been so focused on that one tear drop shape I would have seen the whole stitch but if I had seen the whole stitch I wouldn’t have thought of putting it end on end.
I was thrilled that Elizabeth was then able to take what I did and work it back into a counted thread design. I think it is exciting that the internet and blogging gives us the opportuntity to bounce ideas back and forth and to learn and be inspired by each other.
|

Tonights detail is another stitch that I have had in mind for awhile just waiting to find a seam to do it on.
For this Stitch I have to thank Elizabeth, If you havn’t seen Elizabeths blog of Quiter Moments it is worth a visit, she is doing really exciting things with the TAST challege…This seam is inspired by her first sample on 17th march. What I liked about her Stitch was how the Up and Down Buttonhole is enclosed by the tear drop shape.
The tear drop shape is held in place by small holding stitches, on the counted thread background these are done before slipping the thread under them to form the loops, when I tried this on the crazy block I couldn’t get the stitch length or even spacing for the holding stitches and I found it easier to do the holding stitches last, I used a pin to hold the thread in place while I worked the stitch.
|
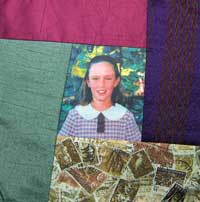 Another block pieced. I have used mostly plain fabrics in this quilt but when I found this stamp fabric in my old stash of quilting cottons I thought that it would be nice to represent all the letters that family has written. Another block pieced. I have used mostly plain fabrics in this quilt but when I found this stamp fabric in my old stash of quilting cottons I thought that it would be nice to represent all the letters that family has written.
As I get nearer to the end of a project I look for what it needs to keep the whole thing balanced/united and as I used some laces and ribbons in the first 9 blocks I need to use some in the rest of the blocks.
I illustreated how to do this Loopy Ribbon on day 8 of the details last year. For this seam I used a very narrow satin ribbon, made the loops small and gently zig zagged the loopy rosettes back and forth across the seams.

|

The stitching on the first 9 blocks of this quilt, which were the UFO Portion from 1994, are mostly the basic stitches, with the influence of TAST the stitches I have been doing on the later blocks has become very varied and every so often I feel as if I should throw in a basic stitch to blend the 2 blocks together…with this in mind I had a look at all the seams that I have done and realized that I hadn’t yet done a seam of the basic Double Feather Stitch so Double Feather Stitch it was today.
And here is the 21st finished block for mum’s quilt

|
This Photo gave me room to do a wide seam so I chose this Up and Down Buttonhole Stitch which is one of my TAST week 11 visual journal sketches.
|
 For a technically simple stitch, Running Stitch is quit a challenge to use as a seam treatment on crazy quilting. For a technically simple stitch, Running Stitch is quit a challenge to use as a seam treatment on crazy quilting.
As I drew thoughts into my visual journal, I realized that I was being influenced by having been a quilter and was thinking of running stitch as used for quilting patterns.
So will they translate into a seam treatment? only way to find out is to try one.

Well that didn’t work…If I had done it straight onto one of the blocks for mum’s quilt I would probably have pulled it out but as this is a sampler block I thought What If? What if I laced another thread through the running stitches to make them a continous line…

The lacing produced an eccentric looking seam which I liked enough to do on one of mum’s blocks. The lacing on the first seam pulled the fabric in a lot so the second time I was careful to keep the running stitches loose to prevent the pulling…I finished the seam with a couple of bugle beads in the enclosed spaces (I couldn’t decide wether to use dark or light beads so used both).

I used waste canvas to get the spacing for this next running stitch seam…It works OK but was a lot of bother and I don’t feel inclined to copy it.

|


