The March Take it further Design Challenge is Do you ever notice the little things, the small moments, the details in life? This months challenge is to do just that, pay attention to the tiny details. Sometimes the small things become emblematic for something larger. That is it!
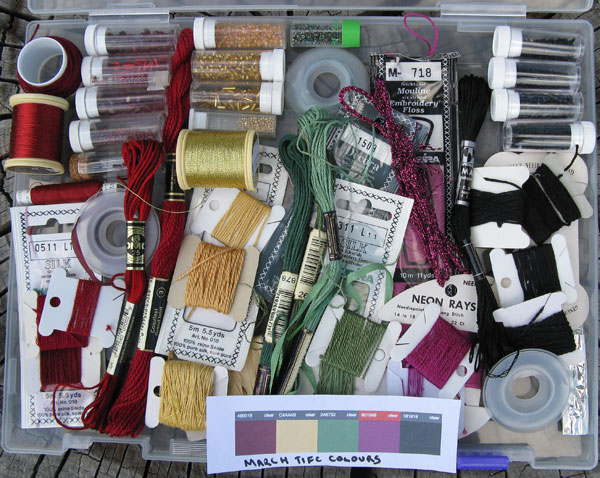
I am not sure what to make of this months concept, I will just have to pay attention to the tiny details and see what I make of them…In the meantime I like the march colours and have selected a variety of thread types and beads for each colour.
|
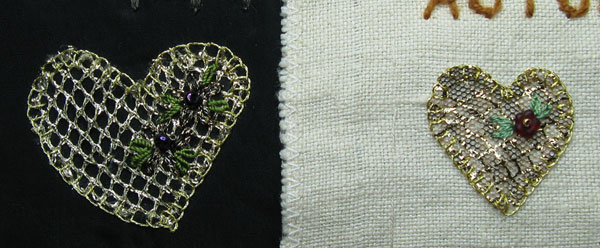
The Heart on the right is on my sampler, inspired by the heart on the left which is on my wall hanging A Secret garden in my Heart.
I cut heart shapes from gold net and buttonhole stitched around the edges with gold metalic thread before decorating with bead flowers and detached chain stitch leaves.
|
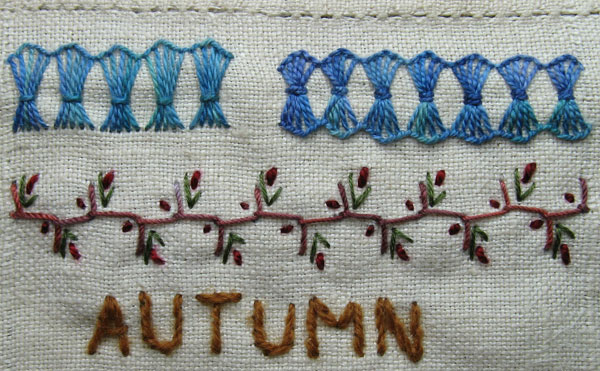
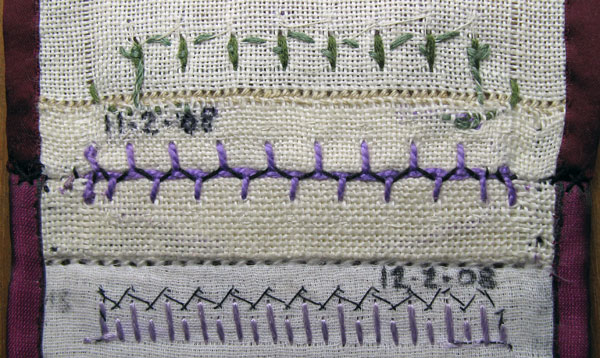
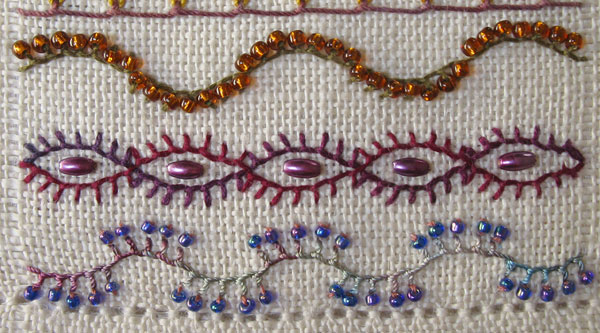
Top Row…The first part of this seam is from one of Elizabeth’s tast experiments, I was having trouble with the tension and thought of another way to get a similar effect, I did 2 rows with groups in each row coming together at one point and then straight stitches over the central points…size 8 silk thread.
Middle Row…a simple flipped buttonhole stitch trimmed with straight stitches worked with 2 strands of green cotton floss and red size 5 cotton pearl thread…I like how delicate the straight stitches make this seam look.
Bottom Row…Marking the change of Season….Stem stitch done with a wool thread, it has been such a cool summer we are already thinking about pulling out the winter woollies
|
I have laced the panels together so that they are securely joined but can be unlaced and seperated for display and relaced for security
To Join the 2 panels I a row of Buttonhole/Blanket Stitch, trimmed with beads, along the bottom of panel 1 and the top of panel 2, I attached silk ribbon to each side of the top of panel 2 and laced the 2 panels together by weaving the ribbon through the buttonhole stitches and tying the ends with a bow (the bow was Sharon’s idea).
On the Back I used a black thread and big visible stitches to hold the ends of the seam together and wove it through the buttonhole stitches from one side to the other….On the back I have also written the start and finish dates for each panel.
|
Today all my sitching time went into stitching the binding on the edges of Panel 2 but I also have the 3rd Panel ready for stitching
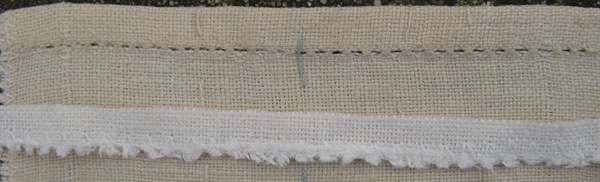
The Fabric for Panel 3 is a tighter weave Linen, I backed it with loose weave cotton fabric the same as I did for Panel 2, this time I basted the 2 layers together more thoughly with a 5 lines of basting (blue is the centre line) running the length of the Panel…I hesitated in using this fabric because it was a little to white but decided that over the years I will use many different fabrics and they will all be different so this one will blend in with the rest but when I had it all prepared for stitching I really didn’t like the whiteness and remembered what I used to do with white lace before the ready availability of dyes and coloured lace, I dyed the lace with coffee and I plunged the Linen into a bowl of strong coffee, much nicer…I don’t know how archival coffee is but the laces I dyed more than 20 years ago show no sign of deterioration.
|
I have finished the second Panel of my Band Sampler…I have photographed it with the first panel so that you can see how there lengths differ, the second panel is 33 inches long making a total length of 63.5 inches.
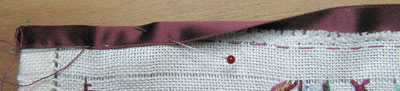
My next task is to bind the edges of the panels…originally I was going to bind the panels with black but when I went to purchase some ribbon I thought that the dark red looked much nicer…I am using 5/8th inch Satin Ribbon, using running stitch done with a matching thread I stitched the ribbon to the back of the panel then folded the ribbon to the front and stitched it in place again using a running stitch done with a matching thread.
|
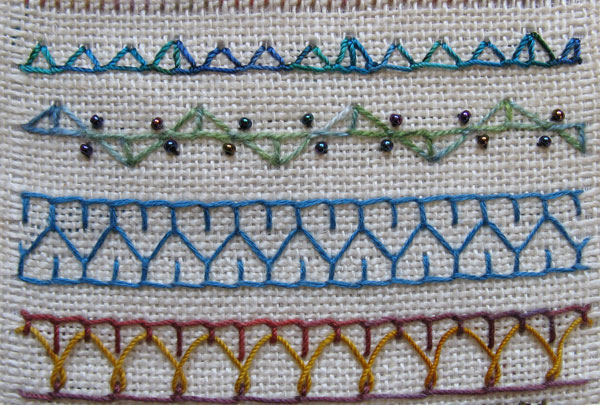
These 3 seams are based on one by Lin Moon.
Top row…With this seam I put the beads on the stitch as I worked it instead of at the ends of the stitch.
Middle row…the top row looked so different from Lin’s that I thought I would do it again with the beads on the ends of the stitch but after doing the row of flipped buttonhole stitches I thought what if I did a second row in the spaces of the first which gave a nice centre to put the long beads….2 strands silk floss and 2 strands of cotton floss.
Bottom row…trying again, this one is very similar to Lin’s but only has 5 stitches on each side because I was at the bottom of the panel and didn’t have enough space for the swing of the 7 stitches….Rayon Thread.
|
All of todays details are based on stitches on skybellarts buttonhole stitch sampler.
Top row…The arms of the Buttonhole Stitch are sloped with 2 or 3 arms sharing the same hole at the top to form triangles….Rayon thread.
Second row…This seam uses the 3 arm triangles which I elongated and flipped from side to side…silk thread.
Third row…2 rows of Buttonhole stitch, with their arms faceing each other and threaded together forming the geometric design…2 strands cotton floss.
Bottom row…2 rows of Buttonhole, the top row with alternating long and short arms, the lower row with very short arms aligned with the long arms of the top row and then threaded with the contrasting colour…Cotton Thread.
|
Top 3 rows are from Sharon’s Sampler
Top Row…Alternating pairs of short and long Buttonhole Stitches, worked with 2 strands of cotton floss.
Second Row…staggered Buttonhole stitches flipped from side to side , worked with 2 strands cotton floss, it looks different from sharon’s because I have used a finer thread, less stitches in each group and the stitches are shorter…I like the way the detached chain stitch (3 strands silk floss) and beads fit into this variation.
Third row…Buttonhole stitches, staggered on both sides and flipped from side to side, worked with a fine silk thread.
Bottom row…Is from a stitch by stitch1peta, I liked the border formed by adding the narrow row of buttonhole to the top of the scollop topped row and the overall fringe looking effect of the combination. Worked with 2 strands of a varigated cotton floss.
|
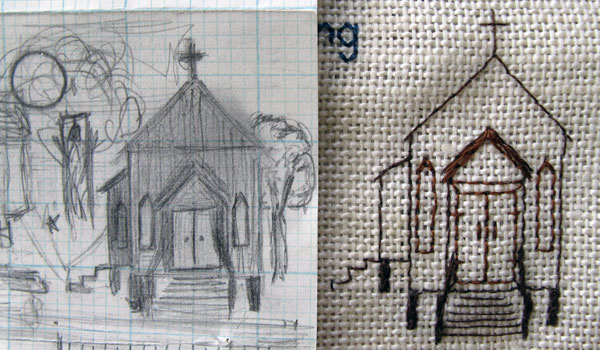
The Take it Further February design concept is What are you old enough to remember…I interprette that to mean not my oldest memory but the oldest memory that would be shared by others, so from my First Thoughts I have taken the local memory of the New Ballina Catholic Church or more specifically the closeing of the Old Church which I also link to a family memory because my sister was the last baby to be Baptized in the old church in 1962…
The old church was a tall narrow building with steps up to a small porch at the front and painted brown, to me a much nicer building than the modern, blond brick, building of the new church.
Umm, I think that I should have done more experiments with how the fabric pens worked on the linen and then
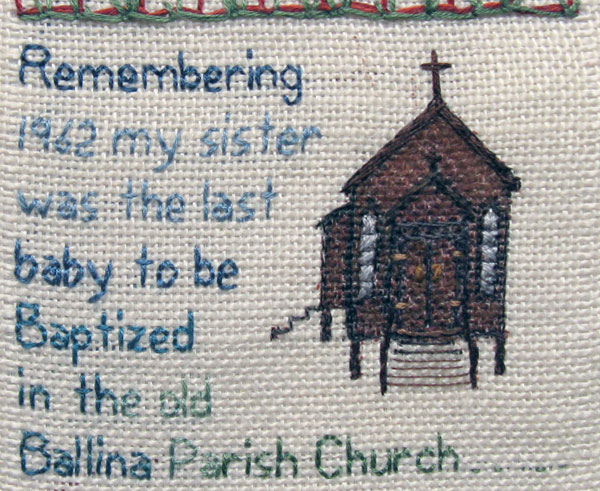
not coloured the building…it looked a lot better as an outline than it did after painting.
|


