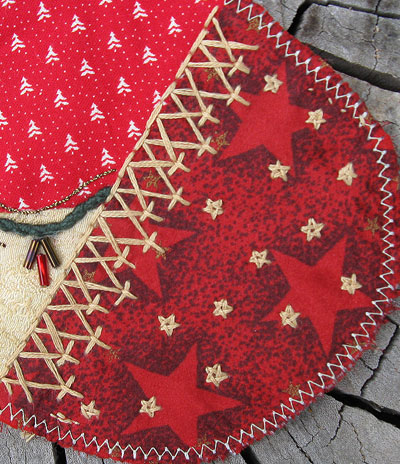
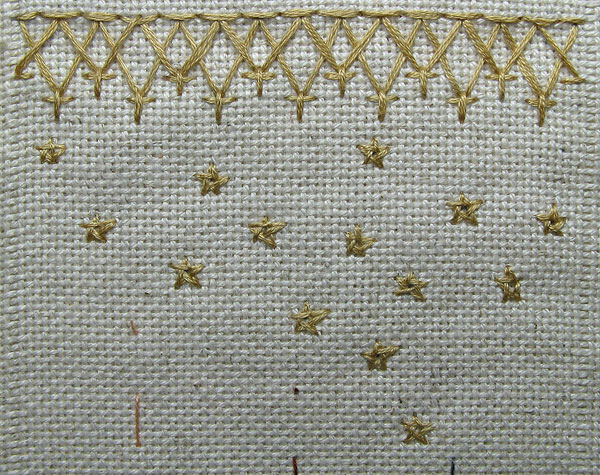
This Chevron Stitch variation is a combination of details 675 and 676, I wanted to do detail 675 but I thought I needed a one sided seam treatment which is what detail 676 is but when I stitched the seam it didn’t end up like either of them and I wasn’t happy with the look of the new variation it was chunky and visually cut the toe off from the stocking instead of connecting it…this one had me stumped for a while until I showed my sister who immediately suggested that I use the same thread is used for the seam to highlight the little stars on the fabric, perfect, the stars lighten up the seam and flows out of the stocking connecting the toe to the rest of the stocking.
This seam evolved from ideas on my sampler and then gone full circle back onto my sampler as yet another idea.
|
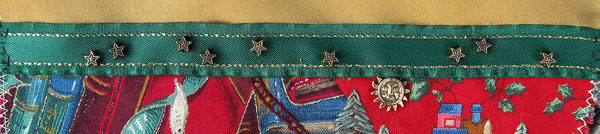
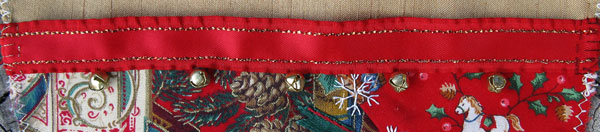
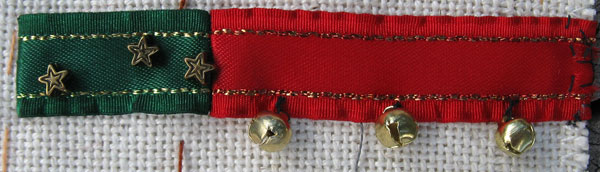
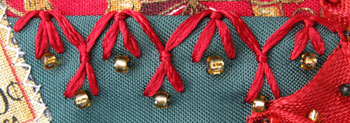
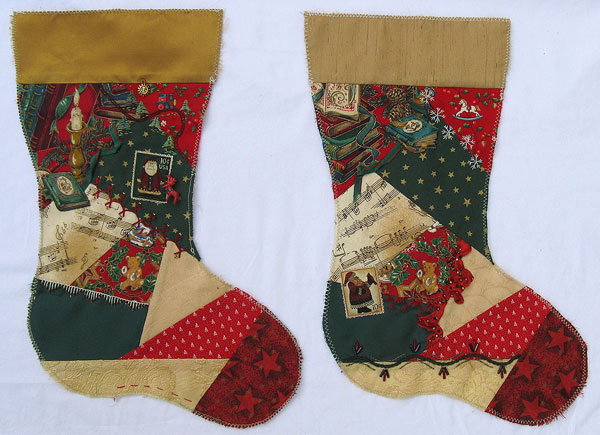
For the tops of the twin stockings I have the same ribbon in 2 colours…choosing which stocking to put which colour on was easy the green ribbon definitely looked better on one, the red definitely looked better on the other…I scattered the star beads along the top of the green one and was going to do the same on the red one but I only had a few stars left, went looking for what else I could use and found the little bells, I did also find more star beads but by then I preferred the bells both because I liked the way they looked and because they really help to make the top of the stockings look very different…I have only tacked the bells on for the photo and will stitch them on permanently after I have embroidered the name on the top.
|
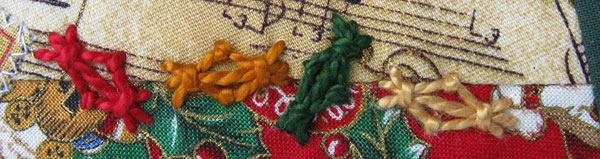
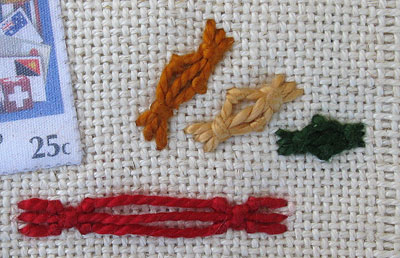
I described how to stitch these little Christmas candies in this previous post …This time I have done them with different coloured wrappings.
An advantage of working on the sampler is that if I have an idea I can try it and record it at the time, as I was stitching the candies I realized that longer stitches would probably make a Christmas BonBon/cracker I needed to put 2 couching stitches at each end to get the shape of the cracker end and the tension of the outside stitches is a little harder to gauge but on the whole it does make a good BonBon.
|
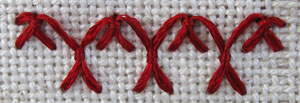
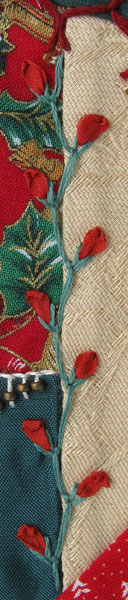 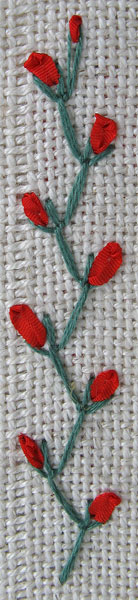 This seam is Feather Stitch with a second stitch on each stitch to form V shapes…The V Shapes are filled with a silk ribbon straight stitch with the needle being put down through the ribbon but not pulled tight so that the ribbon just starts to roll on the end. This seam is Feather Stitch with a second stitch on each stitch to form V shapes…The V Shapes are filled with a silk ribbon straight stitch with the needle being put down through the ribbon but not pulled tight so that the ribbon just starts to roll on the end.
|
Mine is the 3rd birthday I have blogged this month and that is less than half of my families October births.
I had a lovely afternoon visiting Sharon after which, with my niece, I mixed up a batch of cement for my castle (there is a castle update in the draft copy), I have been told how to mix it from the cement powder and sand rather than the premixed bags I have been buying and I just wanted to do a batch to see if it would work for me and it did.
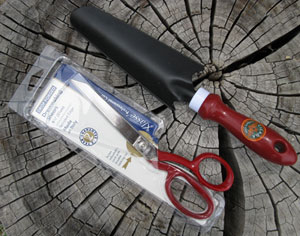 I also spent a lot of time on the phone with family and friends. The image is my present from a friend who knows me well, knows that it is a long time since I had a pair of dressmaking sized scissors, it is ridicules to be cutting fabric with tiny scissors but whenever I do visit the Scissor Man, it is always the new embroidery scissors that I leave with…Maybe now that I have the proper scissors for the job, my embroidery scissors will stay sharp longer but I now have no excuse for not making the new curtains for my lounge…And with the scissors, a transplanting trowel, just the best tool for getting long rooted weeds out of the garden. I also spent a lot of time on the phone with family and friends. The image is my present from a friend who knows me well, knows that it is a long time since I had a pair of dressmaking sized scissors, it is ridicules to be cutting fabric with tiny scissors but whenever I do visit the Scissor Man, it is always the new embroidery scissors that I leave with…Maybe now that I have the proper scissors for the job, my embroidery scissors will stay sharp longer but I now have no excuse for not making the new curtains for my lounge…And with the scissors, a transplanting trowel, just the best tool for getting long rooted weeds out of the garden.
|
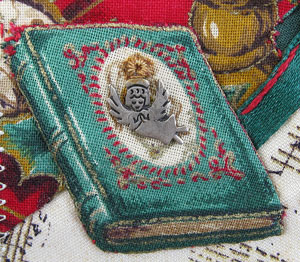 I love it when I can Hide things within my crazy quilting, when well hidden most people wont even see them but I like the idea that they are there for the very observant to find…This very tiny angel has hidden away very nicely fitting into the printed oval on one of the books. I love it when I can Hide things within my crazy quilting, when well hidden most people wont even see them but I like the idea that they are there for the very observant to find…This very tiny angel has hidden away very nicely fitting into the printed oval on one of the books.
|
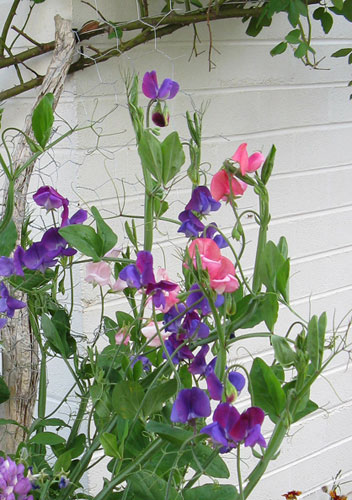 It has been a BEAUTIFUL Spring day and I spent most of it in the garden. It has been a BEAUTIFUL Spring day and I spent most of it in the garden.
The photo is some of the Sweet Peas that I planted and recorded on my sampler on St Patricks day.
|
 This is another variation of Up and Down Buttonhole Stitch which I have stitched with a Ribbon Floss…Only half a row of this variation on my sampler because that is all the ribbon floss that I had left. This is another variation of Up and Down Buttonhole Stitch which I have stitched with a Ribbon Floss…Only half a row of this variation on my sampler because that is all the ribbon floss that I had left.
|
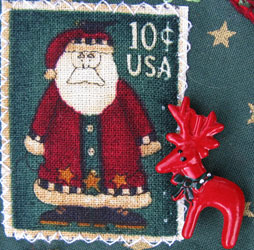 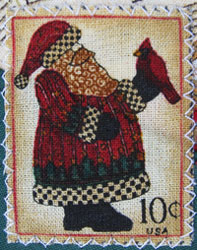 I have this fabric, with USA Christmas stamps on it, from a swap years ago and the stamps are just perfect for helping me make the 2 stockings visually different, I have put the cream backed stamp at the bottom of the cream music fabric to visually increase the size of the cream patch at the same time I have been reduceing the size of the cream patch on the other stocking…The green backed stamp I have put on the green star patch where it keeps the patch green but reduces the intensity of the stars…The red reindeer button matches with the same button on one of the other stockings and I have added a sun button above the train which pairs with the moon charm on another of the stockings. I have this fabric, with USA Christmas stamps on it, from a swap years ago and the stamps are just perfect for helping me make the 2 stockings visually different, I have put the cream backed stamp at the bottom of the cream music fabric to visually increase the size of the cream patch at the same time I have been reduceing the size of the cream patch on the other stocking…The green backed stamp I have put on the green star patch where it keeps the patch green but reduces the intensity of the stars…The red reindeer button matches with the same button on one of the other stockings and I have added a sun button above the train which pairs with the moon charm on another of the stockings.
|
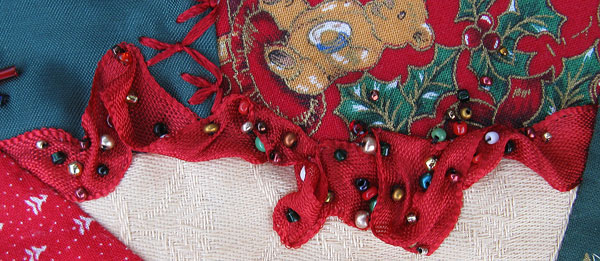
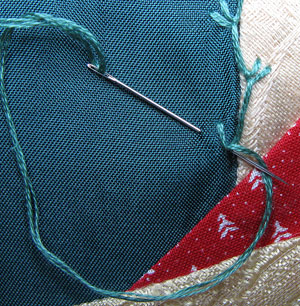
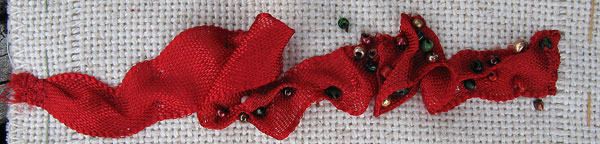
Scrunched Ribbon with Beads…I took the sampler photo when it was only half beaded so that you can see how I tack the ribbon on roughly and then go back over and bead it into shape.
|


