
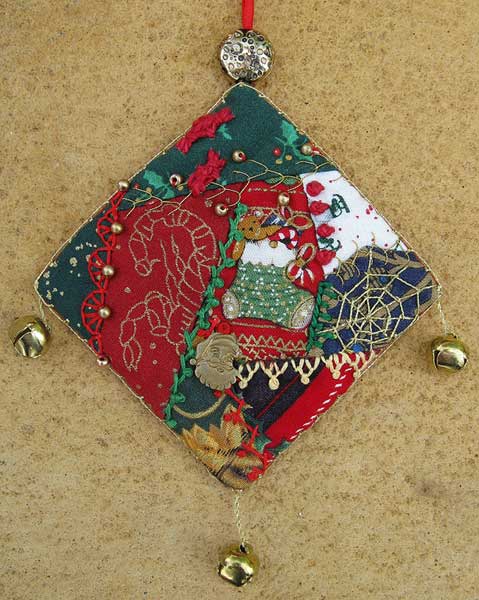
 To finish this little christmas decoration I added a Santa Charm to the crazy. To finish this little christmas decoration I added a Santa Charm to the crazy.
After stitching the square right sides together with a backing and with the hanging ribbon inserted into the seam and turning it right side out through a gap in the seam, I used Gold Metalic thread, stitched so that it formed little loops, around the edge.
A big gold bead threaded onto the hanging ribbon and a bell on each corner complete the decoration which I will give to a young friend for christmas.
|

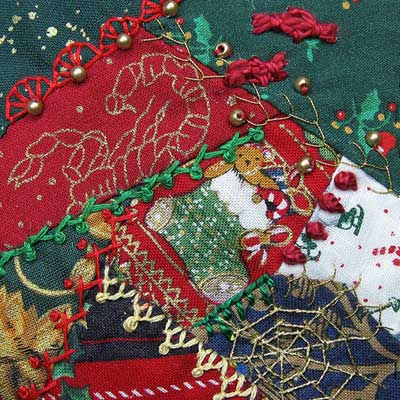 These candys are 3 straight stitches with holding stitches on each side of the middle to hold the sides out and a holding stitch over all 3 threads a little in from each end to form the candy shape. These candys are 3 straight stitches with holding stitches on each side of the middle to hold the sides out and a holding stitch over all 3 threads a little in from each end to form the candy shape.
They are a copy of the little candy that I found on this 3 inch square that a stitched several years ago and is all done except for sewing it into a christmas tree decoration.
|
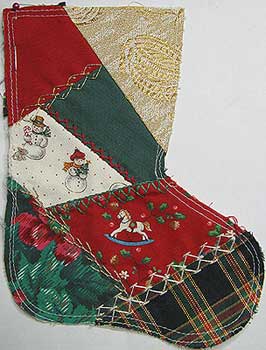
 I have finished the stocking that I was working on last week. I have finished the stocking that I was working on last week.
When it came to the embellishments I liked the way the Santa Button looked and a bit out of character for me who likes lots of embellishments I thought that the Santa Button was all this one needed.
See this post of how to construct a christmas stocking.
Keeping with the simplisity of useing minimal embellishment instead of putting lace around the top I have used a few stars and beads to hold the lining in place so that it doesn’t creep out over the top.
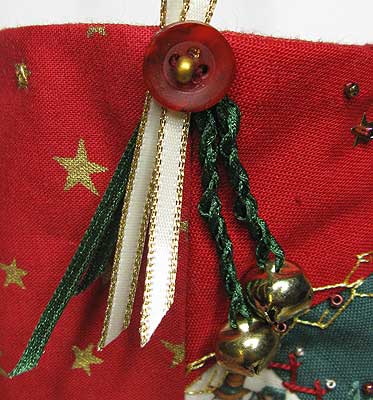
Still keeping the embellishments simple I attached the bells and hanger with a single red button and gold bead.

|
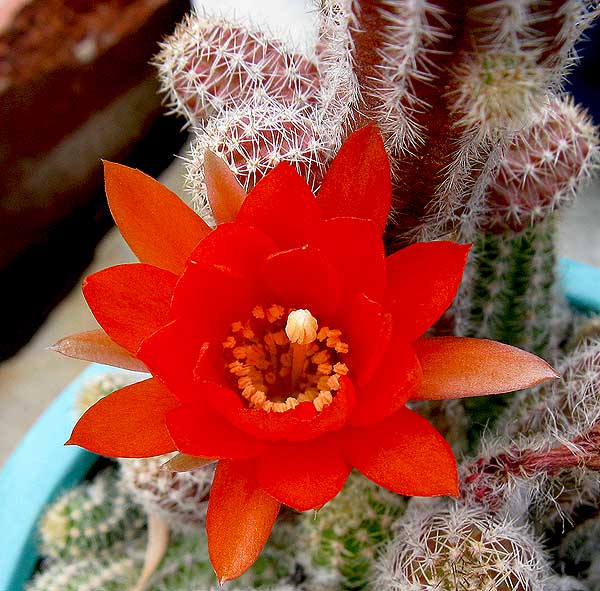
The flowers on My sister’s Cactus were a delicate pink colour…This one, on a Cactus plant that my son left here when he moved, has the same delicate structure but is a vibrant orange colour.
|
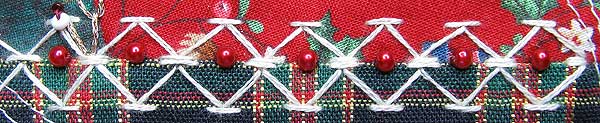
Combined Up and Down Buttonhole Stitch with Herringobone Stitch and done two rows matching the herringbone Stitch down the centre.
|
This Seam is 2 rows of a Feather Stitch Variation which is worked all on one side and then mirrored on the other side of the seam.
I didn’t really need to add beads to this seam because it does stand alone but as I have beaded every other seam on this stocking I added a single bead in each section the stitch forms.
|
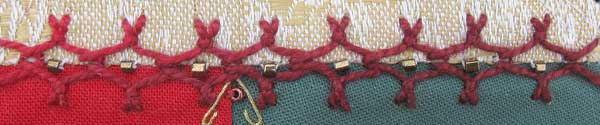
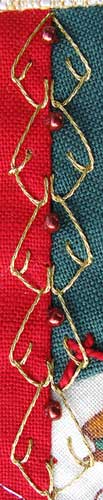
 This seam treatment is done with Fly Stitches topped with a row of Stem Stitch. When I originally did the seam I did the fly stitches in groups of 3… This seam treatment is done with Fly Stitches topped with a row of Stem Stitch. When I originally did the seam I did the fly stitches in groups of 3…
I have now conected the groups with additional fly Stitches and then used gold metalic thread to add a Pistil Stitch (which is the week 49 TAST Stitch), to each point to give it a fringe like edge.
I wanted to do more to this seam then just add a bead to each of Herringbone Stitch but the stitches where to close together so I have just put a bead on most of the stitches but have added interest by alternating them with the Detached Chain Stitches and red beads.
|
 I have been reminded that Christmas is approaching fast and that maybe it is time to start thinking about it… I have been reminded that Christmas is approaching fast and that maybe it is time to start thinking about it…
To get in the mood I have pulled out a 6 inch christmas stocking that I pieced and started to embroider 5 or 6 years ago and added beads to 2 of the seams.
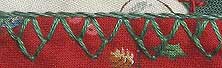
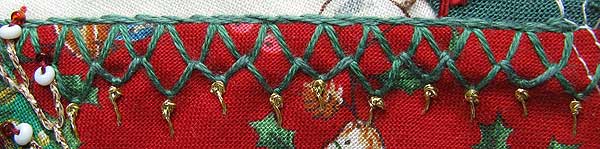
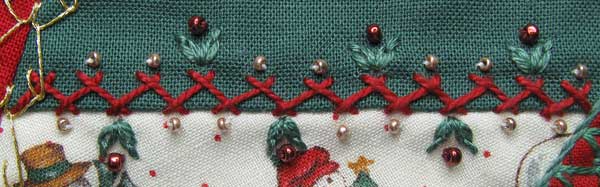
The first seam is 2 rows of Chevron Stitch to which I added red beads
The second seam is Double Feather Stitch, I added a white seed bead and a petit red bead to the end of each stitch.

|
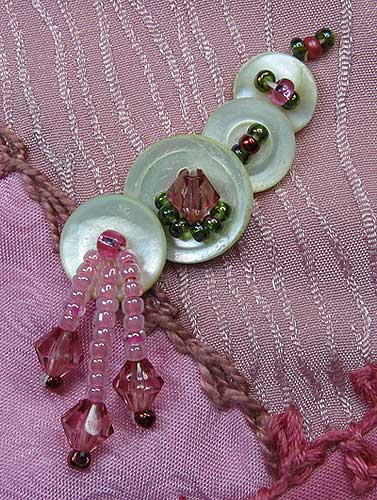
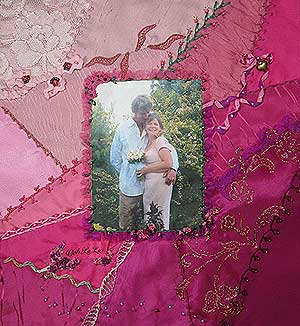
On the left side of the Photo I have put a Button Cluster.
I have used MOP (Mother of Pearl) Buttons and used beads to give them Sparkle.
On 4 holed button I used a pink crystal with green seed beads to match those I did on top of the pink ric rac.
The dangling beads are done by comming up through a hole in the button, thread on desired length of beads, select the end bead and go through it only once before putting the needle back through the rest of the beads in the dangle and the same hole in the button…leave thread a bit loose when securing thread on the back, if thread is to tight the dangle will stick up instead of dangling.
|
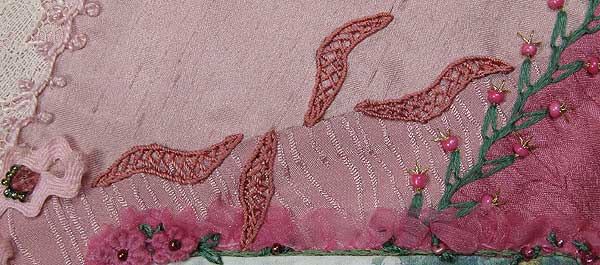
 These shapes are the start of something but at this point I have no idea what. These shapes are the start of something but at this point I have no idea what.
The shapes are Closed Herringbone Stitch outlined with Stem Stitch…I did the 2 that run along the seam because I didn’t want a buzy embroidery stitch butting onto the loop of ric rac and I had the intension of putting a fan or something between the 2 shapes but when I looked at it in relation to the block around it I realized that the space was to central to put a focal embellishment because it would be almost directly above the heads in the photo.
I then added the other 2 shapes to fill the seam and thought that I needed something else in the gap above the seam but looking at the photo now I am thinking that it actually does look ok as it is…I’ll sleep on it.
|


