Todays detail is a Shi Sha surrounded with a combination of detached chain stitch and fly stitch sealed with a colonial knot…
If you have ever tried to sew on a shi sha and given up in disgust I will encourage you to give it another go…as they are not that difficult once you know the tricks and are worth mastering because they are a lovely embellishment and the technicque can be ever so handy for attaching many interesting items to your crzy quilts.
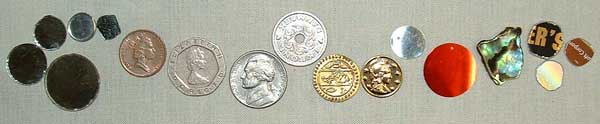
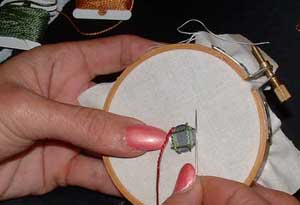
Shi Shas are held in place with straight stitches, the difficulty with sewing shi shas on is holding them in place while you do the first four stitches…to overcome this I suggest that you start with a sequin or coin charm that has a hole in it so that it can be stitched in place and wont fall out while you are trying to figure out where the next stitch goes…OR Learn/practice the stitch sequence on a circle drawn on some scrape fabric, then when you move onto the shisha you will know the stitch and can concentrate on holding it in place with your thumb.
Drawing a circle on the Fabric is what I did for my sample because it solved the problem I was having with the flash on the shi sha.
   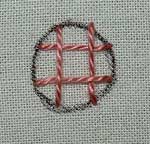
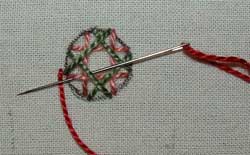
These are the first 4 Straight Stitches that hold the shi sha in place…don’t pull the support stitches tightly as they need some movement so that they can be pulled closer to the edge when you do the edge stitching.
Another 4 Straight Stitches complete the support structure for the edgeing.
When you start you will possibly find it easier to go come up and go down as 2 motions, once you understand how the support structure works you will find that you can go down and come up with one motion.
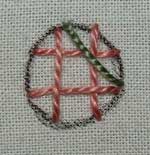
Step 1 of the edgeing stitch is worked by slipping the needle under all the threads from the centre to the edge of the shi sha and looping the thread under the needle as you do for a blanket stitch.
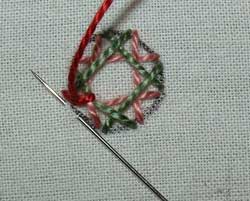
Step 2 is a small back stitch beside the shi sha which anchors the step 1 stitch to the background.
Repeat these 2 steps….
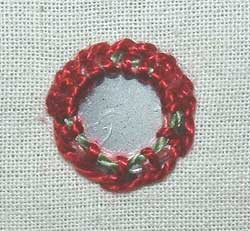
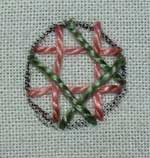
The edge stitches can be close together as in the top of my sample or spaced apart as on the bottom of my sample…
POSTSCRIPT posted 31st Oct 2007
Sharon B has illustrated Shisha stitchfor Week 35 of Take a stitch Tuesday…She has shown a different method of anchoring the Shisha to the fabric and of the surrounding stitches…I have tried her method and love the way she anchors the shisha, but I prefer the method I have described above for the surrounding stitches.
|


 This first shisha is still very much in experimental phase…
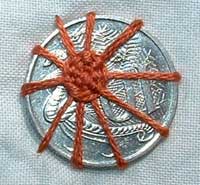 The other idea that I have been playing with is using a spider type web to hold the shisha in place…The first sample is a simple experiment to see how the spokes of a
 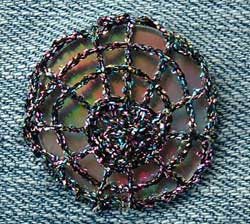 For the second one I made an odd number of spokes and wove the thread in a spiral, it was a bit hard to keep the tension of the spiral this may not work with other threads because the threads want to slip into the middle and I think the metalic thread catching on itself helped keep this one in place.
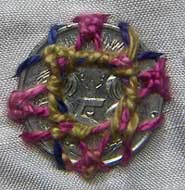
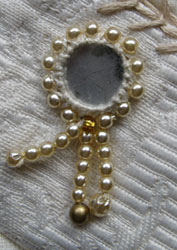
 On this shisha I was playing around with a different combination of stitches that would give more shape interest to the edge of the shisha.
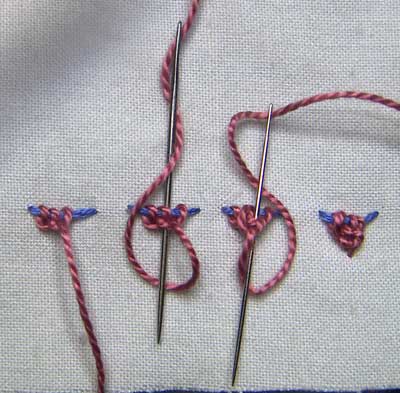

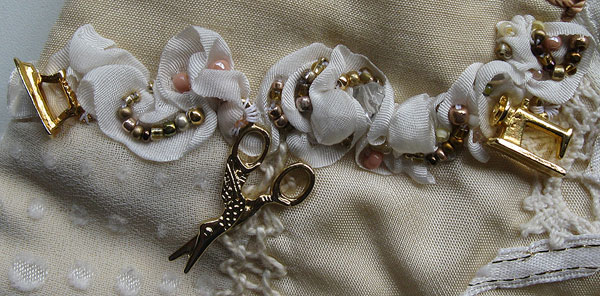
 …Shisha ideas and started experimenting with adding beads.
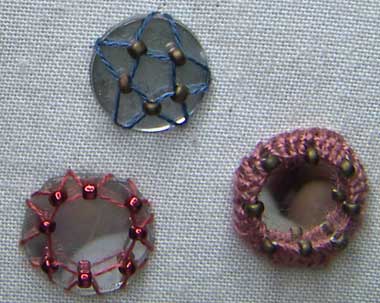
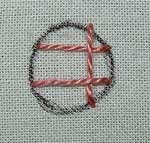
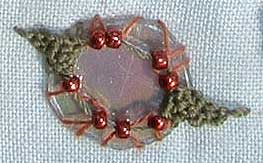
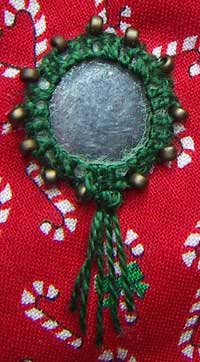
 This shisha is a 1/2 inch square mirror…to attach it I came up at the middle of the bottom edge, down at the middle of the left edge, up middle of top edge, down middle of the right edge, that gave me 2 diagonal lines across the corners of the square…from there I finished the square and kept working around the mirror with straight stitches till I got to the corners which I finished with colonial knots…At the bottom I made a tassal from a few straight stitches.
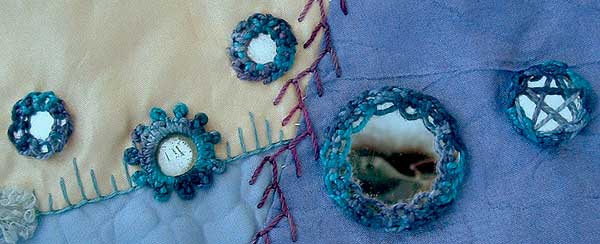
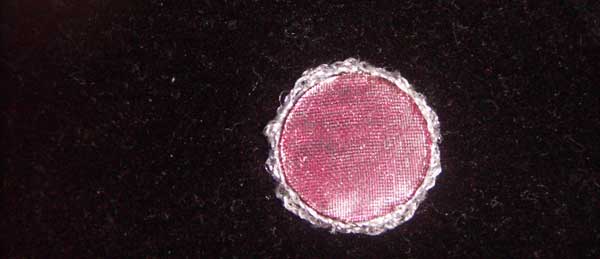
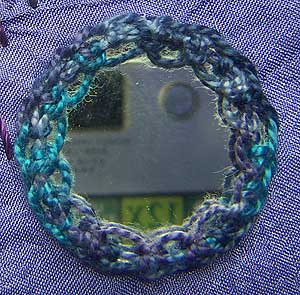 The 4th shisha is a 1.25 inch diameter mirror that
 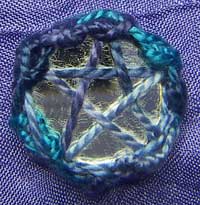 I anchored the last shisha with a
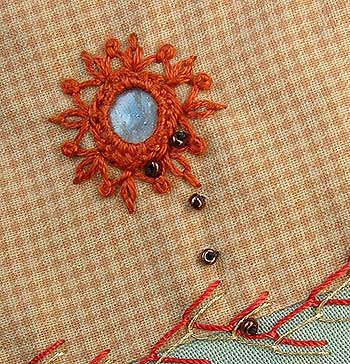
 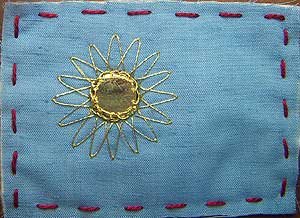 I have stitched a golden Shisha Sun to Celebrate that today is the first day of spring.
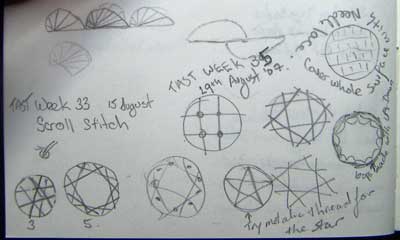 Shisha stitch and Sharon has illustrated a different method than the one I knew so the first thing to do was to try
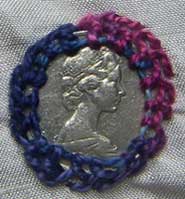
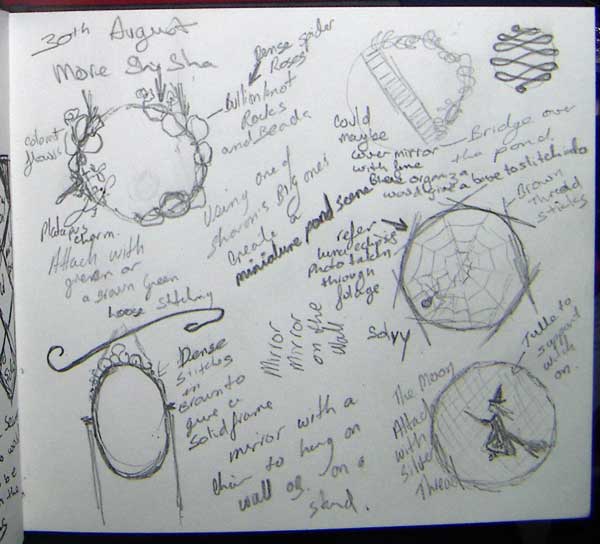
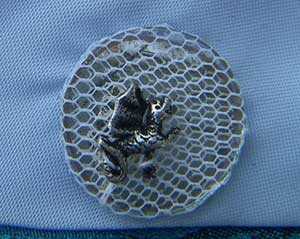 When I got to the witch flying in front of the moon, the problem was How do I attach a charm to the shisha…I would need to have something to stitch it to, something that wouldn’t block the mirror, something like the fine net that some laces are made on…Tulle would be worth an experiment…I have used a miniature dragon because I didn’t have a witch charm and it worked, I had a solution…