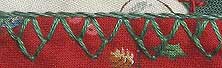
 This seam treatment is done with Fly Stitches topped with a row of Stem Stitch. When I originally did the seam I did the fly stitches in groups of 3… This seam treatment is done with Fly Stitches topped with a row of Stem Stitch. When I originally did the seam I did the fly stitches in groups of 3…
I have now conected the groups with additional fly Stitches and then used gold metalic thread to add a Pistil Stitch (which is the week 49 TAST Stitch), to each point to give it a fringe like edge.
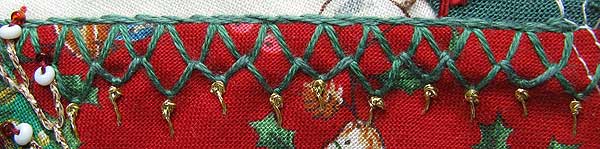
I wanted to do more to this seam then just add a bead to each of Herringbone Stitch but the stitches where to close together so I have just put a bead on most of the stitches but have added interest by alternating them with the Detached Chain Stitches and red beads.
|
 I have been reminded that Christmas is approaching fast and that maybe it is time to start thinking about it… I have been reminded that Christmas is approaching fast and that maybe it is time to start thinking about it…
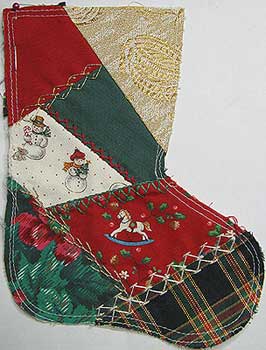
To get in the mood I have pulled out a 6 inch christmas stocking that I pieced and started to embroider 5 or 6 years ago and added beads to 2 of the seams.
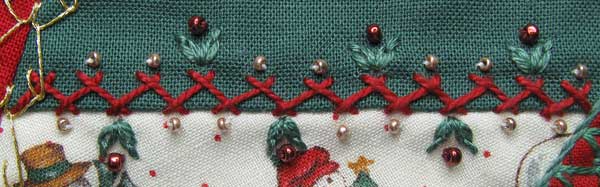
The first seam is 2 rows of Chevron Stitch to which I added red beads
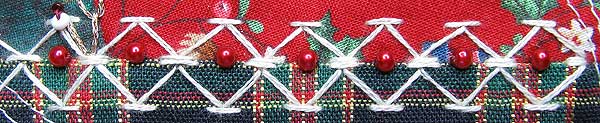
The second seam is Double Feather Stitch, I added a white seed bead and a petit red bead to the end of each stitch.

|
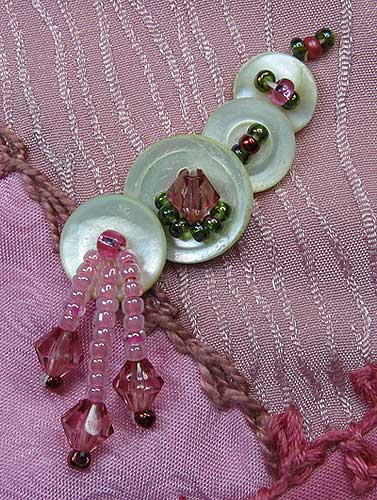
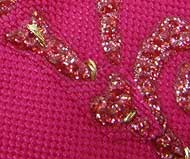
On the left side of the Photo I have put a Button Cluster.
I have used MOP (Mother of Pearl) Buttons and used beads to give them Sparkle.
On 4 holed button I used a pink crystal with green seed beads to match those I did on top of the pink ric rac.
The dangling beads are done by comming up through a hole in the button, thread on desired length of beads, select the end bead and go through it only once before putting the needle back through the rest of the beads in the dangle and the same hole in the button…leave thread a bit loose when securing thread on the back, if thread is to tight the dangle will stick up instead of dangling.
|
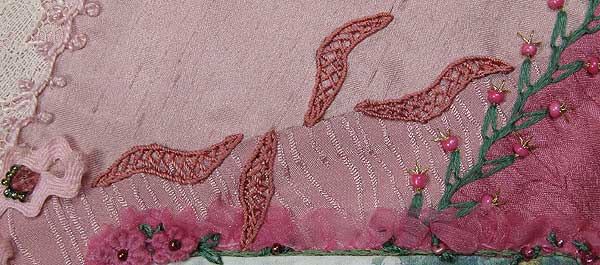
 These shapes are the start of something but at this point I have no idea what. These shapes are the start of something but at this point I have no idea what.
The shapes are Closed Herringbone Stitch outlined with Stem Stitch…I did the 2 that run along the seam because I didn’t want a buzy embroidery stitch butting onto the loop of ric rac and I had the intension of putting a fan or something between the 2 shapes but when I looked at it in relation to the block around it I realized that the space was to central to put a focal embellishment because it would be almost directly above the heads in the photo.
I then added the other 2 shapes to fill the seam and thought that I needed something else in the gap above the seam but looking at the photo now I am thinking that it actually does look ok as it is…I’ll sleep on it.
|
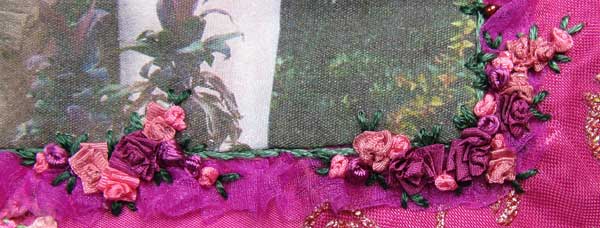
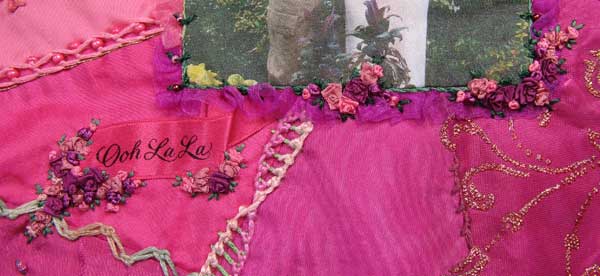
Across the bottom I did clusters of Silk Ribbon Roses.
I did give these clusters there own detail number but they could equally well be considered as an extention to the Ooh La La detail
|
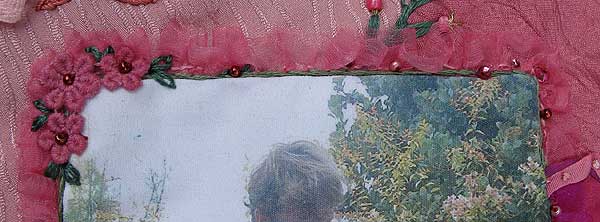
Across the top of the photo I have put three lace flowers, with bead centres and green lazy daisy leaves, in the left hand corner and then lightly sprinkled beads across the top of the photo and down the sides…I put tiny straight stitch leaves on the bead closest to the corner and after looking at the photo I will add tiny leaves to all the beads around the edge.
|
When I put the gathered organza ribbon on the top and left edges I was still going to put lace flowers in the bottom right corner…but…
When I put some lace flowers along the bottom and right edges and stood back from it the flowers didn’t balance the ribbon…More gathered organza ribbon on the other edges…Still not sure it is working, while thinking about it I used a slightly darker green thread to do stem Stitch along the edge of the photo…Umm I am starting to like it, I find it quite amazeing that a thin line, that can barely be seen, can make a big visual difference to how a piece looks…
Know that I like what is happening around the photo I think that it will only need a few lace flowers and beads scattered around the edges to finish it.
|
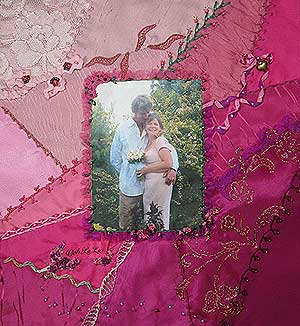
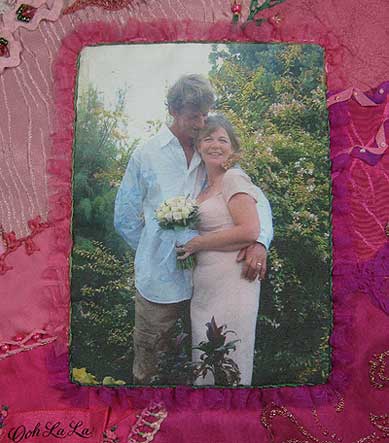
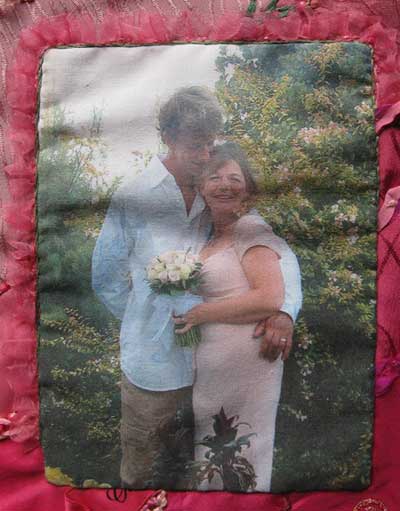 When I prepared the photo to put on the block I put a layer of batting under the photo….Before stitching the photo on I took the batting out because it made the photo sit to high off the block. When I prepared the photo to put on the block I put a layer of batting under the photo….Before stitching the photo on I took the batting out because it made the photo sit to high off the block.
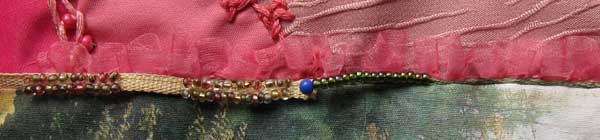
Originally I was going to put the beaded braid along the left side and across the top, when I got the photo stitched on I didn’t like the way the braid looked and thought if I put the gathered organza ribbon under the braid it would blend the braid in….
When I got the organza ribbon stitched on I still didn’t like the way the braid looked and thought about what else I could do…I like the look of the green beads but don’t have enough green beads and opted for a line of green Stem Stitch
|
To Finish the patch with the gold design I added 2 extra pieces in the middle so the the design has a continuous flow from top to bottom.
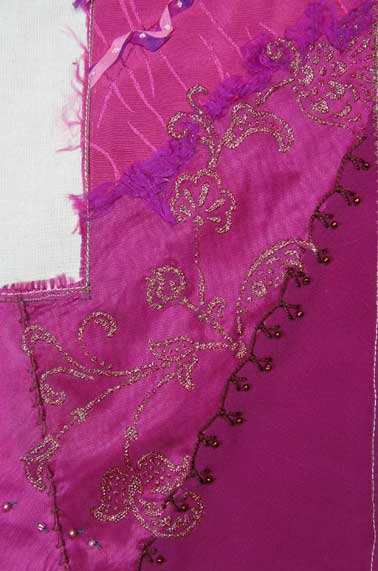 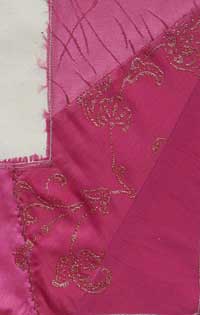
To add the extra parts to the gold design I cut around parts of the gold design from the unused fabric, backed the cut out pieces with fusible webbing, ironed them in place on the patch and did a few stitches with a gold thread to reinforse the fusible webbing.
|

This is an Up and Down Buttonhole Stitch trimmed with beads.
Holiday Snaps Day 25
and Day 26 home
|


