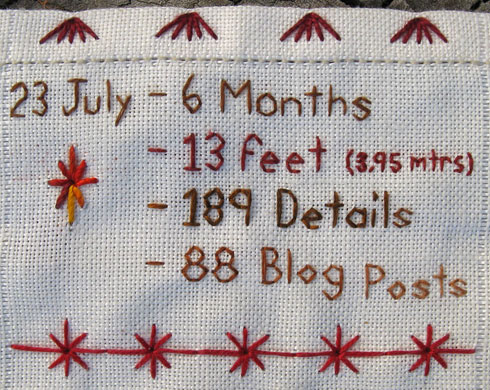
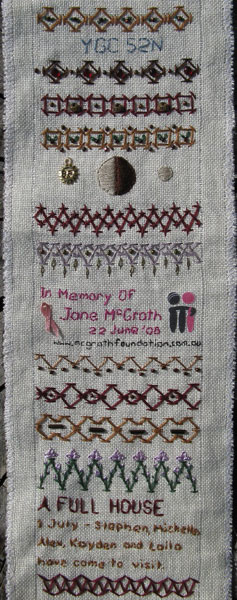
It is 6 Months since I started this sampler and to mark the 6 months I have started the 5th panel with a summary of the information that I record on the back of the sampler.
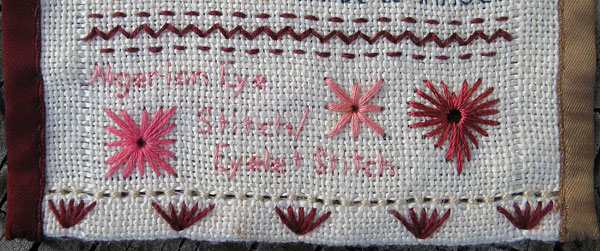
The seam at the bottom is a row of elongated Algerian eye stitches.
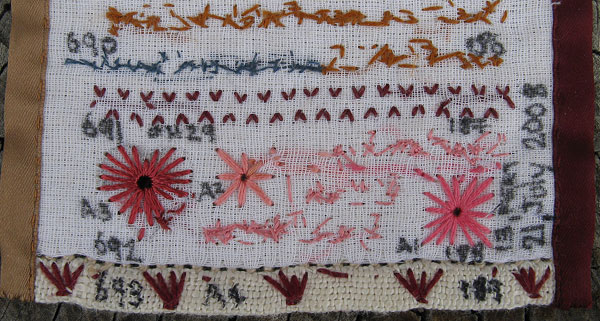
I started backing the panels of my sampler with a light weight fabric because I like the firmer feel of the double layer of fabric…I then realized that I could also use the backing fabric to record statistical information…the number on the right hand side are the blog post detail numbers, numbers preceded by letters are the stitch count ie ch29 is the 29th chevron stitch variation, the number on the left side is the running count of details on the sampler, I also record the panel number and the date I start and finish each panel and along the edge I mark the length in feet and metres.
|
 I have finished the 4th panel of my band sampler… I have finished the 4th panel of my band sampler…
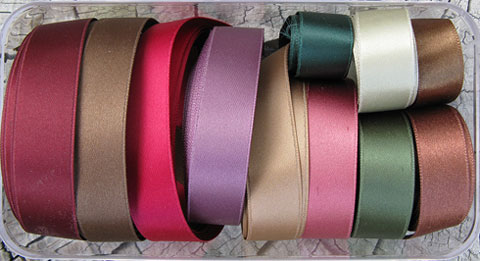
For the first 3 panels I used Burgundy/Maroon coloured ribbons to edge them, a part of my brain wanted to keep the dark red edges as a constant for the length of the sampler, another part of my brain kept whispering that changes in the colour along the edge would be more exciting…Guess which part won out, I have purchased ribbon in a range of colours…and to add another twist I have changed colour mid panel and only on one side so the left hand side is burgundy and the right hand side starts with Burgundy and changes to gold.
I placed the change of colour at the 10 feet mark.
Total length of the 4 panels is 13 feet…
|
 On Thursday I went to the Craft and Quilt Fair with Sharon and another friend. The Canberra Quilters Exhibition was as wonderful as we have come to expect, a fabulous variety of exciting quilts all beautifully hung. On Thursday I went to the Craft and Quilt Fair with Sharon and another friend. The Canberra Quilters Exhibition was as wonderful as we have come to expect, a fabulous variety of exciting quilts all beautifully hung.
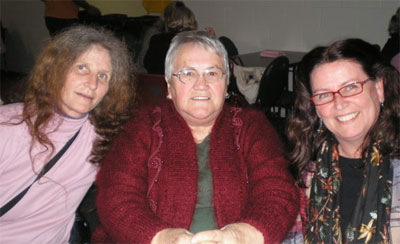
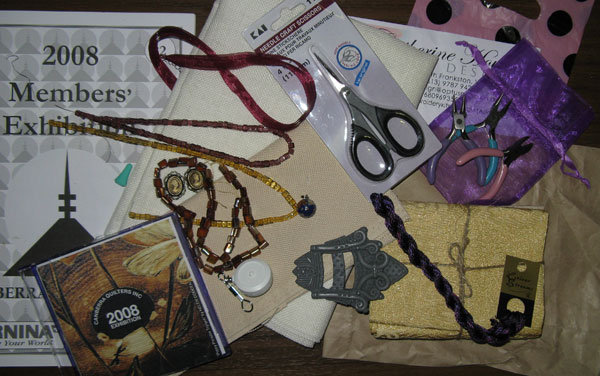
We met up with Doreen of Creative meanderings for Lunch and spent a small fortune on Linen for My Sampler, I also bought a few beads and charms and a new pair scissors.
On Saturday I went back out to the craft and quilt fair to meet up with a coupe of out of town fiends, had a lovely time catching up with them, found Sharon, who had gone back for a second look, and added some gold fabrics, some colour streams thread and some very cute miniature tools, that will fit nicely into my sewing box, to my purchases.
|
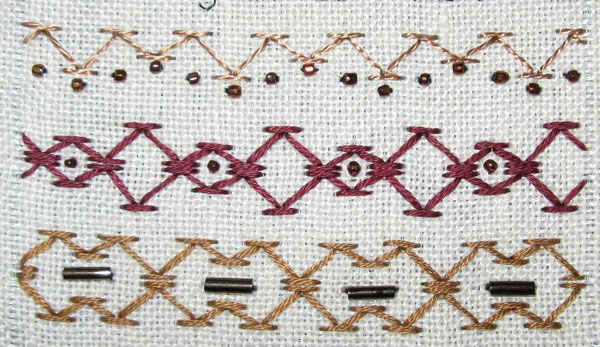
Top Row…while I was stitching the seams with the bar crossing over the central stitch I thought what if I angle the stitch out from the seam, the result is this delightfully simple seam of zig zag with a dashed line either side.
That is the end of my ideas for Chevron Stitch and I am now moving on to Algerian Eye and Eyelet Stitch, The week 6 TAST stitch. On the left there is an eyelet stitch, the middle stitch is Algerian eye stitch and on the right a heart shaped eyelet stitch.
The bottom row is 1/4 Eyelet stitches that I will use to join this panel to the next one.
|
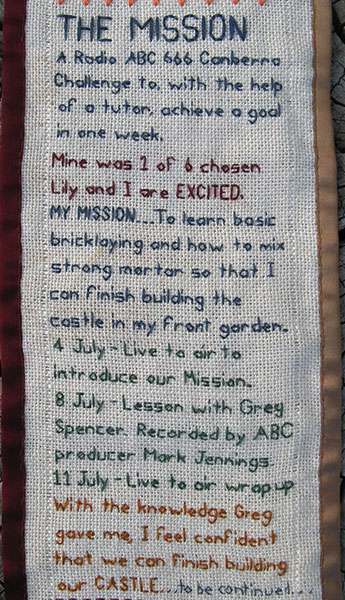 Earlier this month I told you about My Mission, Cold weather has limited the time I can spend outside and what time I have spent has been work below ground so there isn’t much to show for my efforts, I have dug out the foundations so that I can waterproof them with pond sealer and concreted the step outside the door, I will do a castle update when I have something more to show…In the meantime I have recorded my mission on my sampler. Earlier this month I told you about My Mission, Cold weather has limited the time I can spend outside and what time I have spent has been work below ground so there isn’t much to show for my efforts, I have dug out the foundations so that I can waterproof them with pond sealer and concreted the step outside the door, I will do a castle update when I have something more to show…In the meantime I have recorded my mission on my sampler.
|
Top line…I had played around,in visual diary, with slopeing the bar on the edge of the chevron stitch but looking at my sketches I didn’t think that it would work but it does,Elizabeth got it working
by having the bars meeting along the edge.
The rest of the details are
a Chevron Stitch variation of Elizabeths, I followed her illustrations for how to do the stitch, Then varied the angles, width and spacings of the stitch, it is amazing how different each one is with only small changes.
I left the side border of my sampler so that you can see where I joined another peice of fabric on to make the panel longer.

 The first line was also the end of my 12 inches of stitching with the Take It Further June Colours The first line was also the end of my 12 inches of stitching with the Take It Further June Colours
|
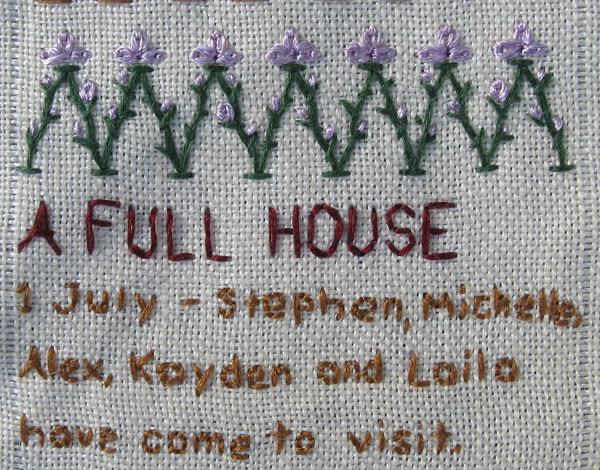
The top line tonight was inspired by one of Lin Moon’s TAST stitches.
The Bottom detail records the visit of my brother and his family.
|
Whilst I didn’t get much computer time while my visitors were here I did get some stitching done which I will show you over the next few posts…
Top line is a single row of chevron stitch with one edge as a straight line and the other edge staggered in lengths.
Middle line is 2 rows of the top stitch with the straight edges meeting in the middle.
Bottom line is 2 rows of the top stitch with the staggered edges meeting in the middle.
|
My visiting family have returned home after a wonderful visit, their time here flew by all to quickly…The house seems very quite without them here.
I particularly enjoyed the company of my nearly 10 year old nephew, he worked with me in the garden and helped us build the castle And when he showed an interest in my sampler I asked him if he would like to learn some stitching, I got an enthusiastic yes and he has started his own sampler, he is a delight to teach, he has a keen eye and good focus, I only had to show him once how to thread his own needle and knot the thread and he quickly mastered running stitch and backstitch…
 It was then time to teach his little brother how to do running stitch, I don’t think little brother was understanding what he was doing but the instructions he was giving were good and it was a delight to see him wanting to share his new found knowledge. It was then time to teach his little brother how to do running stitch, I don’t think little brother was understanding what he was doing but the instructions he was giving were good and it was a delight to see him wanting to share his new found knowledge.
Later that evening I was showing my brother the basics so that he could assist with the sampler when they get home, brother asked if he could have a strip of fabric to do his own sampler and a little later sister in law asked if she could have one too, I sent them home with their strips of fabric, needles and threads to get them started and we will correspond by email as to where on the net they can find instructions and may write the occassional post as a lesson for something that they want to learn.
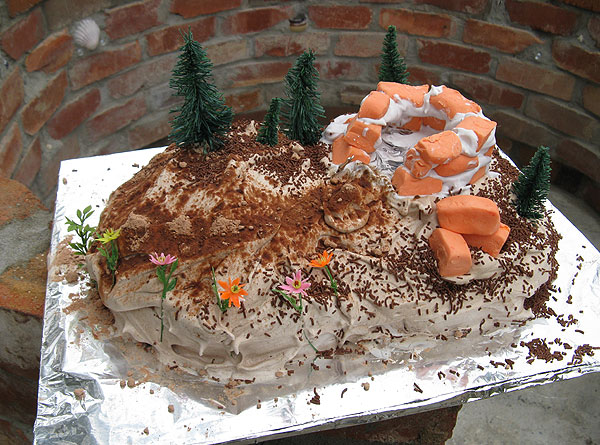
As I said my nephew is nearly ten, his birthday is next week and we decided to have an early birthday party for him…having enjoyed his company while working in the garden I was inspired to make him a special cake that would remind him of his holiday in Canberra, and what better reminder than a castle cake…well it was really a castle ruin, I didn’t have much time to think it through so it really is a wonky castle but the overall effect still looked great.
|
My Mission is going well, on Tuesday Greg my tutor and the ABC 666 producer came out to my place, as it turns out my mortar is fine but there is a few extra things which Greg talked me through that will make sure that the upper part of my castle walls will be strong and safe…the edited pre recorded segment went to air this afternoon and it sounded great.
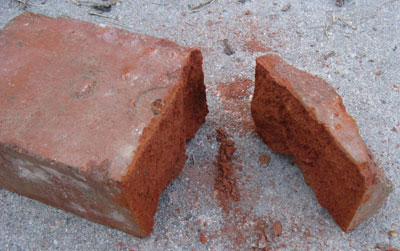
Greg also showed me how to split a brick using a bolster and hammer…I was pretty happy with my first attempt.
|


