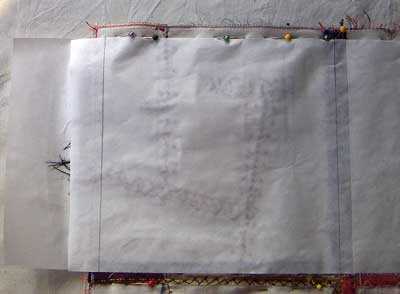
In past posts I have explained about freezer paper and how to use it to size blocks when joining rows…When you come to joining multiple rows the pieceing becomes a little more tricky as you need to measure the width of the underside blocks as well as the upper row…I took photos today, as I joined the top and bottom sections of mum’s quilt, to illustrate how I go about joining the bigger units.
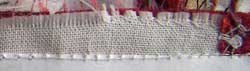
I start by ironing a strip of freezer paper to the back of both rows to be joined, I have the freezer paper strips cut longer than the join, the underside piece a little longer than the upper piece so that I can see both when I put the blocks together.
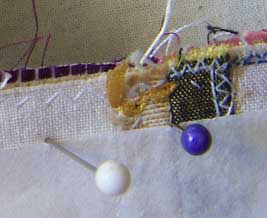
When I put the halves together I put a piece of fabric between them so that embellishments don’t rub together and after pinning the seam I put additional pins on the other side of the freezer paper to help hold the layers together and reduce drag and slippage.
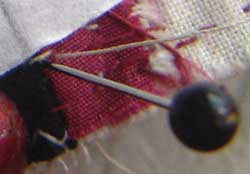
I spear pin through each intersection taking care to put the pin through the seam right next to the paper on the top and the bottom.
 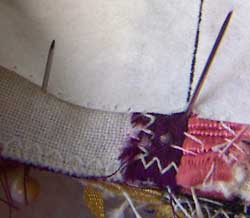
I then pin between the blocks checking with every pin that it is right next to the paper on the underside, weraing glasses makes this a bit difficult, every time I lent forward to check the location of the pin on the back my glasses slipped off.
When I have The seam pinned I Tack the intersections, doing a backstitch around the point where the joins do intersect, before taking the spear pin out…It is also worth tacking any patches of velvet.
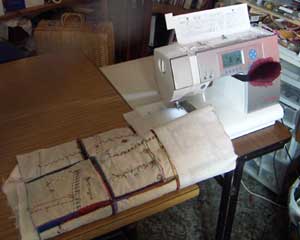
I set my sewing machine up on a small table that is slightly lower than my studio table and put a box behind the machine so that I have a level surface for the quilt to move over.
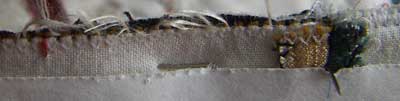
Umm…maybe it is worth tacking the whole seam…because even with all that care in pinning when I checked the back I had some slippage…I unpicked and realigned and restitched these in small sections.
Leave a Reply
|


July 26th, 2007 at 8:36 am
Thank you for the instruction on constructing the quilt. I didn’t use freezer paper when I did mine but I had spear pins and did some tacking, frogging and restitching, lots of pinning, too. Some of those fabrics are so slick, nothing short of pins every 1/2 inch holds them still, LOL.
July 26th, 2007 at 11:17 pm
Nice tutorial, Annie. I’ll have to print this out and save it for future reference. Thanks!!
July 31st, 2007 at 5:09 pm
Wow, thanks for all the pictures to illustrate what you mean. This is great!