
Portuguese Stem Stitch is a satisfying stitch to work, it is only a thin line but with a thick thread it has a lovely texture.
|

Spanish knotted Feather Stitch

Closed Feather Stitch
|

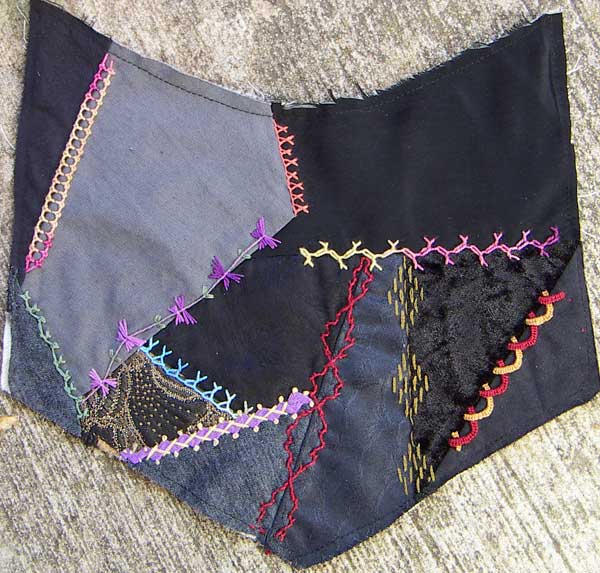
I am still feeling my way with the embroidery on the seams that join these blocks, the ones I have done have had similar colours both sides so it was easy to find a thread colour that blended into both, this join has different colours both sides and I didn’t know which colour to go with but Chequered chain stitch, from the Anchor book, solved the problem because I could just use both colours.
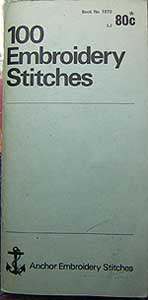
I was asked about the ‘Anchor 100 embroidery Stitches’ book…The copy I have was printed in Australia and purchased in the 1980’s…I have photographed the details of the company that published it and the cover.

|
 The green stitch on the left is 3 prong up and down buttonhole stitch done on a slope. The green stitch on the left is 3 prong up and down buttonhole stitch done on a slope.
the stitch on the right side is wheatear stitch

This stitchon the left is double knot stitch which I found on page 29 of the Anchor 100 Embroidery stitches book…the stitch on the right is cable chain stitch from page 26 of the Anchor book.
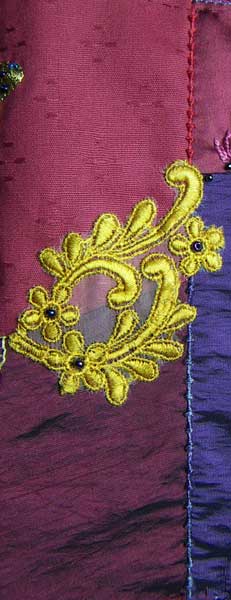
I intended this yellow motif to go over onto the next block but it went to far over…umm I cut half of it off but then it didn’t go close enough to the seam so I unpicked the other half and replaced it so that it just covered the join seam…the stitch that I did above and below is double knot stitch.
|

I covered one join with Wheatear Stitch, this weeks TAST Stitch… if you look carefully you will see that the stitches on the right are slightly different to those on the left end, I was going under the loop instead of under the straight stitches…it does look better when done under the straight stitches but I didn’t bother redoing the missdone stitches because the thread almost blends with the fabric and you do really have to look carefully to see it.
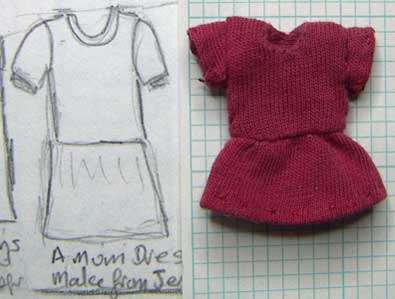
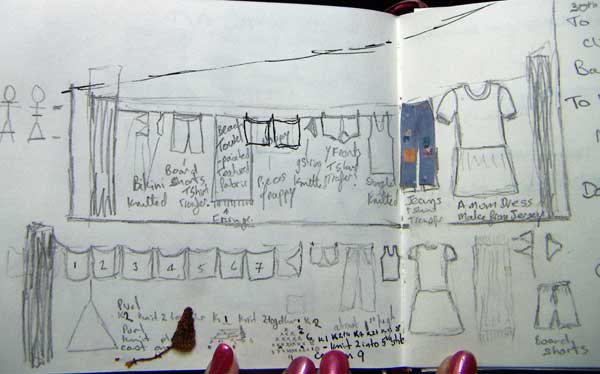
 Some years back mum settled on a style of dress that is quick and easy for her to make, she varies it with different colours, trims, made from cotton jersey it is easy to care for, it can be dressed up or down, looks nice on her and most importantly is comfortable, she has many of them and I wanted to make one for my clothsline…Jersey is not a favourite fabric of mine and at first I thought I didn’t have any, then I remembered the box of Barbie Doll cloths where I found a lovely print jersey that I think mum would like, it is an outfit made by my daughters other Granny and the Question is Do I Cut it Up? How far do I go in the pursuit of creativity? Some years back mum settled on a style of dress that is quick and easy for her to make, she varies it with different colours, trims, made from cotton jersey it is easy to care for, it can be dressed up or down, looks nice on her and most importantly is comfortable, she has many of them and I wanted to make one for my clothsline…Jersey is not a favourite fabric of mine and at first I thought I didn’t have any, then I remembered the box of Barbie Doll cloths where I found a lovely print jersey that I think mum would like, it is an outfit made by my daughters other Granny and the Question is Do I Cut it Up? How far do I go in the pursuit of creativity?
Umm best do an experiment to see if I can actually make a dress as small as I want it, (about 1 1/2 inchs high)…For my experiment I used a piece of very old T shirt that I use to clean my glasses…it took a bit of trial and error but my experiment was so successful that I won’t need to remodel Barbie’s dress, even the colour looks good on the background that it will be on.
|
I joined another 4 Pairs of blocks today…When I started this quilt in 1993 I cut the foundation blocks 7″, I probably intended them to be 6″ with 1/2″ seams but since I have been working on them again this year I have assumed 1/4″ seams, I measured all the blocks to find the smallest which was 7″ so my finished block size will be 6 1/2 “… When I assembled the all that Jazz Quilts the blocks varied in size by up to an inch and to assemble them I trimmed all the blocks to the same size.…The blocks in this quilt only vary in size by about 1/4 inch and rather than trying to trim them all to the same size I am using freezer paper to size them…Freezer Paper is the American freezer paper that has been adopted by quilters, it has a waxy side that when ironed adheres lightly to the fabric and then peels off easily without causing damage and can be reused many times…I cut a 6 1/2 inch square of Freezer Paper, which is my finished block size and ironed it to the back of the smallest block of each pair and then stitched the seam down the edge of the Freezer Paper, by doing this I can visually see that I have sufficient seam allowance on all edges and that the seams are straight.
The post joining the all that jazz blocks gives tips on how to sew over bulky beads and embellishments.
|

 Tongitht I joined 5 pairs of blocks and embroidered one of them before I remembered that it was Monday night and that I hadn’t done the TAST Stitch for this week. Tongitht I joined 5 pairs of blocks and embroidered one of them before I remembered that it was Monday night and that I hadn’t done the TAST Stitch for this week.
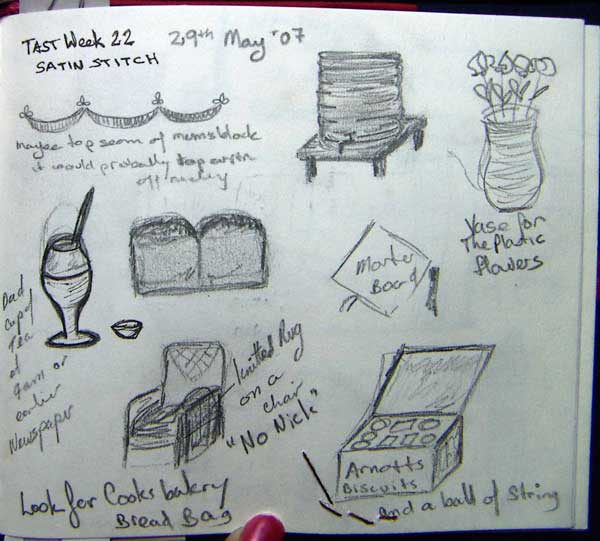
This weeks stitch is Satin Stitch, not a stitch that is easy to work into a crazy quilt seam so I thought I might experiment with using it to put the design ( a beach ball) onto a beach towel to hang on the cloths line…the somewhat tiny sample I did probably doesn’t really count as having done the stitch but it was enough for me to know that satin stitch wont give me the texture I want.
Really doing this stitch is going to have to wait untill I find a place to use it, below are some visual journal ideas for things I want to put on this quilt that may suit being done in Satin Stitch.
|
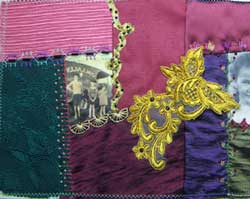
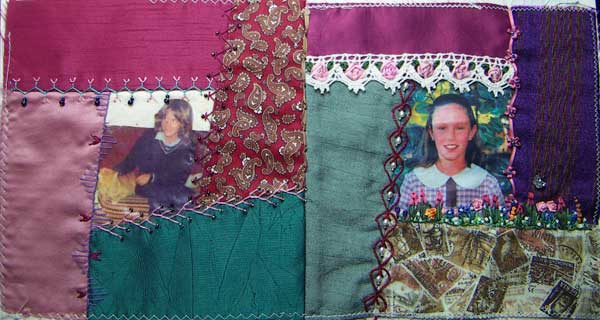
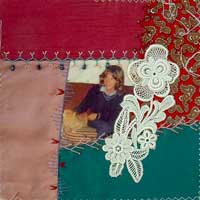 When I made the block on the left I put a large white lace motif on it…As I got more blocks up on the wall I realized that the motif was sticking out like a sore thumb, I used the white lace on the block beside it in a attempt to draw attention away from itbut it didn’t work…my next option was to use fabric dyes and a paint brush to add colour to it, I think that would have worked but when I decided that I wanted to put the clothsline across the green patchs then the white motif just had to go to make room…when I removed it I tried to find a smaller coloured lace motif to replace it but in the end I went with the simplicity of matching the beads and filling in the gaps that had been under the motif. When I made the block on the left I put a large white lace motif on it…As I got more blocks up on the wall I realized that the motif was sticking out like a sore thumb, I used the white lace on the block beside it in a attempt to draw attention away from itbut it didn’t work…my next option was to use fabric dyes and a paint brush to add colour to it, I think that would have worked but when I decided that I wanted to put the clothsline across the green patchs then the white motif just had to go to make room…when I removed it I tried to find a smaller coloured lace motif to replace it but in the end I went with the simplicity of matching the beads and filling in the gaps that had been under the motif.
I ironed the seam opened because they sit flatter and took the extra time to tack them back with a herringbone stitch so that they don’t get caught up when I am embroidering over them.

on the upper part of the join seam I have done coral stitch with silk ribbon which is what I will do on most of the joins, the fine line of coral stitch done with the silk ribbon is just enough for the seam to be covered but not so much that it will compete with the embroidery on the blocks.

|
The unexpected arrival of interstate visitors this morning has meant that I have had a lovely day but have got no stitching done…actually the visitors arn’t the only reason for not having done the next block, I actually only have one of the 4 photoes that I need to finish the blocks, and that one is mum’s and I was wanting to leave hers till last, I am waiting for brothers to send me the others…In the meantime so as not to loose the momentum that I have to continue this quilt I have decided that I will start joining the blocks.
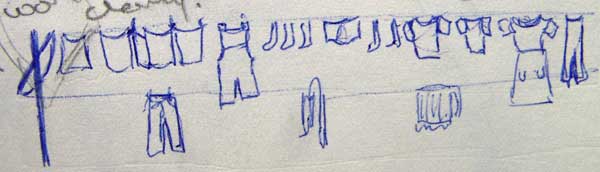
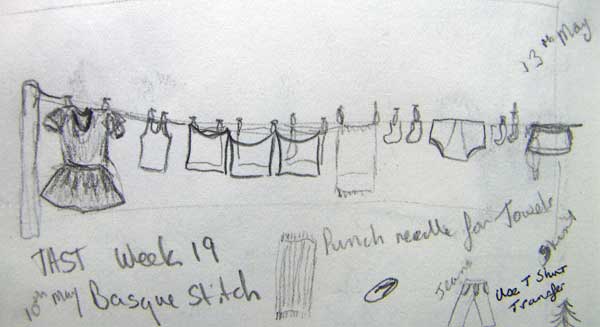
And will start with joining the 2 blocks where I have decided that the clothsline scene can go…below are my visual journal sketches for this scene…the first shows 2 lines as they as they originally where but there is not room for that level of detail so I simplified it to one line…the third image I have done to the approximate size that will fit in the space I have with cloths approximatley sized in proportion to each other.
|
It is the first day of winter down under and it is starting to get cold.
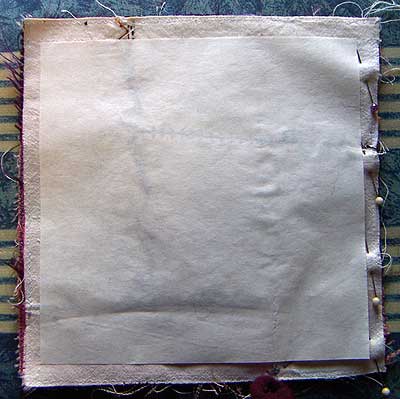
I didn’t get any stitching done today so I will take it as an opportunity to post the finished sample block that I have been doing some of the TAST stitches on…It looks a bit bare across the top but when it is made up into a bag that area is gathered and covered by the flap.
|


