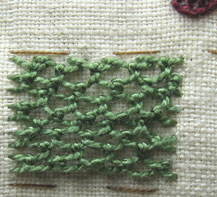
 Many Needle lace fill patterns are done with buttonholes stitch, tonights sample is rows of buttonhole stitch, each worked into the previous row. Many Needle lace fill patterns are done with buttonholes stitch, tonights sample is rows of buttonhole stitch, each worked into the previous row.
|
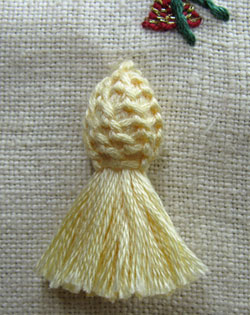 Buttonhole Stitch can be used to make a cover for the top of Tassels… Buttonhole Stitch can be used to make a cover for the top of Tassels…
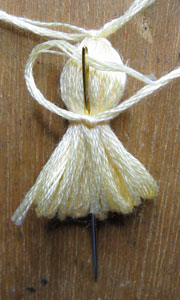
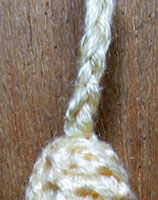
To make a Tassel wrap thread around a piece of cardboard a little longer (to allow for trimming) than you want the finished tassel to be…poke a length of thread between the cardboard and wrapped threads and tie the bundle at one end, slip the bundle off the cardboard.
I poked a small ball of batting between the threads at the top to give shape to the top of my tassel.
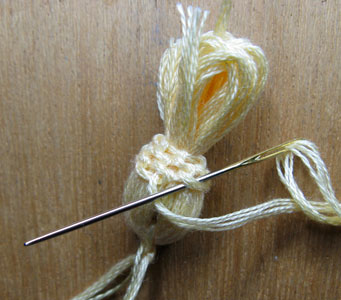
Cut a length of thread about 20 inches long (needs to be long enough to work the buttonhole stitch) and tie one end around the top of the tassel…use a tapestry needle to thread the short end down into the tassel and with the long end buttonhole stitch onto the thread around the tassel and then continue to work into the last row of stitching until top is covered, with the last couple of rows work into every second stitch of the previous row to shape the cover.
Form a cord by plaiting the 3 threads that are at the top of the tassel.
Cut and trim the threads at the bottom of the tassel.
|
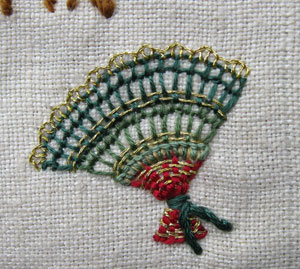
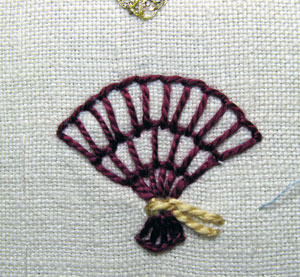
Last year for the Buttonhole Tast stitch I did a Fan and thought that I would do one on my sampler, as it turns out I have done 2…For the first one I used a thin thread (2 strands cotton floss) which caused me to do smaller stitches and I did more rows and because it wasn’t looking very good I wove a metalic thread through the buttonhole and did a row of buttonhole with the metalic thread at the top of the fan…the metalic thread saved the look of this fan but the finished fan is rather complex so I did a second fan with a thicker thread (size 3 cotton pearl) and kept it simple like the original.
|
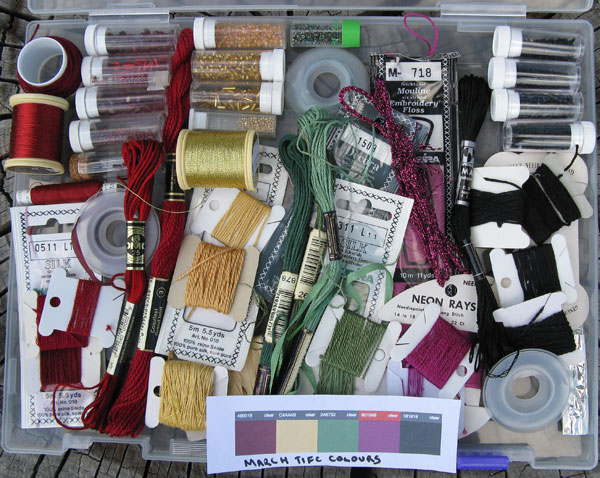
The March Take it further Design Challenge is Do you ever notice the little things, the small moments, the details in life? This months challenge is to do just that, pay attention to the tiny details. Sometimes the small things become emblematic for something larger. That is it!
I am not sure what to make of this months concept, I will just have to pay attention to the tiny details and see what I make of them…In the meantime I like the march colours and have selected a variety of thread types and beads for each colour.
|
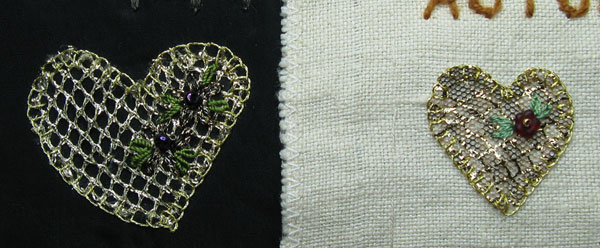
The Heart on the right is on my sampler, inspired by the heart on the left which is on my wall hanging A Secret garden in my Heart.
I cut heart shapes from gold net and buttonhole stitched around the edges with gold metalic thread before decorating with bead flowers and detached chain stitch leaves.
|
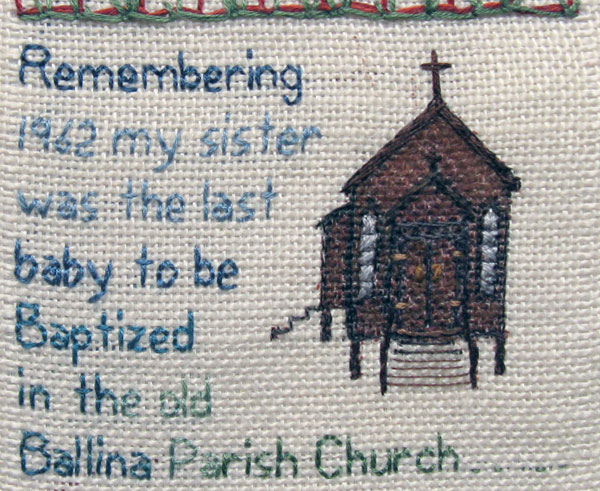
The Take it Further February design concept is What are you old enough to remember…I interprette that to mean not my oldest memory but the oldest memory that would be shared by others, so from my First Thoughts I have taken the local memory of the New Ballina Catholic Church or more specifically the closeing of the Old Church which I also link to a family memory because my sister was the last baby to be Baptized in the old church in 1962…
The old church was a tall narrow building with steps up to a small porch at the front and painted brown, to me a much nicer building than the modern, blond brick, building of the new church.
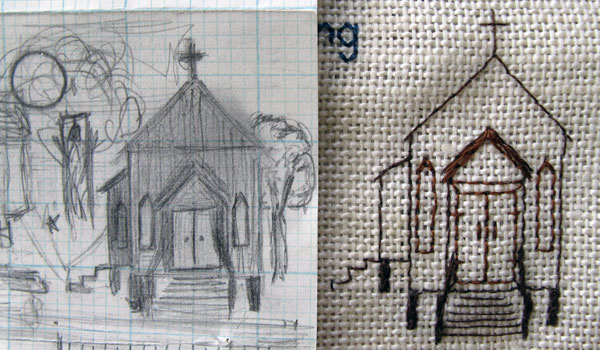
Umm, I think that I should have done more experiments with how the fabric pens worked on the linen and then
not coloured the building…it looked a lot better as an outline than it did after painting.
|
My intension for this seam was a couple of buttonhole staggered likc bricks…Once I had Bricks on my brain I couldn’t resist doing a extra rows to make a brick wall.
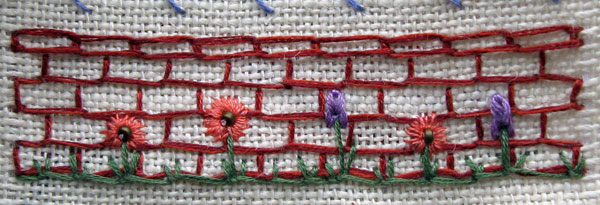
Bricks are 3 strands of cotton floss, 2 strands of dark brown with 1 strand of light brown, mixing the colours gives more txture to the bricks.
The grass and Flower stems are Random Buttonhole Stitch with 3 strands of cotton floss.
This brick wall completes my 12 inches of stitching with the Take it Further February Colours.
The green at the bottom is an overlapp onto the Feb colours but also if I was working with these colours on a crazy block I would just about always allow myself to use green with them, for leaves and grass.
|
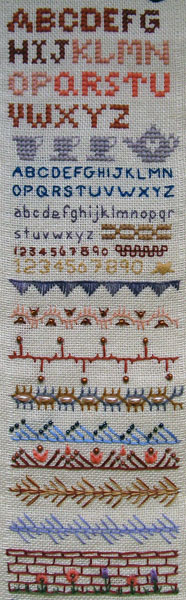
I thought that I was recording known variations of stitches on this sampler but it appears that I am also experimenting with them too…while using Detail 115 as the model for the top stitch I saw several other ways that it could be arranged to form different patterns.
Top row…uses buttonhole stitch worked with an angle, is stitched with ribbon floss and trimmed with beads,
second row…reverses the direction of alternate groups of 3 stitches to give quite a different look which is further emphasised by the addition of Detached Chain Stitches and the arrangement of the beads..Both threads are 6 strands of cotton floss.
Third row…work a second row, which mirrors the first row…the uses of 2 light strands and 1 dark strand of cotton floss gives an extra texture to the stitch.
Bottom Row…work the second row in the opposite direction to the first row…2 strands cotton floss.
|

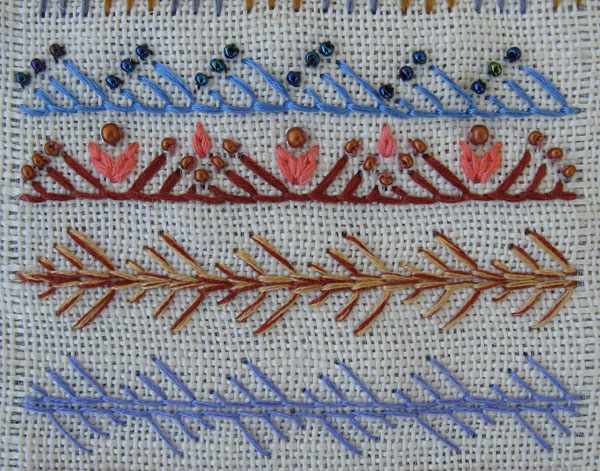
Top row…Buttonhole Stitch with stepped arm lengths, worked with a varigated silk thread.
second row… Buttonhole Stitch with stepped arm lengths and flipped from side to side, trimmed with beads held on with a straight stitch that bends when threaded through the bead…3 strands of cotton floss.
third row…Buttonhole stitch with long and short arms flipping from side to side…Thread strands of cotton floss.
Bottom row…2 rows of Buttonhole stitch in groups of 3, flipped from side to side, the second row worked into the spaces of the first riw…Blue thread 3 strands of cotton floss, mustrard colour thread is wool.
|
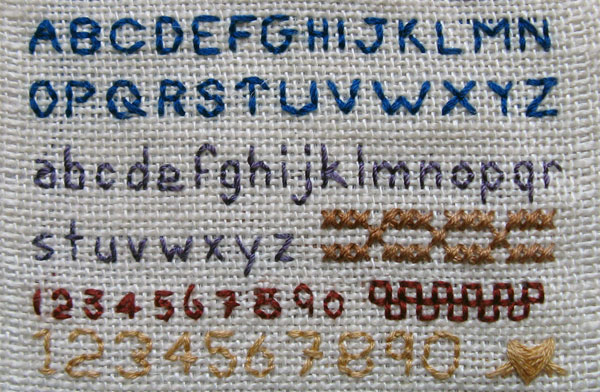
For the smaller alphabets I looked at them in the book but when it came to stitching them I shaped them for myself which was easy because of the common shapes shared by letters.
Capital Letters…Back Stitch with 2 strands cotton floss.
Lower case alphabet…Back Stitch with silk Buttonhole twist thread.
Numbers…Back stitch with 2 strands of cotton floss.
|


