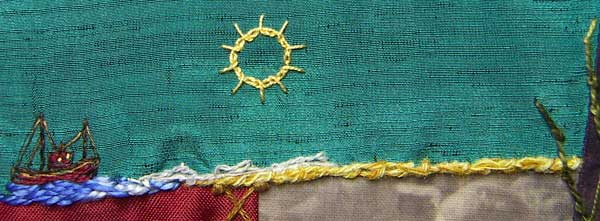
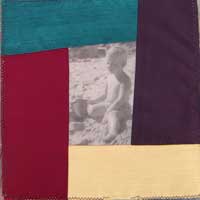
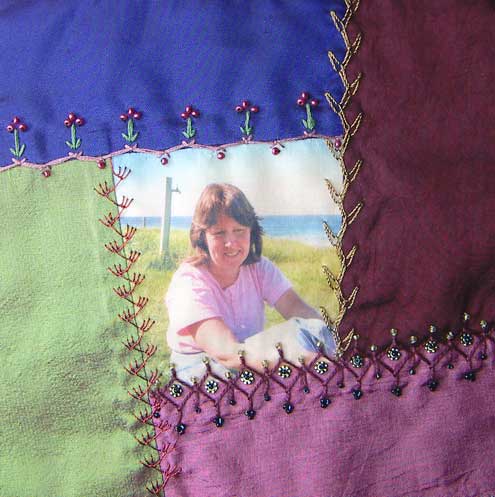
As you can see I have gone with my idea from yesturday and created a stitched picture along this seam…The sand, waves and water are couched threads and straight stitches done with rough textured, varigated threads, I did a google image search for fishing trawler to get the basic shape for the boat and stitched it with straight stitches and the Sun is a circle of Barred Chain Stitch.
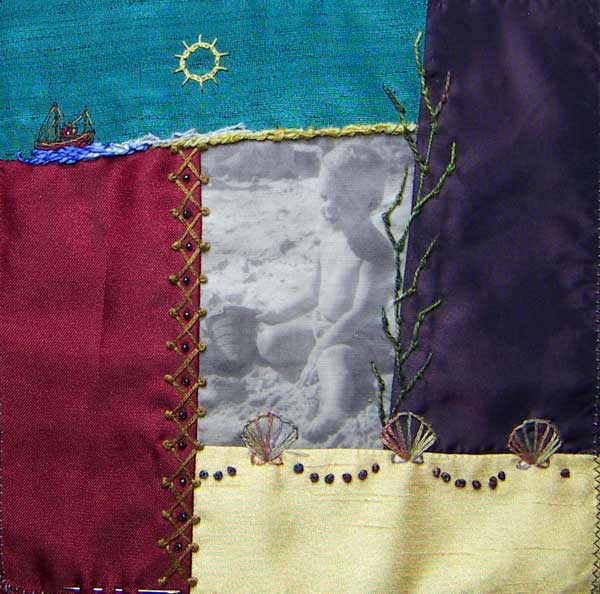
I Can’t remember why I originally planned this project to have embroidered seams but no embellishments but thinking about it I have realized that by embellishments I meant baskets, flower clusters, ribbon fans, lace butterflies, embellishments that are pretty but have not particular meaning and I may have felt that they would overwhelm the images that I wanted to be the focus…In the 12 years since then I have done a lot of themed and biograhical crazy pieces which has expanded the meaning of ’embellishments’ for me and whilst I still feel that embellishments that are just pretty would overwhelm and distract from the images I am thinking that embellishments that are relevant to family history/stories/memories would compliment the images, add a lot of interest and actually enhance the finished project…I discussed the pros and cons with my sister and decided that for now I would include ‘some’ embroidered embellishments as I have done in this seam where the fishing Trawler will remind my mum and family of the 12 months that my dad spent working on the trawlers and that he remained friends with the fishermen who would often drop by with a bucket of fresh seafood, we were poor but as we sat under the mango tree eating prawns, crabs and my favourite morten bay bugs we would wonder what the rich people were eating, amused that it couldn’t be better than what we were dining on.
I have a feeling that with the decision to do this seam I may have opened the floodgates because my mind is already thinking of a few charms and how could I fit them into a seam treatment…
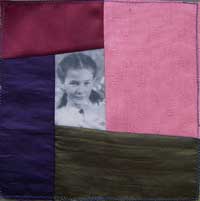
Below is the finished 12th block
|

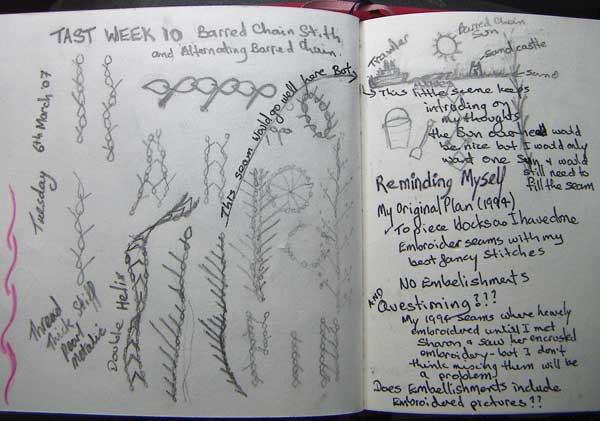
I have done twisted chain stitch before but never done Barred Chain Stitch, this weeks TAST stitch…After playing with it in my visual Journal I picke the above variation because I thought that it looked like waves and I was going to put it on the block with the shells and seaweed but when I looked at the block I thought the barred chain done in a circle would look like the sun above the beach, when I started drawing the sun a little picture developed along the seam, I am still not sure wether I am going to go with that idea or not because it takes the embroidery in a different direction to what I had planned for this project but I do like it so while I think about it I stitched the seam above on another of the blocks and was glad that I had done it on a different block because the spaces between the bars is wider than I thought it would be and it doesn’t look like waves at all…
|
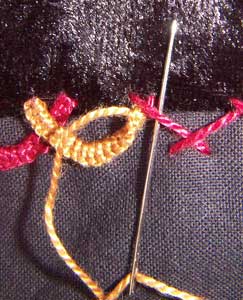
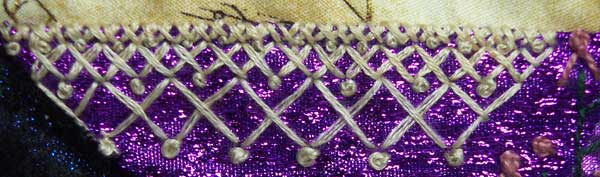
 After I posted yesturday I realized that I may have made the stitch look a little confusing because by not thinking ahead I had started the herringbone on the right hand end which meant that to have the scollops at the bottom of the seam (and still be able to stitch the underneath thread of the crossover first) I had to work the bottonhole from right to left and although doing buttonhole in the reverse direction direction is not difficult it does make the illustration look a bit cackhanded so I decided to give it another go (I like stitching this seam treatment, it is not quick but its repetitive nature makes it a good seam to do while I am watching TV). After I posted yesturday I realized that I may have made the stitch look a little confusing because by not thinking ahead I had started the herringbone on the right hand end which meant that to have the scollops at the bottom of the seam (and still be able to stitch the underneath thread of the crossover first) I had to work the bottonhole from right to left and although doing buttonhole in the reverse direction direction is not difficult it does make the illustration look a bit cackhanded so I decided to give it another go (I like stitching this seam treatment, it is not quick but its repetitive nature makes it a good seam to do while I am watching TV).
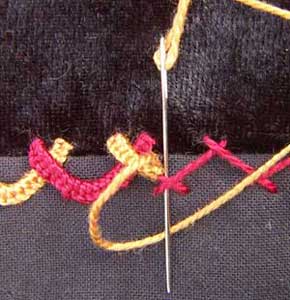
To make this seam distinctive from the ones last night I stitched the scollops in alternating colours which also has the advantage of making the illustrations clearer…
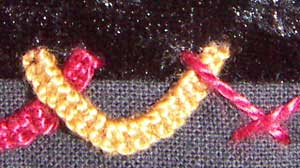
 I have also added an extra image image to show how when the end of the underlapping scollop is finished the thread is sitting on top of it ready for the next scollop ….Last night I also forgot to mention that using a tapestry needle for the buttonhole stitch makes it easier to slip the needle under the herringbone thread without catching the fabric beneath. I have also added an extra image image to show how when the end of the underlapping scollop is finished the thread is sitting on top of it ready for the next scollop ….Last night I also forgot to mention that using a tapestry needle for the buttonhole stitch makes it easier to slip the needle under the herringbone thread without catching the fabric beneath.

|

Above is one of the seams on my box top below I have repeated it on mums memory quilt…It is Buttonhole stitch worked over the threads of Herringbone Stitch.
The cotton pearl thread I used for the seam above stitched up more evenly and neater than the softer silk thread I used for todays seam…I do like the way varigated thread works in this seam treatment.

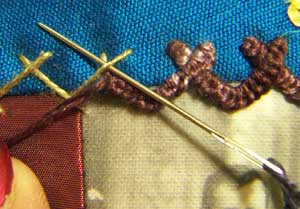
when working this seam treatment you will find that the buttonhole stitch wants to twist around the herringbone stitch thread but this is not a problem as the thread is stabalized at the bottom of the curve and again at the top with the seal off stitch at the end of the loop…At the bottom of the curve work a couple of stitches going under both threads of the herringbone, this will stop the twist at this point.
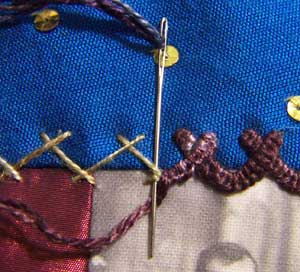
At the top work up to the cross of the herringbone threads then pass your needle under the top thread before doing the last couple of buttonhole stitches.
 See next post for more information… See next post for more information…
|
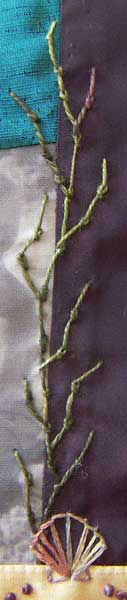 I used Coral Stitch for this seaweed seam treatment because it is quick and easy to do, you can make it follow the line you want and the little knots add a nice texture to the seaweed. I used Coral Stitch for this seaweed seam treatment because it is quick and easy to do, you can make it follow the line you want and the little knots add a nice texture to the seaweed.
|
The photo on this block was taken at the beach and as we lived in a beach town, mum still does, although it is no longer the sleepy little town of my childhood, I thought that it would be fun to continue the beach theme into the embroidery.
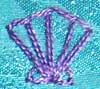 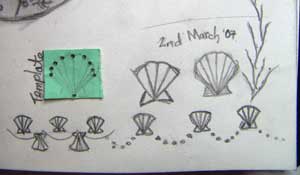 This shell which is apart of my This shell which is apart of my
day 76 detail, was my starting point, I drew it, modified it and decided on an arrangement in my visual journal (I think that you can see the next seam growing above the shell on the far right)…I poked holes in a piece of cardboard to make a template which makes any circular design easier to stitch…The top of the shell has a straight stitch down the middle with buttonhole stitch either side and fly stitches make the shape at the bottom. I like the way the varigated thread coloured the shells

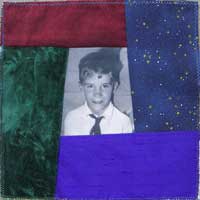  and with these 2 blocks I have pieced half the blocks that I need and have lots of seams to work on. and with these 2 blocks I have pieced half the blocks that I need and have lots of seams to work on.
|
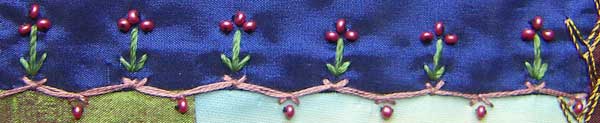
Today I have pieced 2 more blocks and repeated one of yesturdays seam treatments but this time I elongated the cross stitches to give diamond shaped spaces down the middle.

|
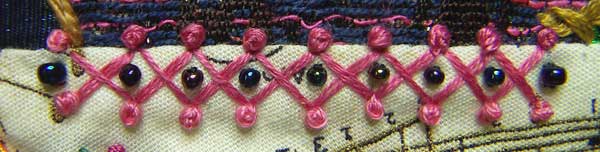
I have stitched 2 of the ideas from my page of cross stitch sketches…The seam above is a row of Cross Stitch to which I have added Colonial Knots and seed beads…it is a simple effective seam treatment (much nicer than I had expected).
The seam below is 3 rows of cross stitches each row increasing in size…A bit dissappointing but it fills the space…I stitched the seam on waste canvas which gave me my stitch size but I think the first row of stitches is to small and if I repeat it I think I would leave out the first row of tiny stitches and do just 2 rows, I like the heart shape that is formed where the 2 different size stitches meet.
|

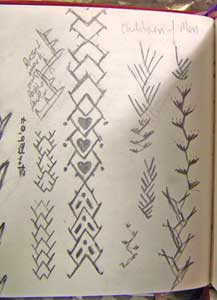 following on from feather stitch I played around in my visual journal with double feather stitch and it was one of those sketchs ( on the right hand side of the page) that I chose for this seam…I used a metalic thread and like the way it turned out. following on from feather stitch I played around in my visual journal with double feather stitch and it was one of those sketchs ( on the right hand side of the page) that I chose for this seam…I used a metalic thread and like the way it turned out.
and this was the last seam on the 11th block for my mum’s memory quilt.
|

Above is a seam on my boxtop below I have repeated it on a block for mum’s quilt…The herringbone stitch on the block below is slightly different because the threads didn’t cross properly so I added an extra little stitch at each cross to pull them into shape, other than that the stiches are much the same but just using different thickness threads and different colour combinations is enough to give each seam a distinctive look.
|


