Cutting shishas from old CD’s makes a good substitute if you don’t have access to the real thing…Cutting shishas from old CD’s also enables you to cut different sizes and shapes.
 Draw the shape you want to cut with a permanent ink pen and Draw the shape you want to cut with a permanent ink pen and
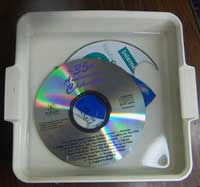
Soak the CD in warm water to soften the plastic so that it cuts rather than shattering…I have also found that sitting the CD beside the heater softens it enough to cut and I daresay that putting the CD out in the sun would work in summer.
Use large sized scissors and make short cuts using the bit of the blade nearest the pivot point of the scissors.
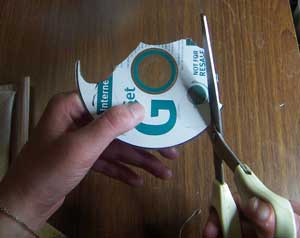
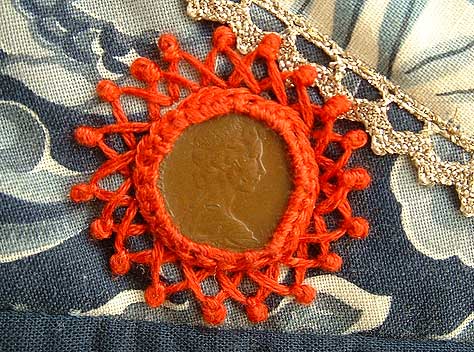
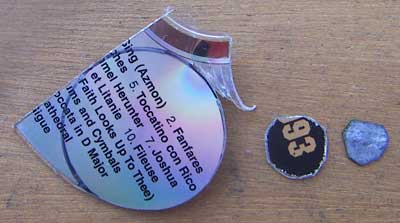
You will find the cutting easier to manage if you cut a wedge from the CD and then you can nibble bits from the side…I seldom bother but you can smooth the sides with an emery board…and don’t worry if your edges are a little jagged, they round up when you stitch them on and they are probably more authentic if they are a little jagged because the original shishas (on the right of the image) are small chips of thin mirror and are very odd shaped and jagged on the edges.
Expect a few cuts to shatter as you get the hang of cutting them, you will have to experiment to get the right temperature water to suit your climate and the season of the year. And try a few different brands of CD, I think the composition of the plastic may vary because I am sure some shatter easier than others and they must be made by different processes because the label side peels of some but stays stuck on others.
|
When I read Elizabeth’s post on the hazard of shi sha dust I was moved to write this post, thankfully no damage done and alls well now but I was reminded of the OH&S module that I studied as part of my Diploma of Visual Arts and Crafts, Until then I had never thought about it and was surprised to learn that my Gentle Art of Needlework could Actually be a dangerous occupation.
When you do think about it we work with pins, needles, scissors and rotary cutters, all sharp objects, irons are hot and burn, fabric sheds dust, poor light causes eye strain, then there is RSI and cramps from sitting in the one place for to long, back ache from working at bad angles and lugging heavy sewing machines and bags to workshops/classes, then there is the toxic elements of some of the products we use, even financial stress when we overspend our sewing budget…sounds a bit doom and gloom but that is not my intention, it is just that Health and safety for needlework studio’s is not often talked about and I think that it should be because I believe that we need to be aware of the hazards in order to prevent or at least minimize their damage.
I would like to invite readers to comment with any tips they have for good work practices that could help make all our studio’s healthy, safe environments to be.
|