In my neices words Painting Eggs has become a family tradition, Easter 2005 I blogged how the tradition got started and 4 years of painted eggs.
I didn’t get Our 2006 eggs blogged…initially because I wasn’t very organized to get them dated, lacquered, photographed and put away…subsequently because while they were waiting for me to finish them I knocked them on the floor….Oooooooops
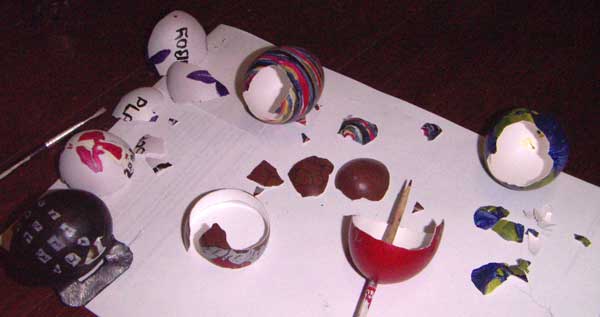
I was upset with myself but not devasted because from the beginning I had let them be touched because really they have to be held and turned around to appreciate their full beauty, they are a living collection which means they are at risk of being broken…still I didn’t know what I would do if one did get broken…
I picked up the pieces, put them in a box and put the box on a shelf in a dark corner. I just couldn’t bring myself to throw the pieces out.
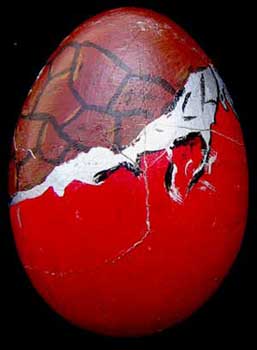
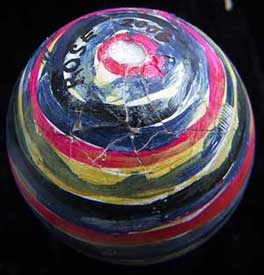
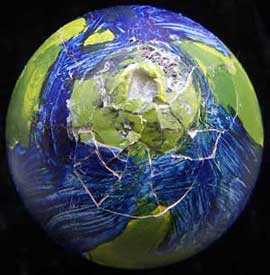
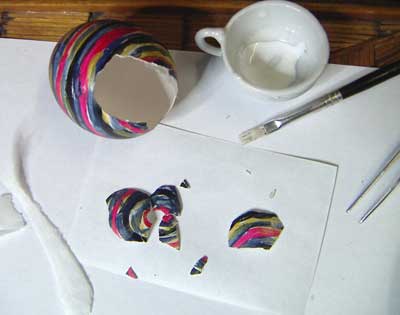 A couple of weeks ago I pulled the box out and wondered if it was possible to repair them, what if I glued strips of paper under one side of the join with half the paper sticking out so that I could glue the matching bit of shell to the paper as well…nothing ventured nothing gained…I seperated the pieces for each egg, 2 of them broken into largeish pieces, 2 of them with shattered ends, each egg with about 15 pieces to be joined…it took time because I had to let the glue dry before joining the next piece… A couple of weeks ago I pulled the box out and wondered if it was possible to repair them, what if I glued strips of paper under one side of the join with half the paper sticking out so that I could glue the matching bit of shell to the paper as well…nothing ventured nothing gained…I seperated the pieces for each egg, 2 of them broken into largeish pieces, 2 of them with shattered ends, each egg with about 15 pieces to be joined…it took time because I had to let the glue dry before joining the next piece…
…the joins are far from perfect but the eggs are in one piece and the cracks give them character.
I am well aware that this is a crazy thing to have done and you are allowed to laugh, Everyone else has…what I find more amazing than the fact that I was able to do it is that when I picked the pieces up off the floor 11 months ago I actually found every last chip of all the shells.
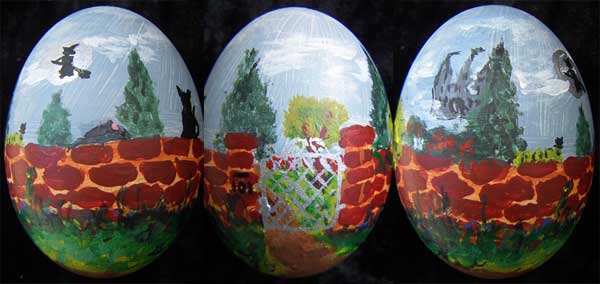
Below are all the 2006 eggs
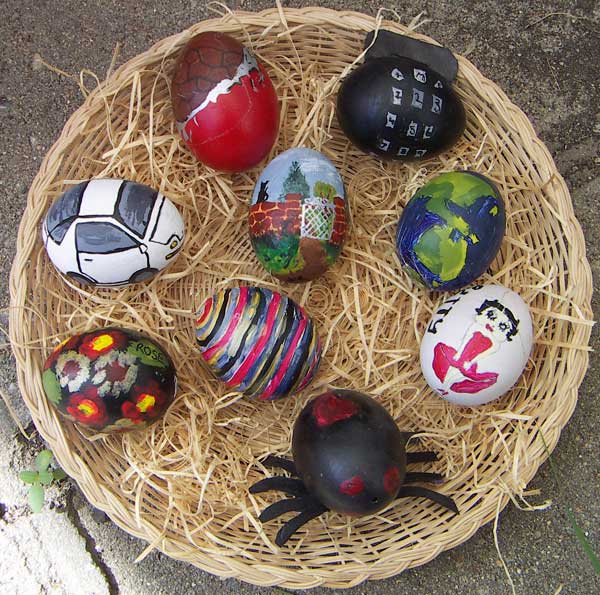
Some of you may recognize the wall on my egg, as the one on my Bags of fun, ‘A Charming Garden’ bag.
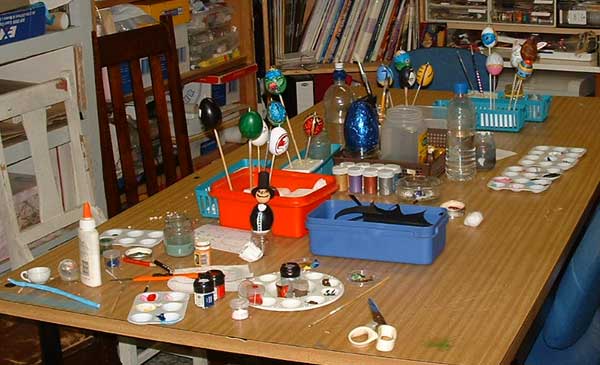
I am organized this year…I have all the eggs blown and undercoated, have purchased new fine brushes and have the paints all ready….Wishing you all a happy, safe Easter.
|


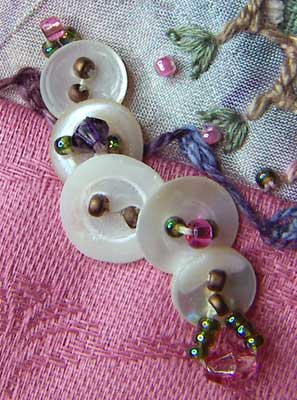 I have added a buttoncluster on the left hand side…and don’t know where to go from there, I have auditioned a few charms but most of them make the areas look crowded or just look out of place, I am going to sleep on it before doing any more.
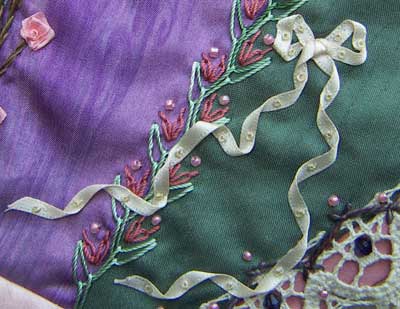 The Ribbon for the bow was easy to find today…
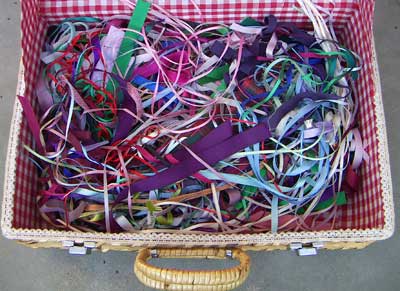 Or maybe that should be ‘On Track’ because organizing my stash is one of my goals for this year…I was side tracked from stitching today when I went to get a piece of satan ribbon to put a bow on the birthday block…confronted with this tangled mess I started sorting them, I started by dividing them into rough colour groups which I held together with a pin stuck through close to the end of each ribbon…I then took the colours one at a time, I put pieces shorter than 6″ into a small box and rolled the longer lengths around a piece of styrene foam, the remaining pieces I further sorted into wide and thin ribbons and held each group together with safty pins, so that I don’t have to open the pins everytime I want a piece of ribbon the pin is very close to the end of each ribbon so that I lose less than 1/4″ of ribbon when I cut pieces from the pin.
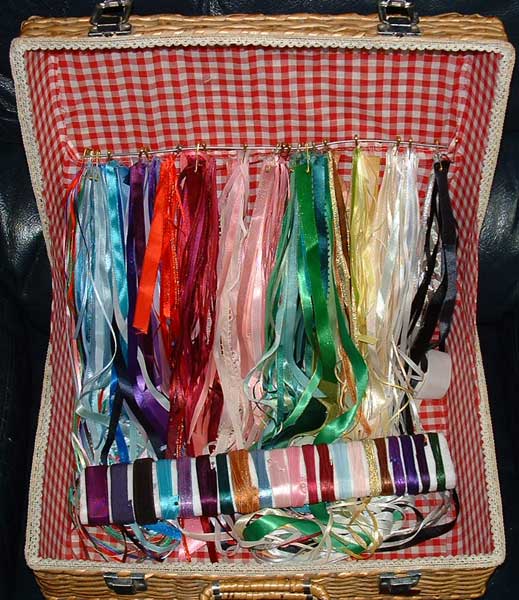
 I like
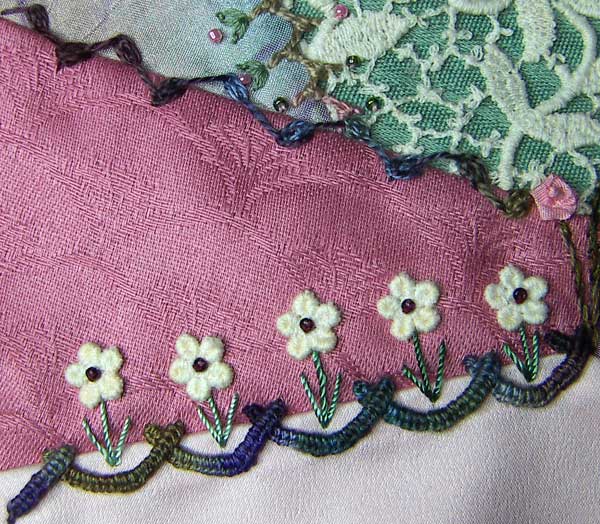
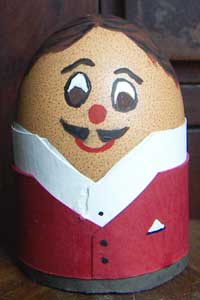
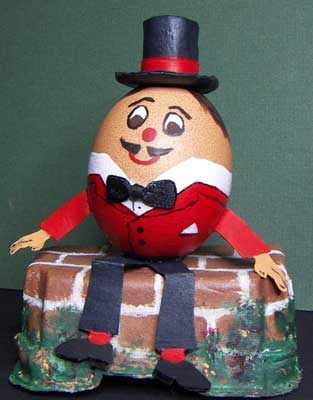 I am glad that I decided to paint Humpty’s coat onto the shell, his legs provide just enough balance to let him sit upright and I love how he turned out…His arms, legs and hat are are made from cardboard and his bowtie is ribbon with thread wrapped around the centre.
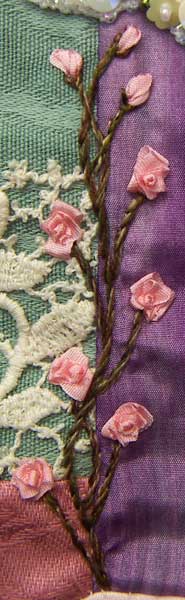 I wanted something special for this seam that is in the middle of the Birthday Block and when I did the
 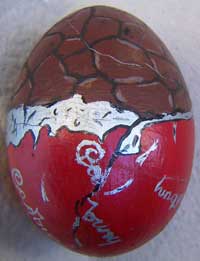 Patricia commented that
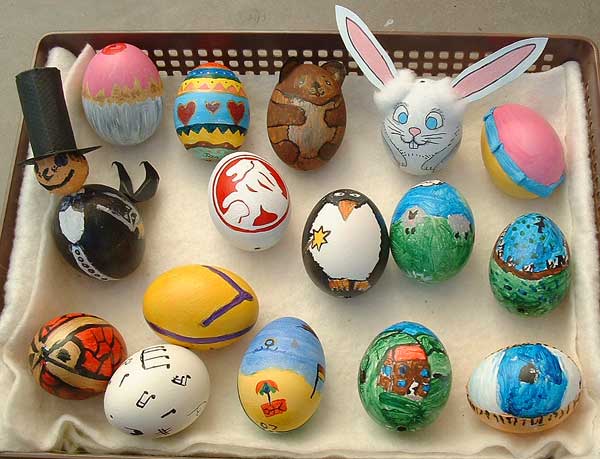

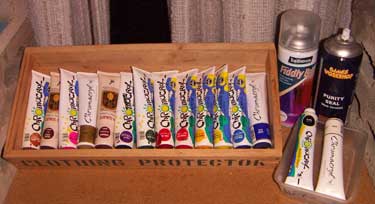
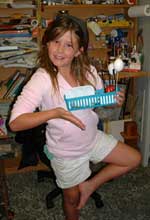 My neice shows off one of the baskets of equipment that she helped me put together…each basket held a pencil, 2 paint brushes, a piece of styrene foam, water bottle, a paper towel, skewers, 2 blown eggs and a chocolate egg…These are the paints we use.