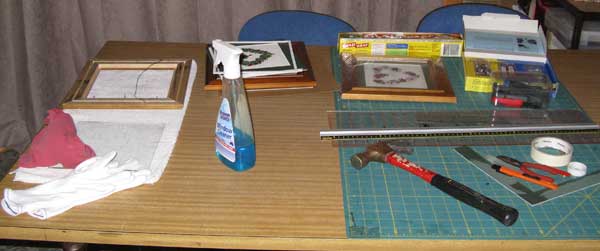
Before I went on Holiday I had everything, except the cut in the mat board, ready to frame a friends embroideries…I have a cutter to cut the hole but since having to wear glasses I don’t trust my eye and I baulked at making the cut…When I did do one of the cuts today I was not at all happy with it, it wasn’t may eyes that let me down but my hands and I was not able to keep a consistant even pressure as I pulled the cutter along and the result was a jaggered cut…on to plan B, I took the mat boardes to the frameing shop and paid a few dollars for them to make clean, crisp cuts around the hole…
Because the embroidery is 3 dimensional I put in a thin border of foam core to hold the mat board and embroidery back from the glass…After getting the first one into the frame I looked at it and oops I had forgotten to put the mat board in…re assemble it with the mat board…Tip remember to put all layers into the Frame.
Together again…oops there is a thread in there…take it apart, remove the thread, reassemble it…Tip last thing before putting the embroidery in the frame check glass for smudges and embroidery for fluff and threads.
Second frame assembled without a single oops but…
Ooops When I came to assemble the third frame the glass was to big to fit, when I measured the hole it was just a bit smaller than the other 2 frames…this meant that I had to undo the second frame to exchange the glass, cut a sliver off every side of the mat board and restretch the embroidery over a slightly smaller board…There was no predicting that problem.
Holiday Snaps Day 18
|
Several months ago I started to build a garden edge from small peices of slate but put it on hold when the mortar dried crumbly, I reasoned that the problem was that my cement was old and stale so I bought another bag of mortar and last week I tried again, no joy the mortar dried crumbly…I talked to a friend on the weekend and he gave me a tip and in so doing reminded me that cement needs to be WELL Mixed and not just stirred till it is all wet, the tip was to add a couple of drops of dishwashing detergent to the water before adding it to the cement…I don’t know wether it was the detergent or the extra mixing but something worked and although my mortar is still not real good it is a lot better and I have finished the short bit of wall that I was building…Just goes to show the value of a little knowledge.
To Blend the wall with other things that I have done in the garden I added small shards of china to the wall and left gaps like little caves where I can put tiny objects.
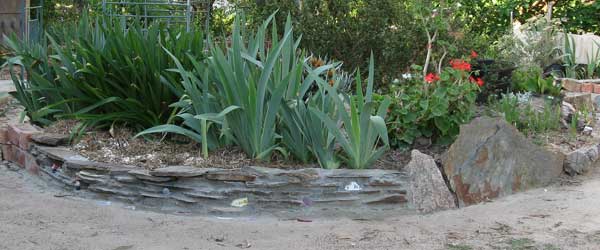
This was a trial run to learn how to work with cement/mortar so that I can make my castle ruin permanent…
Holiday Snaps Day 17
|
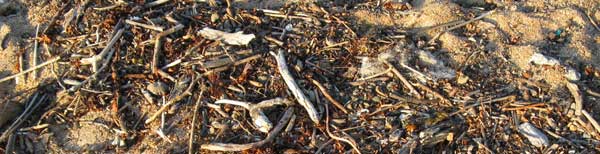
 Driftwood Driftwood
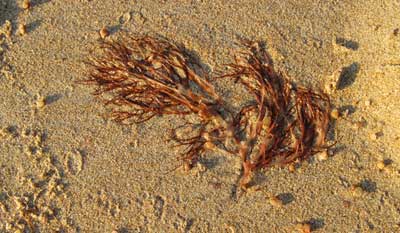
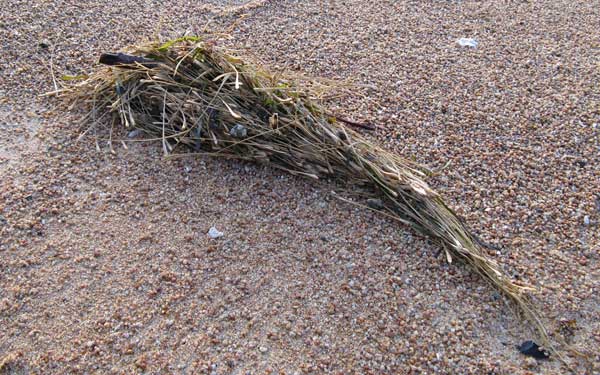
Seaweed
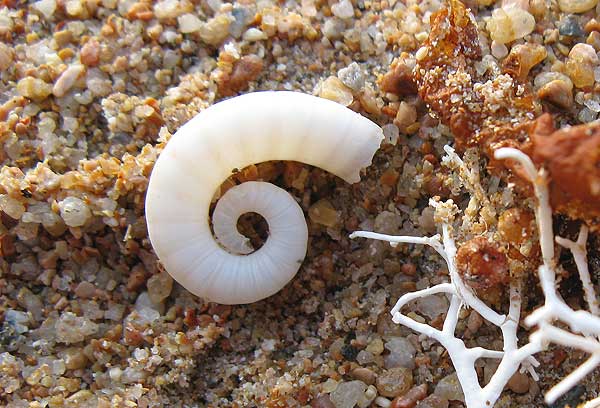
I had more Holiday Shots For Day 16 than I knew what to do with so I am blogging some of them today. After the sun had risen we spent some time wandering along the beach…These are some of the photos I took of Beach objects, they are images that I took for no other reason than that there colours, shapes and textures drew my eye to them.
A Shell
A Branch of seaweed, that must have been tossed around a bit to gather the other materials tangled in its branches, before being left adrift on the beach…I like the way the natural tappering shape of the plant rests in a lovely curve.
|

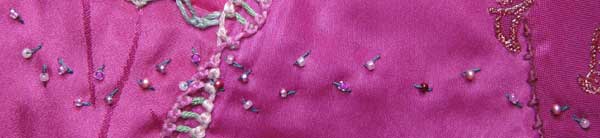
I chose to do TAST week 42 twisted Satin Stitch on a sample block because I was thinking little flowers and couldn’t see them on any one patch of the pink project
Elizabeth’s comment re detail 421 ‘They look like little pink rosebuds scattered everywhere to me’, gave me a Duh moment as I thought they didn’t have to be confined to a patch they could be scattered everywhere or along a path as the rose petals where on the wedding day…I have added a pathway of scattered rose petals across the bottom of the block…by starting them under the Ooh La La detail they also assist in bringing the eye back around into the block
Holiday Snaps Day 15
|

I Don’t particularly like stitches with straight edges so when I saw Sharon’s sample of Pekinese Stitch with 3 rows of backstich I thought OK I will do a solid centre line, with staggered outside rows…It didn’t work quite as I had imagined and I don’t really like the finished seam but having said that it does suit the seam that I did it on.
Holiday Snaps Day 14
|
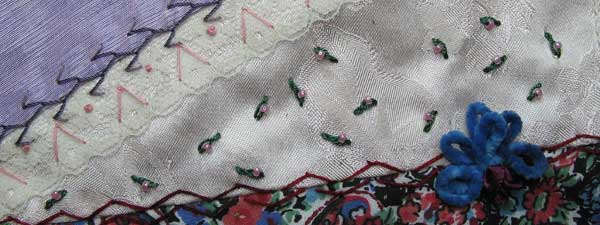
Doing a little catch up on the missed TAST Stitches. This one is the Twisted Satin Stitch from week 42…My first thought for this stitch was to do it with green thread and bead so that it would look like little flowers scattered across a patch.
Holiday Snaps Day 13
|
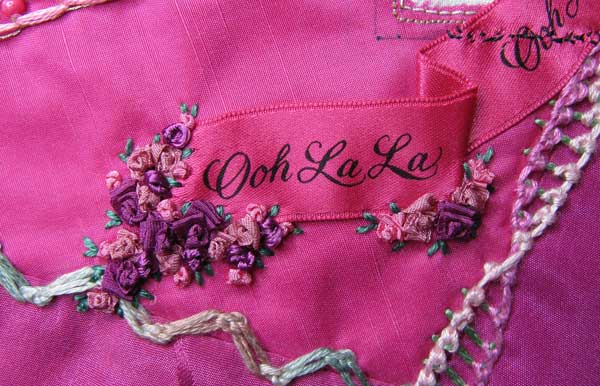
When I start an embellishment it doesn’t mean that I know what the finished embellishment will look like, often I have no idea…
I purhased this ‘Ooh La La’ ribbon (1/2 inch wide) in the Vivian Westwood exhibition shop at the Victoria Albert Museum when I was in London in 2004…It is the right colour, I like the words, It would cover a small glitch in the piecing under the photo and I stitched it in place and that might have been that except that I didn’t like how the end looked…
…Maybe a few Silk Ribbon Roses, and I will need a few on the other corner to balance them…
…Needs some smaller roses, some the same but with only 1/2 inch of ribbon gathered and some Colonial knots in a lighter colour pink…
…That’s better now it just needs some little green straight stitch leaves…
  
…I thought with the leaves I was finished…but when I looked at it in relation to the whole block it looked cramped above the seam…what to do…add more roses so that they crossed the seam putting the seam into the background.
Holiday Snaps Day 12
|
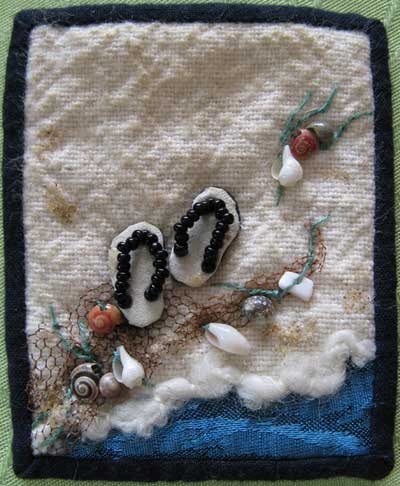 I made this miniature quilt (1.5 x 1.8 inches) for my son in 2002 when he was traveling overseas and I wanted to make him something, small enough to carry easily, that would remind him of home. I made this miniature quilt (1.5 x 1.8 inches) for my son in 2002 when he was traveling overseas and I wanted to make him something, small enough to carry easily, that would remind him of home.
I didn’t get a good photo of it at the time, so when I was visiting him and noticed that he still has it on display in his room, I took the opportunity to take a photo…It also inspired me to pull out the holiday buzy box and make thong brooches (see holiday snaps day 11), as memories of Magnetic Island for some people that I met up there.
Holiday Snaps Day 11
|

This seam is the TAST week 44 – Zig Zag Spanish Knotted stitch, I used a varigated stranded cotton thread and like the gentle curve it forms.
Holiday Snaps Day 10
|
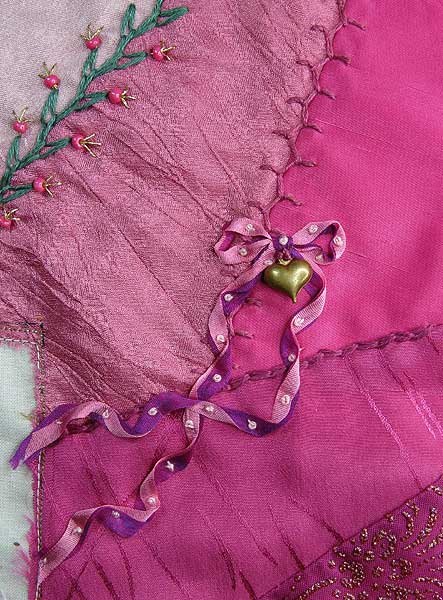 For this Ribbon Bow I put 2 colours of silk ribbon together, then treated them as a single ribbon, to get the colour change as I flipped it from side to side…As it will be the only embellishment in the top right corner I added a heart to the bow to draw the eye. For this Ribbon Bow I put 2 colours of silk ribbon together, then treated them as a single ribbon, to get the colour change as I flipped it from side to side…As it will be the only embellishment in the top right corner I added a heart to the bow to draw the eye.
Holiday Snaps Day 9
|


