| |
About
This is Annie Whitsed's Crazy World a world where I stitch the joys and chaos of life into beautifull crazy quilts. email annie@loopylace.com
September 2024
| M |
T |
W |
T |
F |
S |
S |
| « Nov |
|
|
| | 1 |
| 2 | 3 | 4 | 5 | 6 | 7 | 8 |
| 9 | 10 | 11 | 12 | 13 | 14 | 15 |
| 16 | 17 | 18 | 19 | 20 | 21 | 22 |
| 23 | 24 | 25 | 26 | 27 | 28 | 29 |
| 30 |
|
All That Jazz
Annie\'s Website
Bags-of-Fun
Blogroll
Websites


|
|
While embroidering Panel #1 I had a couple of problems with the fabric…firstly the threads of the weave (25 count linen) were to obvious to ignore and I couldn’t not count them which was difficult because my eyes arn’t so good any more…I also had trouble keeping the tension of my stitches, I don’t use a hoop and I was missing the extra bulk of the crazy blocks that I have done most of my stitching on.
When I mentioned the thread counting problem to Sharon she suggested and gave me some higher count linen which I can ignore the threads on and I figured that to help with the tension I could back the fabric with a light weight, loose weave cotton fabric which has helped with the tension as well as making it easier to start and finish the threads.
I am sure that the higher count fabrics will be nice to work on and I will use the pieces that Sharon gave me because I want to use different fabrics for each panel but being a bit contrary I am doing the second panel on a lower count (21 count Linen) fabric because when I pulled my Spanish Blackwork Tablecloth out the other night I remembered that there had been a scrape of the linen that was cut off to make the tablecloth square, what is quite amazing is that I was able to find that scrape whithin minutes of remembering it…I thought that it would be nice to Stitch on the same Linen as I used for the tablecloth all those years ago.
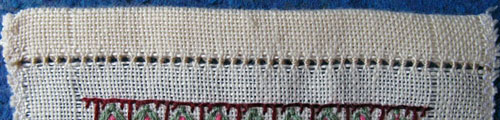
The first image tonight shows the back of the second panel with the linen hemmed, this time I used one of the threads I pulled from the fabric to do the hem stitch and the backing fabric.
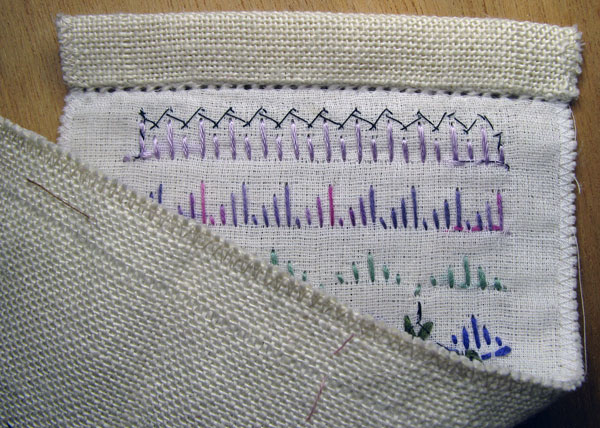
I use lines of tacking to help in counting the threads and to keep the lines strait.
Top row is Buttonhole Stitch with alternating long and short arms stitched with a rayon thread and trimmed with beads.
Middle row is Buttonhole stitch with the arms stepped down, stitched with 3 strands of cotton.
Bottom row is another stepped variation of Buttonhole Stitch done with 6 strands of cotton.
|
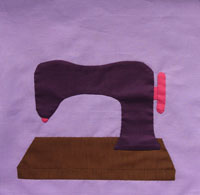 As you can now see it is a sewing machine that I am appliqueing…It is finished but I am not going to show the finished block untill next month As you can now see it is a sewing machine that I am appliqueing…It is finished but I am not going to show the finished block untill next month
|
 This is the start of a hand appliqued block for a group quilt and for tonight I am going to leave you guessing as to what I am appliqueing… This is the start of a hand appliqued block for a group quilt and for tonight I am going to leave you guessing as to what I am appliqueing…
|
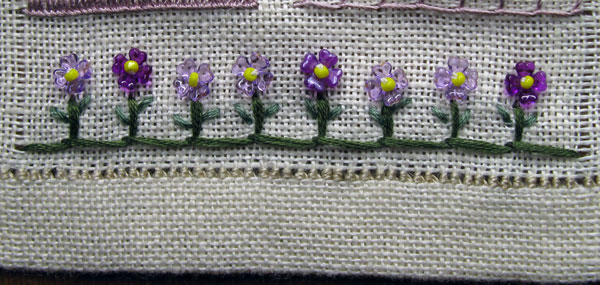
Top row is a Basic Herringbone stitch done with 6 strands of cotton thread…Leaves are Straight stitches with 4 strands of cotton…plastic flowers stitched on with a bead complete the row.
bottom row is Linen hem stitching done with size 8 crochet thread…I am leaving the back of my sampler showing so that the back of the stitches can be seen but I don’t want seams showing on the back so I have hemmed the ends of the panel and will ladder or faggot stitch the panels together…
The first completed panel of my Band Sampler is 30 inches long and has 41 stitch variations.
 For the hem at the top of the panel I stitched over 3 threads which has given a bigger hole which I prefer. For the hem at the top of the panel I stitched over 3 threads which has given a bigger hole which I prefer.
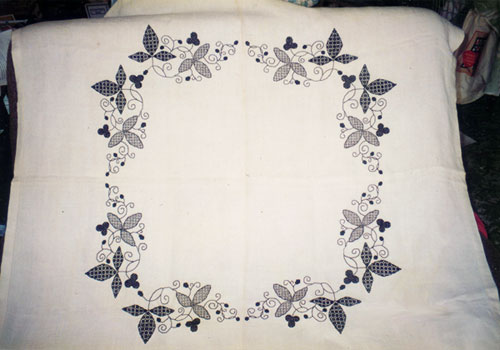
The only other time that I have hemmed Linen was 35 years ago when I hemmed a 50 inch square of Irish Linen for the Tablecloth that I embroidered with Spanish Blackwork for my School Certificate, which was enough hemming to imprint the how to on my brain forever because I had no trouble remembering how to do it…below is the tablecloth (which took me 12 months to embroider) and a detail of the embroidery.

|
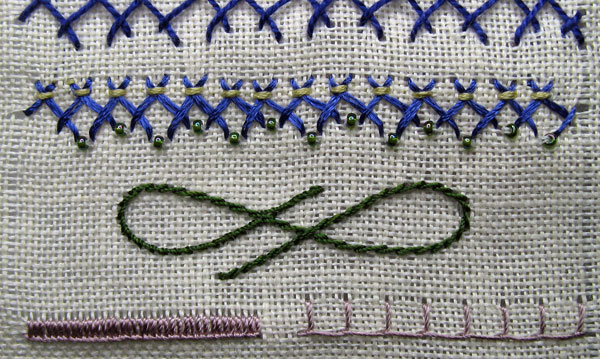
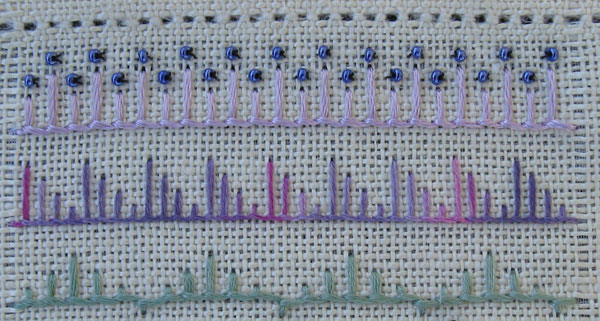
Top Row…Is the same variation as the bottom row last night, but done one sided with different stitch lengths with a Rayon Thread and trimmed with tiny straight sitches (stranded cotton thread) and beads.
Middle row…This Loopy line, of Stem Stitch worked with silk buttonhole twist thread, seperates TAST week 1 stitching, which has taken 2 weeks to stitch 33 Herringbone variations, from…
Bottom row…TAST week 2 which was Buttonhole Stitch the first half of the seam is buttonhole stitch as used to make buttonholes, right side of the seam is Buttonhole Stitch as used to hem blankets and also known as Blanket Stitch…and my Buttonhole Stitch is worked with Silk Buttonhole Twist Thread.
|
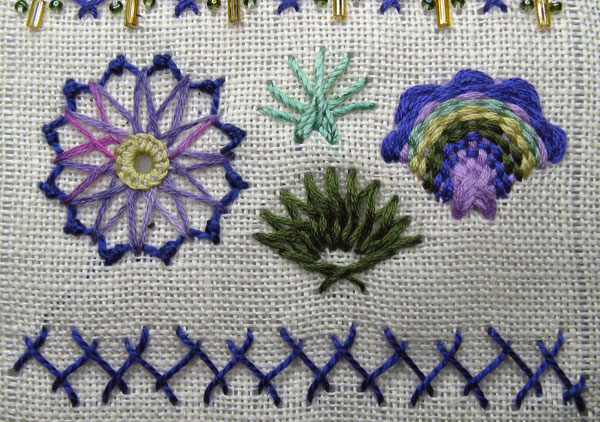
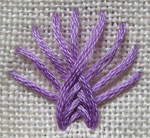
Spot one uses herringbone stitch in a a circular design inspired by Rosalie_sews’…the centre is buttonhole stitch and around the edge I used double knot stitch…yellow and varigated threads are 3 strands of cotton, purple thread is cotton pearl size 3.
Spot two is a pattern from Sharon’s sampler, I think the thread is silk and it has a very fine metalic thread running through it.
Spot three…When I saw the pattern in spot 2 I thought Fan….easier thought than done, it is not the shaped fan I set out to make, it is very bulky at the bottom, I didn’t expect the ribbed overlapping of the herringbone stitch to be so high and the stitches are to long not to be held down somehow…I wove a thread around the middle and found that I could pull the crossover threads lower and then continued to weave the rest of it, as it neared completion I started to like it more and more and I really like the scolloped edge, to form the scollops I wove the last 3 rows over and under the same threads and leaving the thread loose on the overweave…all the threads are 6 strands of stranded cotton.
 Spot fourTRying the fan again, this time I did the first stitch as a single herringbone and then filled in the curve with closed herringbone making bigger stitches on the outside curve…This time it is the shape I wanted (I drew the curve onto the fabric) and not as bulky, It was quick and easy to do and should embellish up nicely on a crazy block with extra stitches and beads…and maybe a thinner thread, thread used for this one is 6 strands of cotton. Spot fourTRying the fan again, this time I did the first stitch as a single herringbone and then filled in the curve with closed herringbone making bigger stitches on the outside curve…This time it is the shape I wanted (I drew the curve onto the fabric) and not as bulky, It was quick and easy to do and should embellish up nicely on a crazy block with extra stitches and beads…and maybe a thinner thread, thread used for this one is 6 strands of cotton.
The bottom row is a variation from Quiter Moments TAST stitchings…It plays with angleing the edge stitches up and down…thread is a cotton pearl size 3…I think that I am going to have to do another row of this one leaving room to add a trim that will emphasis the curve formed along the edge…time for bed……….
|
I am so enjoying my sampler for many reason one of which is that I can take it with me and even on a buzy day I can still get a couple of stitches done.
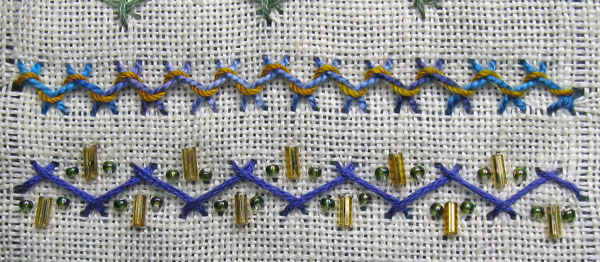
Top row is a basic Herringbone stitch done with a varigated cotton pearl size 5 thread with a cotton thread woven through it.
Bottom row is a variation that I found on
Connie’s Blog, it drew my attention because I like this use of bugle beads…I have stitched the herringbone with 4 strands of silk floss.
|
Thus far the herringbone stitches I have used have been obvious variations, variations I have used in the past or variations that I have seen on Sharon’s Sampler…Today I went to the Flickr group and put Herringbone into search tonights stitches are inspired by variations I found there.
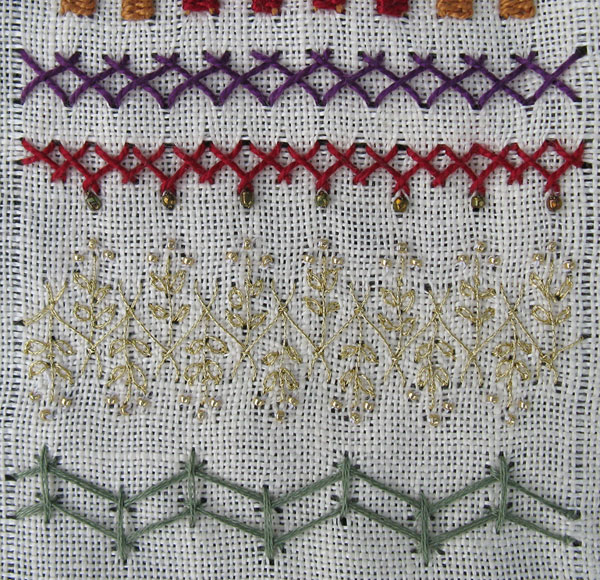
The top row is a herringbone variation by Sapphire_Dakini…It is worked with open herringbone at the top and closed herringbone at the bottom…I liked the squares in the pattern and I think that with a second mirrored row it would make a lovely trellis to put vines on…I think that the thread is Linen.
The second row…When I started this sampler I thought that I would be recording known variations but it would seem that I am still playing with the stitches as well because after doing the top row I used the same variation idea and turned it upside down, made the edge stitches smaller, stepped alternate stitches along the bottom edge and finished it with beads.
Third row…I thought this variation of herringbone stitch done by Lin Moon, looked very elegant and refined…I think that Lin might have used a thinner gold thread then the DMC metallic that I used and I think that she may have done bigger stitches than I did because even with petit beads mine is not quite as delicate as Lin’s.
The Bottom row was inspired by the other stitch in Lin’s, image…I liked the way the straight stitches linked the 2 row’s of herringbone…3 strands of stranded cotton thread.
|
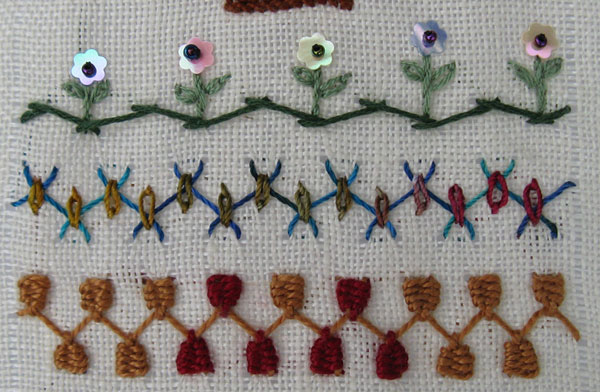
Top row, long narrow herringbone stitches make a nice base for a sweet row of flowers, the flower stems are stem stitch and the leaves are detached chain stitches…Both greens are 2 strands of silk floss
Middle row is a basic herringbone stitch with Detached chain stitches over each cross…Both threads are Rayon Thread…Tip when working with Rayon Thread, damp the thread and let it dry or holding thread at each end pass the thread through the steam of a kettle, it takes the kinks out and makes the thread managable.
Bottom row is a basic herringbone stitch with needle weaving in the V shapes…The second colour was introduced when I realized after doing the first 5 that I only had enough thread left to do 5 more, I did get 6 so I did them at the other end of the row with the 6th one in the middle so the pattern is still balanced…Both Threads are cotton pearl size 5.
|
 Before silk ribbon was available I had worked out a way of stitching baskets using Herringbone Stitch, visit this past post for what lead me to think of the idea and the first basket I stitched. (My photography skills have improve since I wrote that post.) Before silk ribbon was available I had worked out a way of stitching baskets using Herringbone Stitch, visit this past post for what lead me to think of the idea and the first basket I stitched. (My photography skills have improve since I wrote that post.)
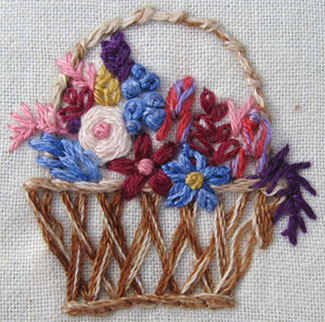
The Basket on the left is a sample that I stitched circa 1987…The Thread is 4 strands of a varigated stranded thread which I have seperated and put back together with 2 of the strands reversed so that I got a mix of shades along the length of the thread…Looking at the flowers in the basket I must have been using scrapes of thread and experimenting with combing different colours of thread to get the colour variation in the flowers.
I draw the basket shape that I want on the fabric and then fill the shape with short wide apart herringbone stitches that are closed on the bottom and spaced at the top…A line of Stem Stitch across the bottom to give it a base and across the top for a neat rim for the basket…The handle can be done with stem stitch, Chain Stitch or Coral Stitch, I like Coral Stitch myself because the little lumps of the stitch have the texture/look of the knobby bits on cane.
Now if you look at the basket on my sampler you will see that it looks quite different, part of the difference is the thread (size 5 cotton pearl) the other difference is because I didn’t look at the older ones first and instead of doing small spaced stitches at the top I did bigger stitches and closed the herringbone.
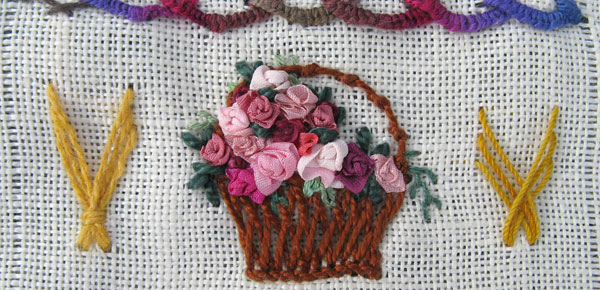
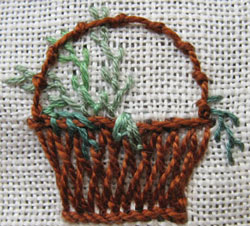 For the flower arrangement in the basket I do leafy looking stitches with a mix of green threads and then put the flowers in on top of the green background, I filled this basket with Gathered Silk Ribbon Roses… I got a little carried away and just about covered most of the green background, so I used a thick size 3 green cotton pearl thread and added straight stitches around the edge and a couple of loops amongst the flowers. For the flower arrangement in the basket I do leafy looking stitches with a mix of green threads and then put the flowers in on top of the green background, I filled this basket with Gathered Silk Ribbon Roses… I got a little carried away and just about covered most of the green background, so I used a thick size 3 green cotton pearl thread and added straight stitches around the edge and a couple of loops amongst the flowers.
Either side of the basket I did a pattern of 3 individual, overlapped herringbone stitches that use the same hole at the bottom but different entry and exit holes at the top…For the left hand pattern I used a Linen thread and the soft thread combined with stitches that are a little to long caused the pattern to be floppy and I had add a stitch over the cross point to hold it in place…For the pattern on the right I used a stiffer cotton thread, did shorter stitches and spaced the entry/exit points further apart.
|
|
|

