Annies Crazy World


  • About

    This is Annie Whitsed's Crazy World a world where I stitch the joys and chaos of life into beautifull crazy quilts. email annie@loopylace.com
Locations of visitors to this page Subscribe with Bloglines
 
Day 22 Wednesday July 12th, 2006

reducing sizes of beads

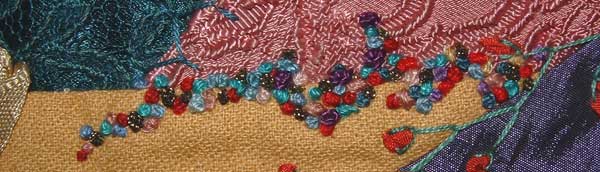
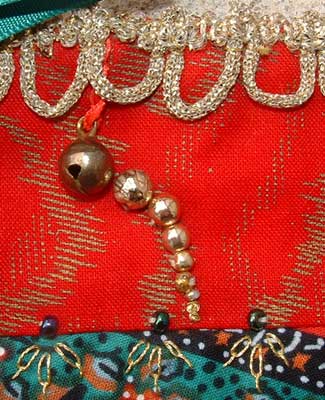
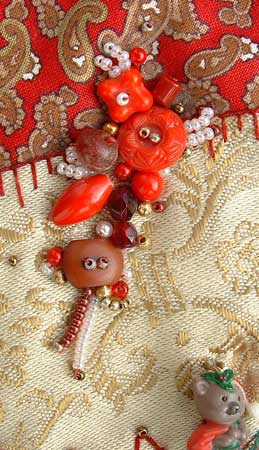
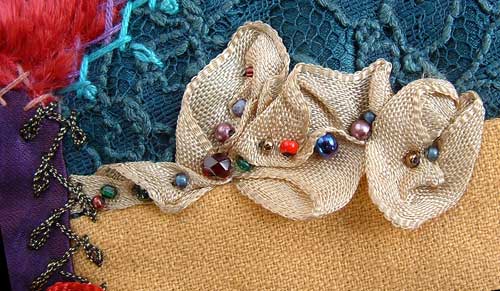
For this embellishment I look for beads that increase gradually in size, in this arrangement the 2 smallest spots are Colonial Knots worked with gold metalic thread and the largest one is a bell…

This is a good embellishment for leading the eye from one patch into the next patch of your block.

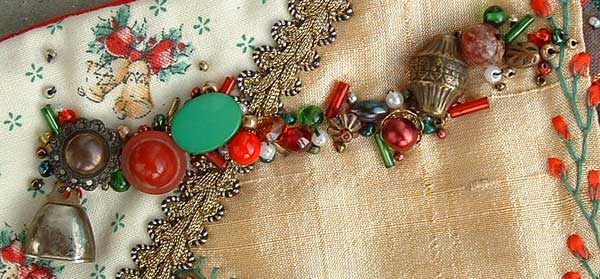
I wanted the bell to be able to move freely so I made it a hanger from twisted ribbon.

thread bell onto ribbon and twist

Choose a narrow ribbon, either Silk or Satin, cut a length a bit more than twice the required finished length, thread bell or other dangley bead onto the ribbon and twist the ribbon untill its starts to twist back on itself…Use your third hand to hold the bell in the middle while you bring the 2 ends of the ribbon together…Let go of the bell…

and twist

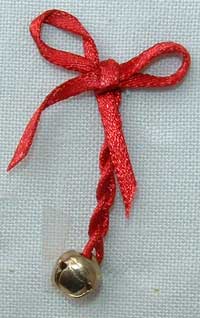
The ribbon will twist around itself…Stitch or pin the raw ends together so that it doesn’t untwist when you let them go.

8\" Christmas Stocking

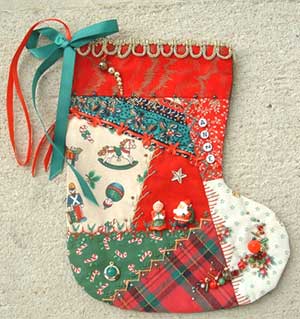
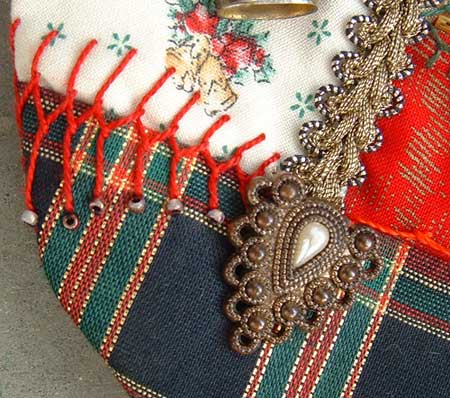
This is the only embellishment that I am going to detail from this little Christmas Stocking…I made this stocking, with simple embellishments, as a sample for a class to show that you don’t need to know a lot neither do you have to spend a lot of time, to be able to make a lovely Christmas stocking…
I have put an Actual size image of this 8 inch high Stocking on flicka so that you can see the rest of the embellishments.

Day 21 Tuesday July 11th, 2006

red beads

the whole stocking

The details from the past 2 days and these 2 bead trails are on a Christmas Stocking that I made in 1992…I have put a big picture on flicka.

red and green beads

Day 20 Monday July 10th, 2006

Cretan stitch and button

The seam on the left is cretan stitch…I like how versatile cretan stitch is and this variation as well as looking good on any block is a good one to learn the stitch because you don’t have to worry about getting the ends even just make each one a little bigger thatn the last.

When I got the image of this detail up on my monitor I noticed that it has suffered some wear and tear in the 14 years since I made it…the beads that I trimmed the cretan stitch with were originally dark red and the colour has warn off the beads…when I looked closer at the beads themselves I remembered that I had a batch of faulty beads that did loose their colour coat and I assume that it is those beads as their is no sign of on any of the other embellishments, that is good, every so often I go over my older pieces of work (some of them up to 24 years old) to see how the fabrics, laces and threads are standing the test of time and thus far they are doing well.

On the right side is a button placed at the end of a fancy braid…At the end of a piece of braid is a good way to feature a special button at the same time as you cover the end of the bread…it is also a useful embellishment for breaking long seams because it leads the eye into the next patch instead of seeing the long line.

Day 19 Sunday July 9th, 2006

Day 019 detail

On Day 8, I showed how to stitch loopy ribbon and my detail had 4 loops Todays detail is a 2 loop sample and because it is a stiff ribbon the loops look like little bows.

The other embellishment uses a couple of short pieces of ribbon to feature a button…it is a good embellishment for using short ends of ribbon.

Day 18 Lace Butterfly July 8th, 2006

Lace Butterfly

I thank Janet Collins for these butterflies…Janet was in a stitching group with me in the late 1980’s which is where I watched her create butterflies by gathering and scrunching small pieces of lace into rough butterfly shapes, then using beads for the bodies and pistol stitch for the antenna.

This Lace butterfly is made by folding the ends of a short piece of lace to the middle and stitching them in place with a gathering stitch…a couple of extra stitches shape the wings…it is when you add beads to form the body that the butterfly emerges and a couple of long pistol stitches (or straight stitches with a knot at the end) complete the butterfly.

Experiment with different types of lace and different ways of folding and gathering the lace…use single long beads or different combinations of smaller beads or embroidery for the body…I like metallic thread for the antenna because it sits nicely but other threads can be used…Add additional decoration to the wings….I look forward to seeing how these little lace butterflies can evolve in your hands.

Day 17 Friday July 7th, 2006

scrunched ribbon

This is a good embellishment to use when you have a long straight line to break up…By choosing a ribbon that is close in colour to one of the patches and arranging the ribbon to cover part of the seam and to extend well into the other coloured patch so that the colour leads the eye around the corner which breaks up the line…Then use another stitch to finish the seam the.

To attach the ribbon twist and scrunch it under your fingers and use beads to hold it in place…I have put one end in a seam and tucked the other under the ribbon but both ends could be hidden under the ribbon.

Day 16 Thursday July 6th, 2006

Buttons without beads

Buttons Without Beads…The other night I mentioned that you can use the plainest of buttons and make them sparkle with beads…Tonights detail uses buttons that are so gorgeous that they stand alone and I felt that adding beads would actually detract from the beauty of the buttons.

Day 15 Wednesday July 5th, 2006

Wheat Stitch Variation

This is a Wheat Stitch Variation…I love the way it sinks into the velvet on this seam.

Wheat Stitch

Day 14 Tuesday July 4th, 2006

Beret 
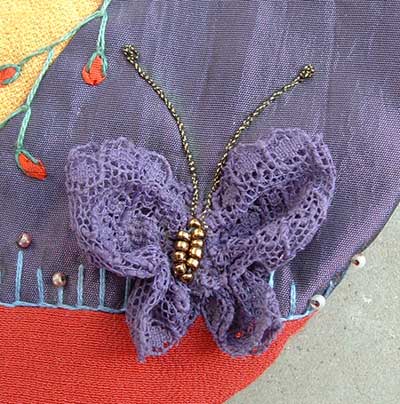
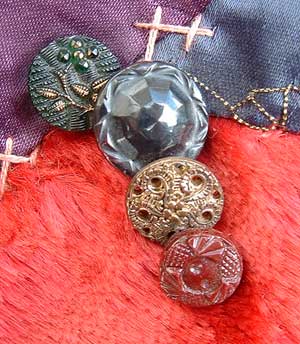
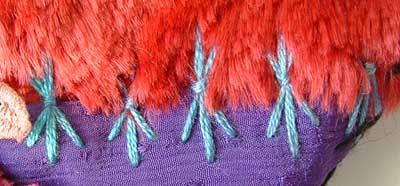
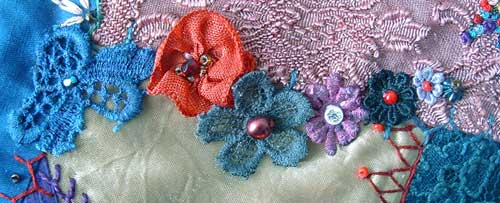
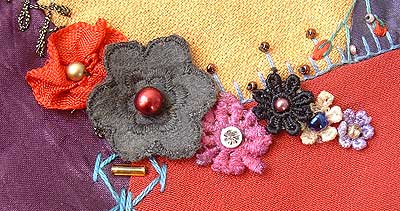
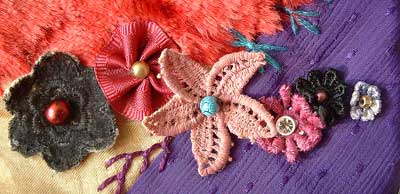
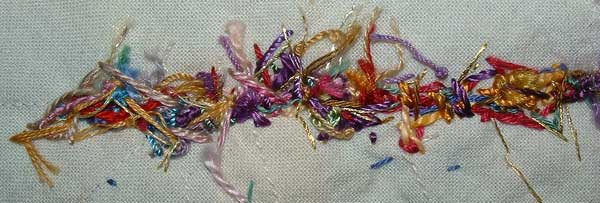
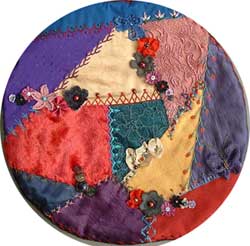
Today I am giving you 3 images as 1 detail…They are on my Beret (big image on flicka) As you can see whilst they are 3 separate flower trails they are made up of the same and similar elements and work together as one embellishment to create movement around the piece and to balance the circular shape.

These details are visually self explanatory as a mix of gathered ribbon flowers and lace flower with beads sparkling in there centres…what is interesting at least for me to reflect back on is that this Beret from 1998 was made before I had a ready access to coloured/dyed laces and I coloured the big black flowers with permanent ink pen and used stenciling paint for the other colours.

flowers 01

flowers 02

flowers 03

Day 13 – Knot Trails July 3rd, 2006

Colonial knot trail

Thread Misers delight….When you finish a seam and the thread left on the needle is not enough to do another seam but is to long to throw away…The first time I did this seam treatment it was to use those short ends of thread and because the ends of thread used were from the same project the colours all blend together…

Work each thread back and forth, up and down along the seam line to distribute the colours…

Different thicknesses of thread will give you a variety of knot sizes and you can get a greater variety by wrapping the thread around the needle extra times when forming the knot.

Add a few beads for greater variety of texture and to add a little glint along the seam.

This seam treatment is also a great way to learn and practice how to do Colonial knots and French knots because your first sloppy/loose knots will blend in and add to the overall texture and the repetition reinforces the how to do.

The back of this one can get quite thick with thread, below is the back of a similar knot trail so that you can see that it will be thick but it is all good.

the back of a knot trail