Annies Crazy World


  • About

    This is Annie Whitsed's Crazy World a world where I stitch the joys and chaos of life into beautifull crazy quilts. email annie@loopylace.com
September 2024
M T W T F S S
« Nov    
 1
2345678
9101112131415
16171819202122
23242526272829
30  
Locations of visitors to this page Subscribe with Bloglines
 
Painted detail – Detail 232 April 6th, 2007

first ideas for horse detail in visual journal
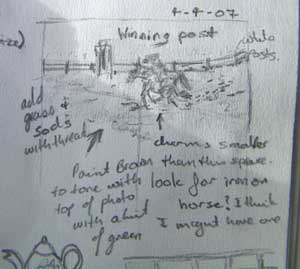
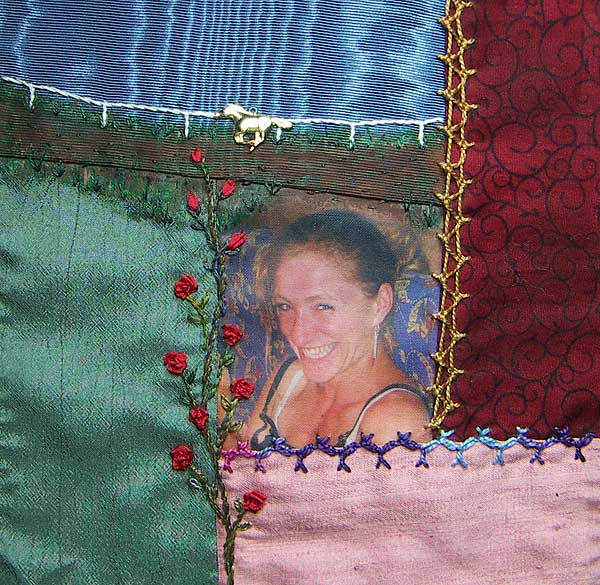
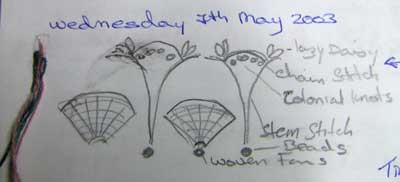
The pencil sketch is my first ideas for a picture seam to represent that my 2 youngest brothers and a sister in law worked with horses.

I thought that an embroidered track would be to textured for the scale of my horse charm so I decided to paint the track…scary decision, paint can’t be undone like stitches if it doesn’t work…best have a practice which I did in my visual journal.

Experimenting in my visual journal

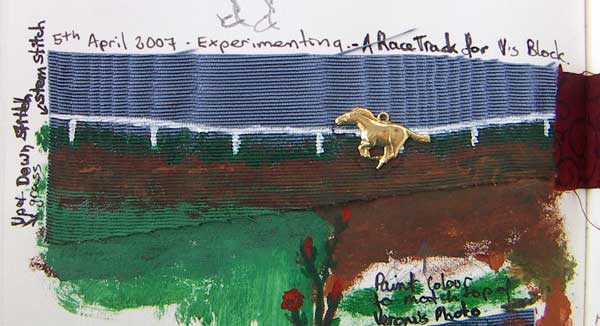
I used acrylic paint and the fabric was easier to paint than I thought it would be and I think it will work…time to be brave and put paint on my block…

I built the scene up in layers letting the paint dry each time before adding the next layer.

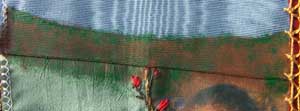
I started by covering the area with brown…..

first layer of paint

The second layer is splodges of dark green along the edges and a little bit on the track.

second layer of paint

I then used lighter browns and greens and a finer brush to blend the track area and add grassy details to the edges.

third layer of paint detail

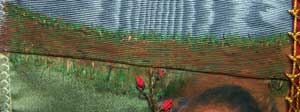
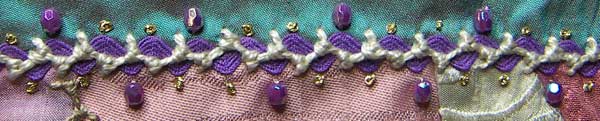
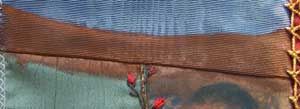
I used single strands of brown and green embroidery thread to add just a little bit of texture and finer details, stem stitch for the fence and finished the seam by extending the tip of the climbing rose to make it apart of the picture.

embroidered detail on paint

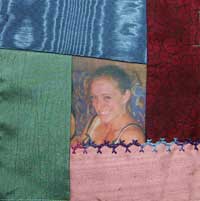
The 19th block for my mum’s memory quilt.

19th block finished for mum

Climbing Rose – Detail 231 April 5th, 2007

climbing rose
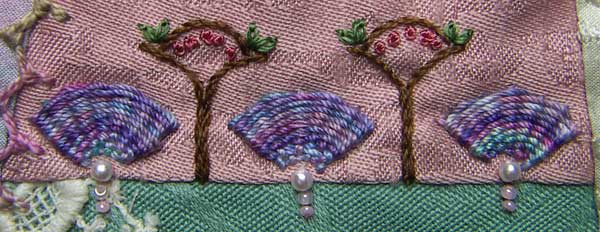
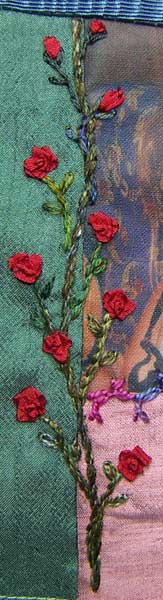
The vine is stem stitch done with a mix of green and brown scraps of thread.

The Roses are the same silk ribbon roses that I illustreated with detail 203 and detached chain stitch for the buds at the top.

One Stitch 4 Seams – Details 227 to 230 April 4th, 2007

The first 3 seams below are on my boxtop…The stitch I started with was Italian Insertion stitch which I found on page 125 of The Embroidery Bible by Betty Barnden…The first one looks completly unlike the diagram and I can’t remember how I did it.

Italian insertion stitch 01

My second attempt and I still only looked at the diagram instead of reading the instructions and consequently I did the buttonhole stitch part from the outside to the centre…actually I like this one better than the original.

Italian insertion stitch 02

3rd attempt and I got it, although it still looks different from the diagram because the stitch is intended for joining 2 pieces of fabric so the stitches need to be close together but as I am useing it as a decorative stitch I have spaced the side stitches further apart which gives it a webby, lacey look.

Italian insertion stitch 03

It is a long time since I did the seams above so I had to get the directions out again…I thought that I would end up with a seam that would look very similar to the one above but oops I didn’t make the seam as wide and only did 2 buttonhole stitches instead of the 4…It would seam that missreading instructions is a good way to come up with different stitches.

Italian insertion stitch 04

TAST week 14 Bonnet Stitch – Details 222 to 226 April 3rd, 2007

Bonnet Stitch, the TAST week 14 stitch is one that I have not done before and as it has a couple of manourvers to form it, I decided to do a sample to get the feel of the stitch.

Tast 14 test 1
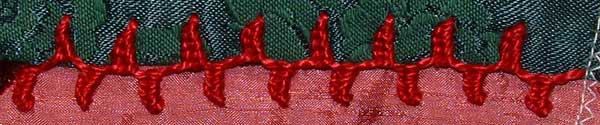
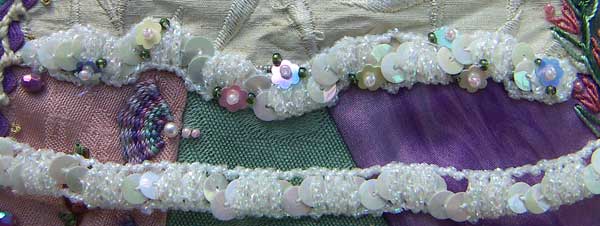
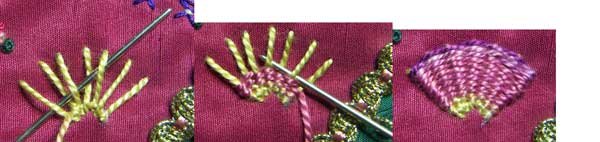
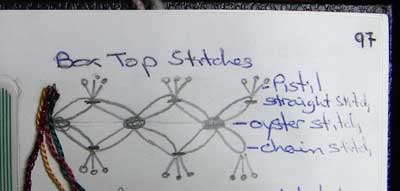
On the first sample I miss read the instructions and didn’t go though the fabric on the second loop stitch, I finished the seam by alternating the actual stitch with my mistake stitch.

Tast 14 test 2
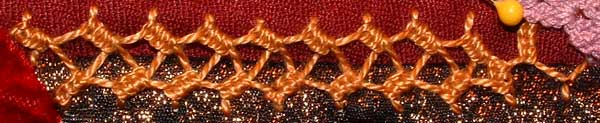
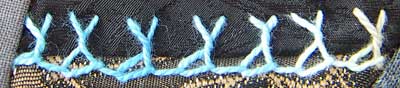
On the second sample I made the upright stitches longer which made it a more open stitch.

Getting into the swing of this stitch I worked my third sample as a 2 sided seam…it took me a couple of tries to work out the direction of the loop for the mirrored side and my spacing and tension are a bit uneven but it was worth the trouble the finished stitch has a nice curvey look to it.

Tast 14 test 3

On the next seam I did the looped part of the stitch as a twisted loop.

Tast 14 test 4

block 19 for mums quilt
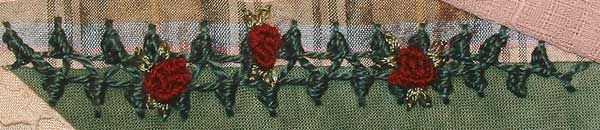
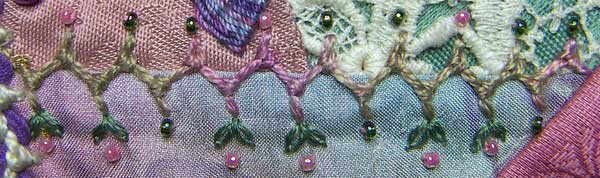
To use this stitch on one of my works in progress I had to make another block for mum’s quilt…I did the 2 sided variation and made the top stithces shorter than the bottom ones…I had planned on putting beads along the bottom but when the stitch was done I decided that it was pretty enough to stand alone.

19th block nearly naked

Additions to detail 211 and Detail 221 April 2nd, 2007

I have been using a lot of beads on the birthday block and the first seam was starting to look a little under dressed so I have given it a few trimmings.

Additions to detail 211

The braid I used for this seam was very crinkled but as I like wriggly lines I stitched it on with the crinkles and added sequin flowers with green bead leaves.

braid with extra beads

Woven Fans – Details 219 and 220 April 1st, 2007

Woven Fan seam in my visual journalThis sketch in my visual jouranl is of a seam on one of Sharon’s Blocks.

The first seam below is how I interpreted it on my Box Top

woven fans on box top

This second seam is how I interpreted it today on the birthday block.

woven fan on birthday block

The Fan is woven over 7 spokes…To get the spokes of the fan even I draw the fan on the back of the block…Bring the thread up close to the bottom of an edge spoke, rethread with a tapestry needle (if you don’t have a tapestry needle use the eye end of the needle for the weaving) and weave over and under to the other end.

woven fan steps a b c

Go around the end spokes so that the weave is reversed in the opposite direction…For a tight weave use the needle to push the woven rows tightly together…Continue weaving until there is no more of the spokes showing and take the thread through to the back…Note varigated threads with quick changes between colours work better than the one that I used for this sample.

woven fan steps d e f

Fly Fish – Detail 218 March 31st, 2007

fish seam in visual journal experimental fish

The first 3 steps for embroidering fish

filling in the details of embroidered fish
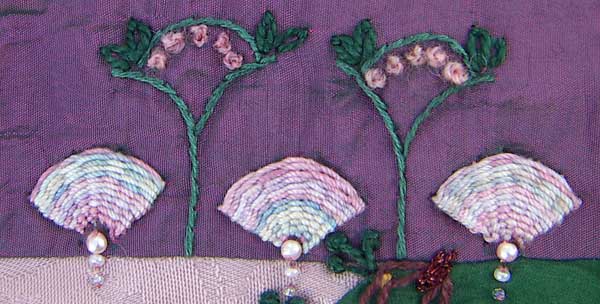
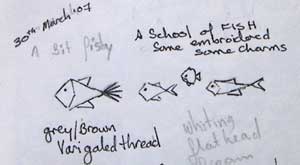
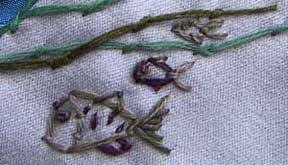
Add an almost straight fly stitch to divide the head from the body and a spot for an eye.

The positions of the Fly stitch for the tail and fins will determine the size and shape of your fish and the great thing about doing it this way is that fish come so many shapes.

Depending on the size of your fish, additional detail can be added with a few straight stitches to fill in the tail and tiny straight stitches that look like scales…The varigated thread that I used gave surprise colouring on the fish.

I was going to have just the school of fish swimming along above the seam but because the thread I chose for the fish blends a little with the watery background the colour didn’t work to frame the image at the top…my solution was to add the riverbed which I created with a haphazard line of mixed coral stitch and oyster stitch to get different sized lumps and then a second row to intersperse the colours on the varigated thread the second row is mostly threaded along the first with just a few extra knots to fill in along the seam.

A School of Fish

Progress has been made…When I kick started this UFO I had 9 blocks made in 1994…I have now matched that with 9 made in 2007… below is the 18th block.

18th block for mum

Zig Zag Chain Stitch 1 2 3 – Details 215 to 217 March 30th, 2007

zig-zag chain stitch sketch in visual journalI had an old visual journal out to look up some notes and while flipping through it, this sketch that I had made as an idea for a seam on my Box Top, jumped off the page, it is dated 9 may 2002, a combination of 2 rows of long zig zag chain stitch, Oyster Stitch, straight stitch and pistol stitch…The first seam below is how I interpreted it on my box top.

zig-zag chain stitch version 1

On the Birthday block I did the oyster stitch across instead of along the intersection, added beads along the edges and a flower bead with detached chain stitch leaves in the centres of the diamonds.

zig-zag chain stitch version 2

On mum’s memory quilt I located the zig zag chains across the seam and replaced the oyster stitch with coils formed by wrapping metalic thread around the anchor stitches at the intersections, black rice beads in the diamonds and seed beads on the points along the edge finish this seam.

zig-zag chain stitch version 3

Soft Green and Pretty Pink – Detail 214 March 29th, 2007

feather stitch with detached chain and beads
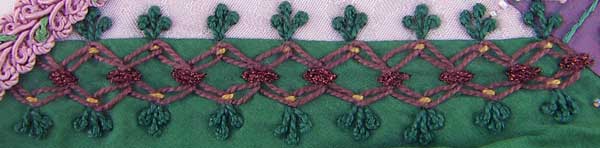
This seam is 2 overlapped rows of Feather stitch from TAST week 7…I think that it has become a favourite stitch as I did
3 variations in week 7 and now I am doing it again…This time I have used a soft varigated green thread for the feather stitch and added pretty pink detached chain stitch and beads.

More TAST week 13 seams – Details 212 and 213 March 28th, 2007

knotted cretan stitch

I think I like Knotted Cretan Stitch…As Sharon said it is little different from cretan stitch but that little knot gives it a lot of extra texture…It is hard to draw but that is not a problem because it will work with the sketchs that I have already done for cretan stitch and in the seam above I have married it with the TAST week 12 stitch by using it to couch the rick rack braid.

Tip: before diciding to do a seam with a thick thread needle test the fabrics, that is stick a needle through the fabric and see how easily it goes through…If I had needle tested my fabrics this seam would have been done with a very fine thread because the top fabric was Very difficult to pull the needle through, I persisted to the end of the seam but couldn’t face going along again to add the pistal stitches that I had intended…I was stitching it while visiting with Sharon and she came to my rescue by supplying me with the beads which are just the perfect colour to balance the mauve patch on the block.

Not put of by how difficult the above seam was to stitch, tonight I have done a seam using 2 rows of knotted cretan partially overlapped in the same way as detail 118 and detail 176.

What is interesting to note here is that the seam above is dainty and looks pretty on the birthday block the seam below is the opposite it is bulky and geometric which makes it look good as part of the frame for a man’s image.

2 rows of knotted cretan stitch