
knotted cretan stitch
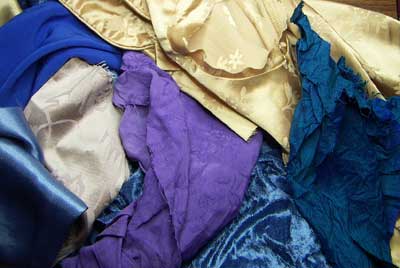
Tonight I went to the canberra crazy quilters monthly meeting, I often resist taking any of the fabric that is always there to share but tonight I grabbed several pieces that might go well in the last few blocks that I have to make for this quilt.
|
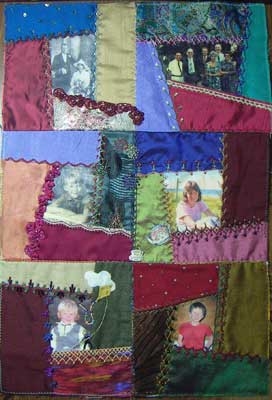 I now have a unit of six blocks…I used a 6″ in wide strip of Freezer Paper to size the blocks, I ironed it on to what was to be the middle row matching one edge to the seam below and stitching along the top edge. I now have a unit of six blocks…I used a 6″ in wide strip of Freezer Paper to size the blocks, I ironed it on to what was to be the middle row matching one edge to the seam below and stitching along the top edge.
I have done Up and down buttonhole in the last section of this new seam.

|
 We lived a block from North Creek and probably spent more time at the creek then the coastal beaches. As well as swimming and fishing we collected oysters off the rocks, sun bathed, built sand castles and chased soldier crabs, as my sister said it was both a place to be when needing time alone and a place of fun. We lived a block from North Creek and probably spent more time at the creek then the coastal beaches. As well as swimming and fishing we collected oysters off the rocks, sun bathed, built sand castles and chased soldier crabs, as my sister said it was both a place to be when needing time alone and a place of fun.
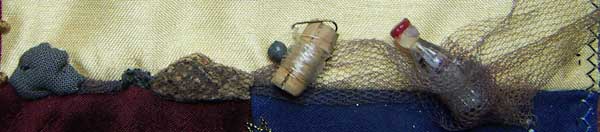
I also used this seam to put the miniature coke bottle for the memories that my brothers made their pocket money by collecting discarded glass drink bottles and returning them to the shop for the 5 cents refund.
|
 Last week was the Queen’s Birthday long weekend which is cracker night in states that still allow fireworks to be sold but the fireworks sold today are nothing like the crackers of our childhood…Each year my uncle would build a 6 foot high bon fire in the cow paddock next to his house where several familys congregated, each bringing a box of crackers, we would dress in our little great coats and walk around the corner for what was one of the best nights of the year… Last week was the Queen’s Birthday long weekend which is cracker night in states that still allow fireworks to be sold but the fireworks sold today are nothing like the crackers of our childhood…Each year my uncle would build a 6 foot high bon fire in the cow paddock next to his house where several familys congregated, each bringing a box of crackers, we would dress in our little great coats and walk around the corner for what was one of the best nights of the year…
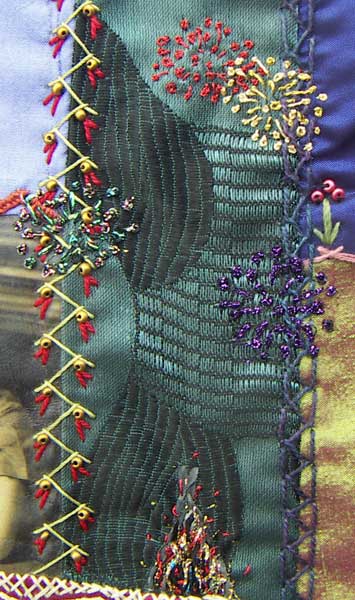
French Knots,This weeks TAST stitch combined with tiny straight stitches done in metalic thread make perfect fireworks.
The Bon Fire is straight stitches done with black, grey and red silk ribbon and black, red and gold metalic threads.
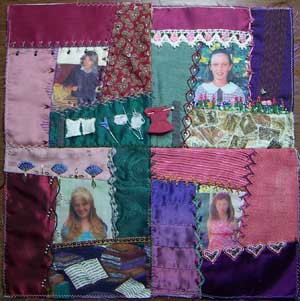
I have also used french knots to start the embroidery on the seam across the middle of the 4th unit of 4 blocks.
For the first part of this seam a couched green silk ribbon with pink silk ribbon French Knots.

the next part of the seam is a narrow herringbone stitch done on one side of the seam, on the other side of the seam I did french knots on the herringbone, this is very subtle in that the french knots are barely visisble but the addition of the french knots anchored the herringbone to the other side of the seam.

|
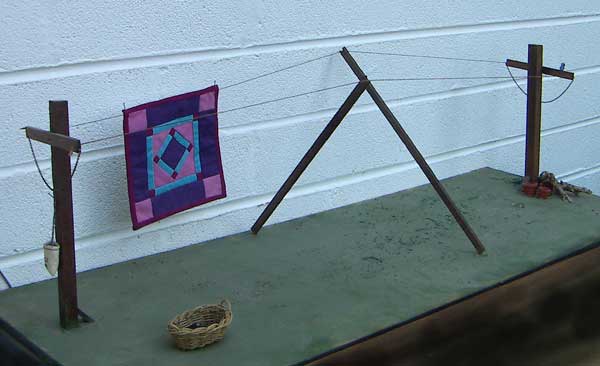
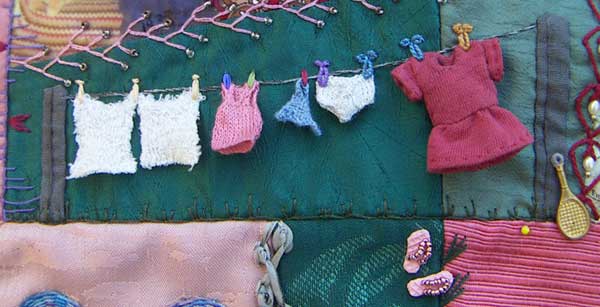
Over the last few weeks I have shown you my miniature cloths line quilt and my visual journal sketches of ideas for this cloths line seam…Below is a 1″/12″ scale cloths line that I modeled on the one from home, I made it to display my miniature quilts at a quilting exhibition, the Amish quilt on the line is 4 1/2″ square.
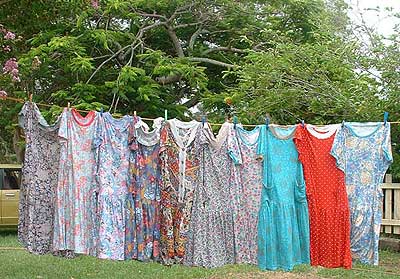 I have also shown you the garments that I have knitted and sewn to go on the line. The photo on the right was the idea behind the dress, mum described the dresses as being like a T shirt with a skirt on the bottom…I have also chosen to use a pink singlet, a G string, and the Y Fronts. I have also shown you the garments that I have knitted and sewn to go on the line. The photo on the right was the idea behind the dress, mum described the dresses as being like a T shirt with a skirt on the bottom…I have also chosen to use a pink singlet, a G string, and the Y Fronts.
I have chosen the items for the line so that they represent the washing of the young and the old, boys and girls and from long ago and recent times…
some of the cloths are pegged with dolly pegs, some with coloured plastic pegs and some with cyclone pegs which a brother made from twisting plastic covered wire into shape, called cyclone pegs because they hold the washing on the line in very strong winds…I finished the scene by adding a tennis racket leaning on the post and and a pair of thongs in the foreground…I have uploaded a bigger image on flicka
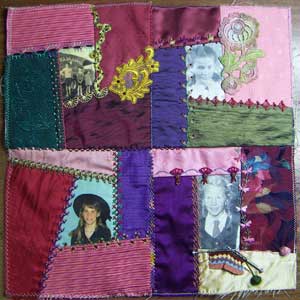
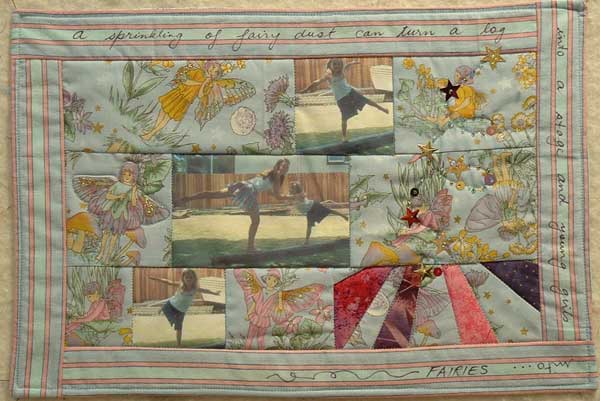
This seam is not the first quilt that the cloths line from home has inspired…a few years ago one end post which had rotted over the years snapped of at the ground when a nephew was swinging on the line…his younger sister started using the pole as a balance beam and joined by her sister they danced on it, I took some lovely photos of there dance and a friend used those photos to make the journal quilt below as a sample for her book A moment in time, available from Creative Living Media.
|
I am a bit frustrated, I nearly had the cloths line finished when the lens fell out of my glasses, I found the screw by feel but can’t find the tiny screw driver to put it back in so will have to wait until tomorrow to fix it, I have spare computer glasses but only the one pair that I can do fine detail with so the last bits of the stitching will also have to wait until tomorrow.
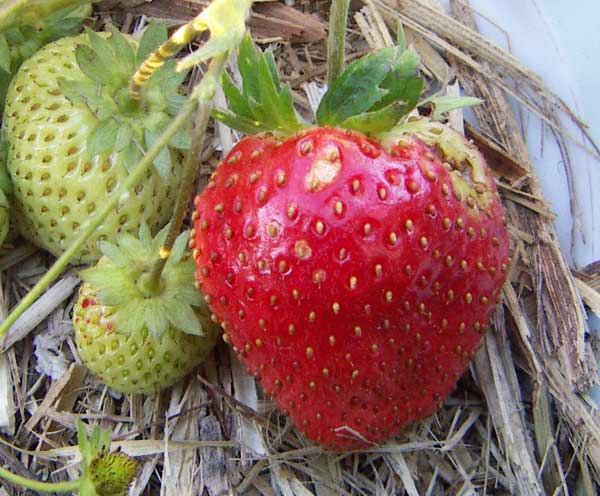
I spent a couple of hours in my garden this afternoon so will leave you with the photo of my strawberry that was ripening nicely out of season but went mushy after being hit by the first (late) frost of the winter.
|
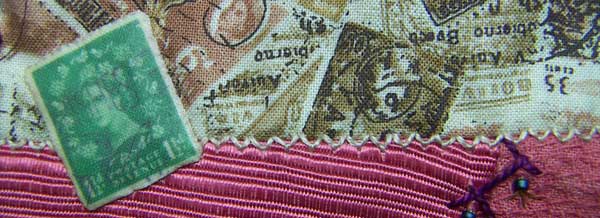
On this seam I did tiny Fly Stitches to mimic the perferations on the edge of stamps…I have also used t shirt transfer to make the extra stamp, I will probably add more stamps to this seam but will wait until I have stitched the seam at the side.
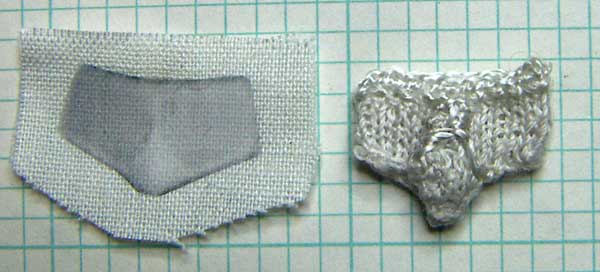
 The plan was to use T Shirt transfer for the Y Fronts on the line but I have been unable to get a clear transfer and then today when I assembled all the garments and took a good look the T shirt transfer looked flat and out of place against all the 3 dimensional garments…so what else could I do but knit them…I used a single strand of stranded embroidery thread for the knitting and a white rayon thread to define the lines at the front and to work 2 rows of buttonhole stitch around the top for the elastic…and I won’t tell you that there is an opening in the Y Front. The plan was to use T Shirt transfer for the Y Fronts on the line but I have been unable to get a clear transfer and then today when I assembled all the garments and took a good look the T shirt transfer looked flat and out of place against all the 3 dimensional garments…so what else could I do but knit them…I used a single strand of stranded embroidery thread for the knitting and a white rayon thread to define the lines at the front and to work 2 rows of buttonhole stitch around the top for the elastic…and I won’t tell you that there is an opening in the Y Front.
|
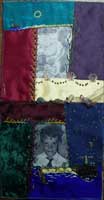
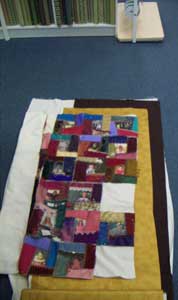 This morning I went shopping for the Border Fabrics for mum’s quilt so that I could take photos and have swatches to put in with my entry form for the Canberra Quilters Exhibition…Entering it in the Exhibition also means that the 4th August is my deadline for finishing…That gives me 7 weeks This morning I went shopping for the Border Fabrics for mum’s quilt so that I could take photos and have swatches to put in with my entry form for the Canberra Quilters Exhibition…Entering it in the Exhibition also means that the 4th August is my deadline for finishing…That gives me 7 weeks
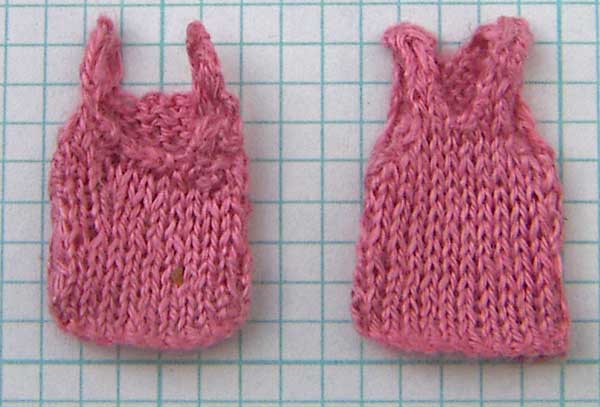
In the middle of this block you can see the start of the clothsline seam scene…I am not fitting nearly as much washing as I thought I would on the cloths line, I have narrowed down the garments I want on it but there is to much white…What can I change, the singlet is the most obvious because they do come in colours but Dad’s were always white…
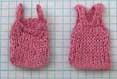 then I remembered that they weren’t always white, the occassional one was Pink from going through the wash with something red, so a pink singlet it is…I have taken artistic licence and made it a darker pink to get the added contrast against the white. then I remembered that they weren’t always white, the occassional one was Pink from going through the wash with something red, so a pink singlet it is…I have taken artistic licence and made it a darker pink to get the added contrast against the white.
I used a single strand of DMC stranded cotton thread and the tiny sock knitting needles and I knitted a singlet, I knitted the back and the front at the same time so that I didn’t have to worry about counting stitchs…I got myself confused with how to do the neck and armholes and I had dropped stitches and had all sorts of bother, despite how I cobbled the top together it is really cute but I knew that I could do better, so I knitted another one…I did have to concentrate hard while doing the neck and armholes but I am thrilled with how well my second attemp worked.
|
I got quite a few things done for the quilt today but when it came to photographing what I did I only had one short seam that was finished ready to be photographed.
It is another seam of double knot stitch but this time just to make it a little different I flip flopped the knots from one side of the seam to the other…

|
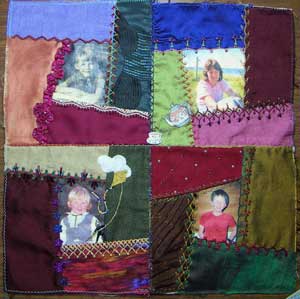
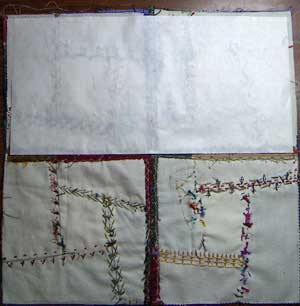
This is the second set of 4 blocks and again I split the seam across the middle into 3 sections.
The first section is more Portuguese Stem Stitch, which has become a favourite stitch, I find it very rythmic and soothing to work.

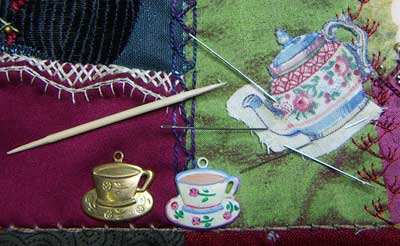 The middle section is double knot stitch above which I added a cuppa tea scene…The Tea Pot is cut from a cotton print fabric and put on with needle turn applique…I put the tooth pick in the picture to remind myself to tell you what a wonderful tool it is for needle turn applique, I have never enjoyed doing needle turn applique until a friend showed me recently how to do it using a tooth pick and it makes all the difference, when turning the seam allowance under with the toothpick the wood grips the fabric and makes it possible to make the fine adjustments required for needle turn applique….I painted the cup charm using acrylic model paints. The middle section is double knot stitch above which I added a cuppa tea scene…The Tea Pot is cut from a cotton print fabric and put on with needle turn applique…I put the tooth pick in the picture to remind myself to tell you what a wonderful tool it is for needle turn applique, I have never enjoyed doing needle turn applique until a friend showed me recently how to do it using a tooth pick and it makes all the difference, when turning the seam allowance under with the toothpick the wood grips the fabric and makes it possible to make the fine adjustments required for needle turn applique….I painted the cup charm using acrylic model paints.

The third seam is Split Stitch done with silk ribbon.

|


