
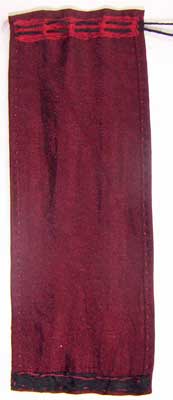
 This weeks TAST Stitch is Sheaf Stitch…For my first seam I used the basic stitch shape set side by side, to add a little interest I used a single strand of 2 colours so that you see flecks of both colours along the seam. This weeks TAST Stitch is Sheaf Stitch…For my first seam I used the basic stitch shape set side by side, to add a little interest I used a single strand of 2 colours so that you see flecks of both colours along the seam.
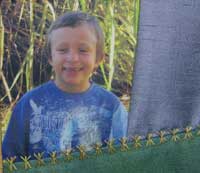
When I was finished the seam I was delighted with how well it ties in with the sugar cane in the background of the photo.
I am really enjoying the TAST challenge for the fresh look at stitches and how they can be arranged…I liked the decreasing length of the bar stitch and I have done it flip flopping it from side to side with the ends of the longest bars touching so that ait forms a continuous line.

|
 I didn’t think that I was going to get any stitching done today, there is not a lot more to do till I get the last photo so I took the opportunity to spend a few hours in the garden this afternoon…then late this evening I received the last of the photos and as I am up late anyway to watch Le tour de France I have been able to piece it and have also pieced my mum’s block which I have left till last. I didn’t think that I was going to get any stitching done today, there is not a lot more to do till I get the last photo so I took the opportunity to spend a few hours in the garden this afternoon…then late this evening I received the last of the photos and as I am up late anyway to watch Le tour de France I have been able to piece it and have also pieced my mum’s block which I have left till last.
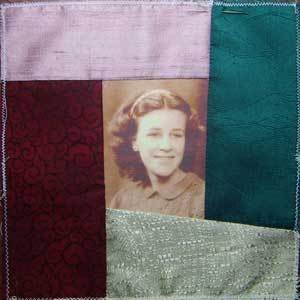
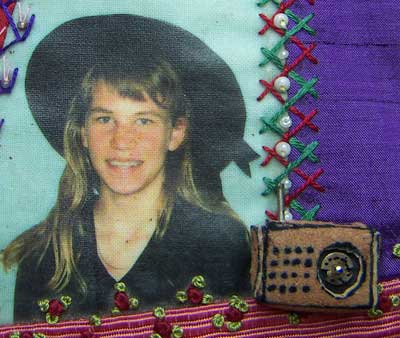
This is the same photo as a friend and I used to make the journal quilt below as a sample for her book A moment in time, available from Creative Living Media...You will notice that mum is facing a different direction in the photos that is because I flipped the image for this quilt so that she looked into the quilt instead of off to the edge.

|
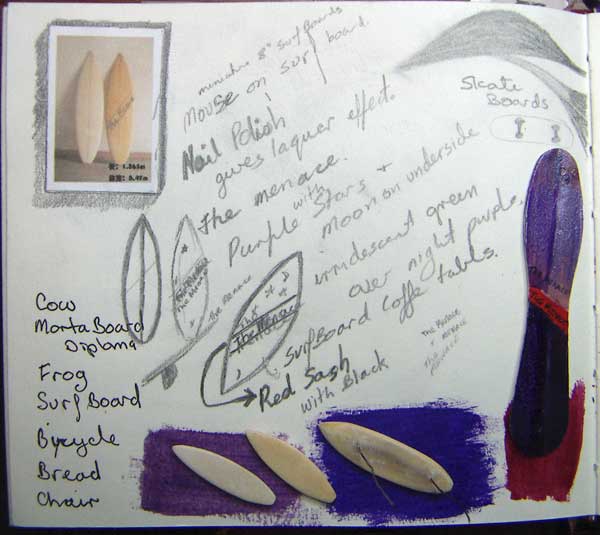
The Surf board is finished, I won’t know, till I can ring my brother again tomorrow, just how close I got to the original…I didn’t think that I was going to be able to do the writing across the middle, I had tried, messed up and had to sand it off and repaint it several times and was ready to give up until a friend lent me a finer pen and suddlenly I was able to fit the words The Menace into the space, it is not real clear but it can be read and I think my brother will be delighted with it.
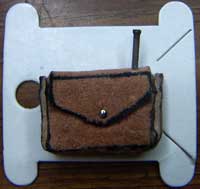
I have also added a Miniature Transistor Radio in the corner of my daughters photo…Mum didn’t like the radio or any noise makers which is a family story in itself, her grand daughter on the other hand can’t live without music.
I made the radio several years back for another project and then didn’t use it…I used a cube of black rubber for the radio shape which I covered with a piece of soft leather cut the same shape as the real thing would be…the dial is a sequin held on by a pin cut off to the thickness of the radio…The antenna is a small nail.
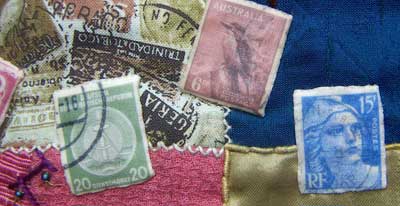
and After talking to mum I have added a French Stamp to complete the ancestry.
|
I am still waiting on one photo which is having email technical difficulties…In the meantime I am making bits that I know I want to finish the last couple of blocks.
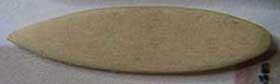
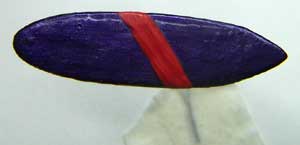 I used purple nail polish to paint the surfboard, I had all sorts of difficulties with the nail polish not going on smoothly, I think mostly impatience not waiting for the first coat to dry properly, and then putting it to close to the heater which caused bubbles to form…However both these problems will add to the finished surfboard, as the lumpy bits look somewhat like a build up of wax and I will sprinkle a little sand over the bubbles when I do the clear top coat (which I am resisting doing until tomorrow when the nailpolish has had the 24 hours it needs to cure properly)….I have often found that mistakes/mess ups can actually add a lot of reality and character miniatures. I used purple nail polish to paint the surfboard, I had all sorts of difficulties with the nail polish not going on smoothly, I think mostly impatience not waiting for the first coat to dry properly, and then putting it to close to the heater which caused bubbles to form…However both these problems will add to the finished surfboard, as the lumpy bits look somewhat like a build up of wax and I will sprinkle a little sand over the bubbles when I do the clear top coat (which I am resisting doing until tomorrow when the nailpolish has had the 24 hours it needs to cure properly)….I have often found that mistakes/mess ups can actually add a lot of reality and character miniatures.
I have also made a curtin, I have photographed the back which shows how I made gathering tape from 7 mm silk ribbon and black thread…I also used silk ribbon to face the bottom because I didn’t allow enough for a proper hem when I measured the fabric.
|
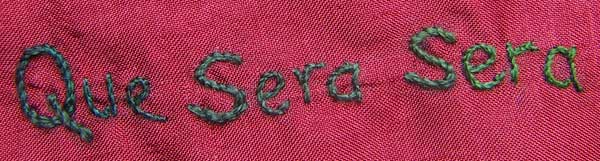
I have used stem stitch to write the words Que Sera Sera on the bottom right corner of my Dad’s Block…Que Sera Sera, whatever will be, will be, The future’s not ours to see, Que Sera Sera… I can still hear my dad singing it.
Before I rang my brother I shaped a second miniature surf board and after I rang him I decided that I wanted it a little bigger and I shaped a third one…So that I can attach it to the quilt I have added wires to the back, I cut a groove in the back glued the bent wire into the groove and glued a piece of fabric to to the bottom to reinforce the wire.
My brother suggested nail polish to give the sheen of the surf board finish so I have experimented with nail polish and paint finishes.
I think my board is to small to do a full replica of the board he described…I will decide tomorrow how close I think I can get it
|
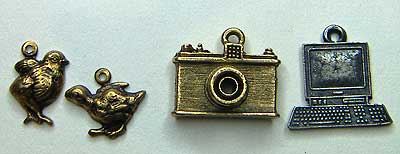 I am looking for a few charms so on the way home from picking my neice up from school today we called into Bead Street…Dealing mostly in beads they don’t have many charms and didn’t have any that I had on my list but I did find some cute Chickens and cool little camera and a computer that I think will go on mum’s quilt… I am looking for a few charms so on the way home from picking my neice up from school today we called into Bead Street…Dealing mostly in beads they don’t have many charms and didn’t have any that I had on my list but I did find some cute Chickens and cool little camera and a computer that I think will go on mum’s quilt…
And somehow several other charms, some beads and a role of maroon beading wire seemed to find there way into my bag.
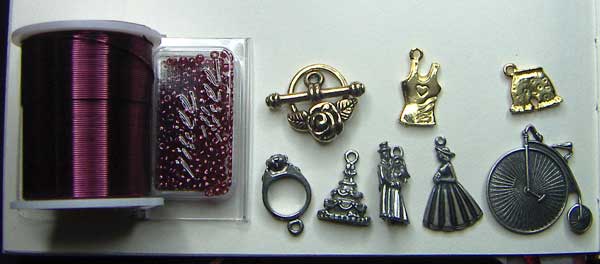
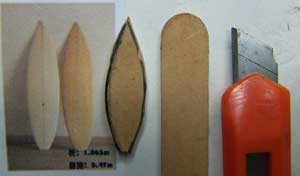 They did have a surf board which was on my list but it was bigger than I wanted…when I got home and thought about it, I decided that I could make one myself…I found an image of a surfboard, drew the shape onto an icypole stick and used a craft knife to cut the rough shape and then used an emery board to file it to shape…before painting it I will ring my brother tomorrow and ask him what colour and design I should paint it. They did have a surf board which was on my list but it was bigger than I wanted…when I got home and thought about it, I decided that I could make one myself…I found an image of a surfboard, drew the shape onto an icypole stick and used a craft knife to cut the rough shape and then used an emery board to file it to shape…before painting it I will ring my brother tomorrow and ask him what colour and design I should paint it.
|
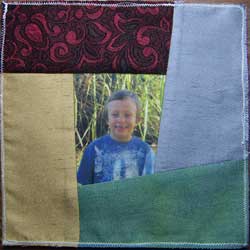
This is the fourth unit of 6 blocks…when I had finished and looked at the new join I realized that everything that I had embroidered on it had been taken from some element that was already on the blocks…
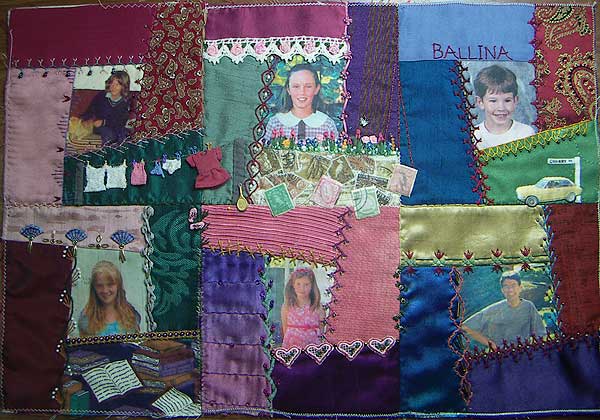
At the top the Stem Stitch lines extend and reflet the lines that are in the fabric.
In the middle I carried the Fly Stitch Stamp edge around the corner…
…and because I liked that, I carried the Bullion Knots around the corner too, which makes it look more integrated.
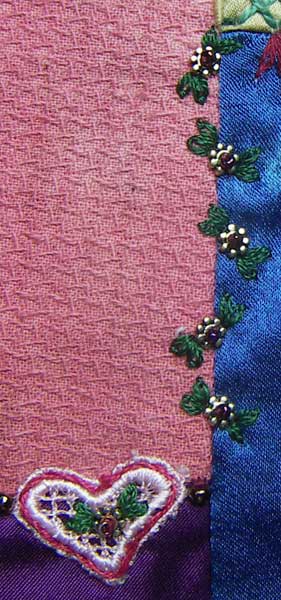
On the lower seam I used the flower beads with detached chain stitch leaves that I decorated the hearts with.
I have left the last section of the join until I have joined the next row on.
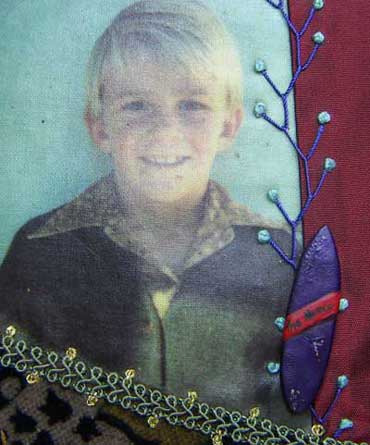
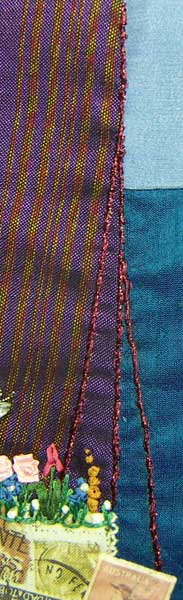
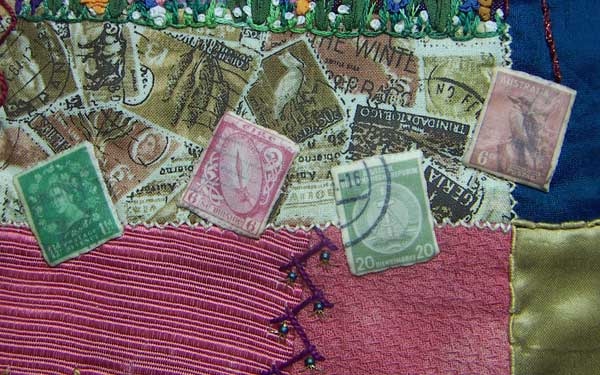
I also added additional stamps I used an English, an Irish, a German and an Australian Stamp which covers most of the ancestry.
|

 My first seam today Bullion Knots which is this weeks TAST Stitch but I haven’t put it in the subject as my doing the stitch because whilst it suits my purposes to have a non descript seam that just sinks into the background it hardly shows Bullion Knots off to there best advantage. My first seam today Bullion Knots which is this weeks TAST Stitch but I haven’t put it in the subject as my doing the stitch because whilst it suits my purposes to have a non descript seam that just sinks into the background it hardly shows Bullion Knots off to there best advantage.
You will notice that the first 4 knots in the row are a slightly different colour, It was the dark, dreary day that made it hard to match the colour…The need for a colour change was a slight miss judgement, For these short seams I am useing up my scraps of thread and forgot that Bullion Knots use quite a lot of thread and that I would need a longer length.
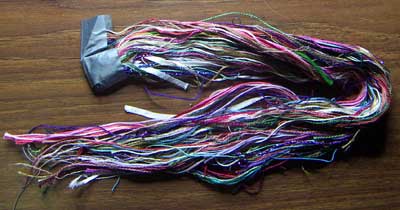
I was doing this while visiting Sharon this afternoon and she suggested that I blog how I keep my scraps of thread which is to stick one end onto sticky tape which holds them together so that I can see what I have, at least I can when the light is good enough to see properly lol.
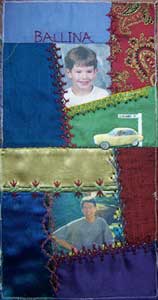
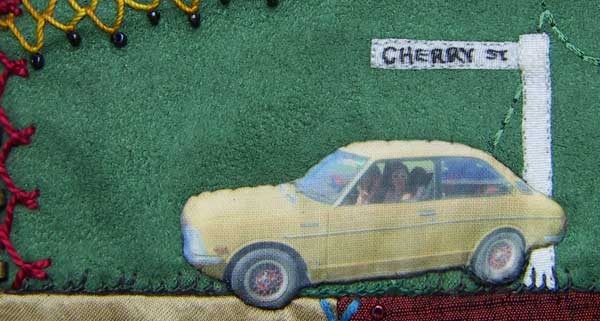
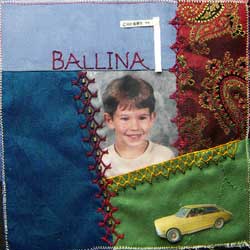
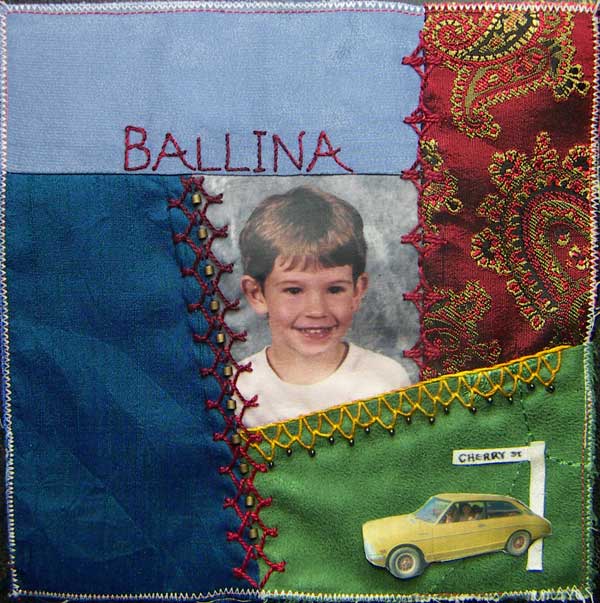
On the second part of this join I didPalestrina Stitch done in green thread with random lenth and oddly angle arms to replicate grass onto which I appliqued the Street sign and an image of one of my brothers cars which I printed onto T shirt transfer.
|
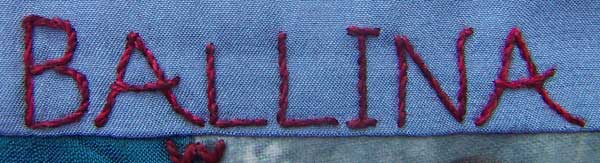
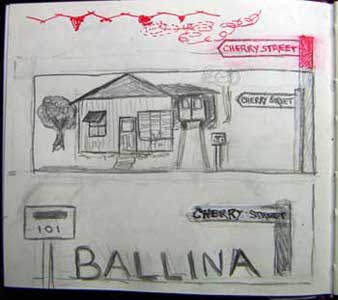 The top Drawing on the Visual Journal Page is what I wanted to put on this block but I can’t find the photo I wanted for it and I would drive myself mad if I tried to embroider it…I thought about what I wanted to say with the seam and figured it was the address which I could express in words so I then came up with the bottom design…I first used words as a seam treatment when I embroidered AUSTRALIA on my Box Top to celebrate Australia Day… The top Drawing on the Visual Journal Page is what I wanted to put on this block but I can’t find the photo I wanted for it and I would drive myself mad if I tried to embroider it…I thought about what I wanted to say with the seam and figured it was the address which I could express in words so I then came up with the bottom design…I first used words as a seam treatment when I embroidered AUSTRALIA on my Box Top to celebrate Australia Day…
I have made the street sign from a double layer of silk ribbon bonded together with steam-a-seam but
I haven’t stitched it on because I think that I like it better behind the car that I am going to put on the bottom of the block.
|
Today I was cold all day and I think it froze my brain as well…I know what I want to do on the current block but have been unsable to work out a way of achieving it, tonight I finally thought of something different to do but by the time I thought of it, it was to late to get it done.
As I have no stitching to show for the day I thought I would take the opportunity to answer a question that I have been asked a few times now that mum’s quilt is nearing completion…
The Question is am I going to have any diffuculty, be saddened when It comes time to give it away?
The Answer is NO…From the beggining I was making it to give away, I have always referred to it as Mum’s Quilt, besides which, Thanks to blogging, I have a detailed record and photos of it and I will always be able to go and visit it…But it is more than that because I will only be giving the finished quilt away, the process of making the quilt, the things I have learnt, the excitement of the challenge and the satisfaction if what I have acheived will always be with me.
|


