
I have pieced 2 more blocks, one is my newest sister in law the other is my niece.
Todays seam is another of my visual journal sketches of feather stitch the TAST week 7 Stitch.
 …It is 2 rows both worked from the bottom and the outside stitches of the feather stitch are shortened….I got the angles different to what I had drawn and it looks different to the sketch but the wonderful thing about designing stitches this way is that even when they don’t work as drawn they still work as a lovely seam treatment. …It is 2 rows both worked from the bottom and the outside stitches of the feather stitch are shortened….I got the angles different to what I had drawn and it looks different to the sketch but the wonderful thing about designing stitches this way is that even when they don’t work as drawn they still work as a lovely seam treatment.
|

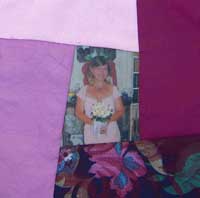
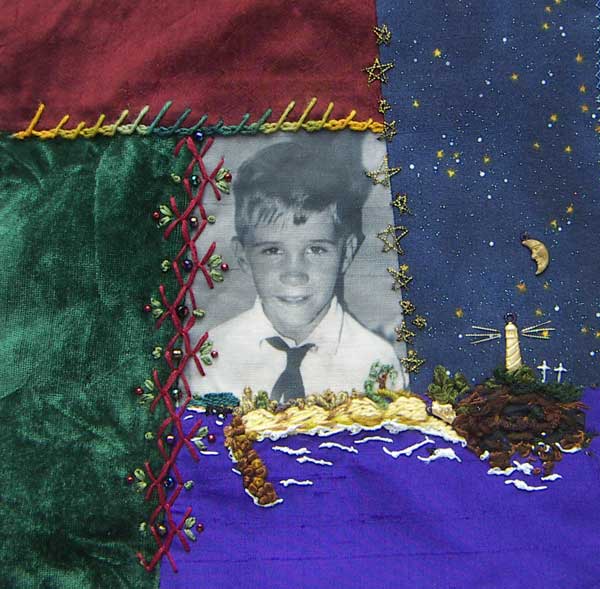
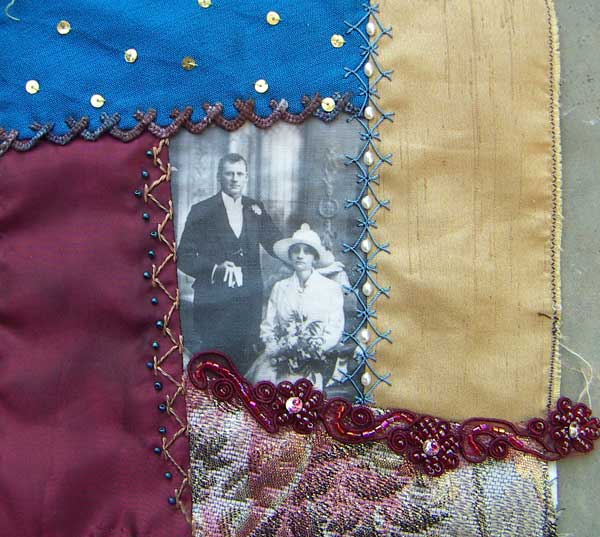
With images that I crop from a larger photo I can leave additional background to give room on the image for the space the embroidery takes but some photos like the one on this block have no extra background so I choose a seam treatment that goes on only one side of the seam so as not to cramp the image more than necessay…Detached chain stitch with beads is a lovley one sided arrangement.
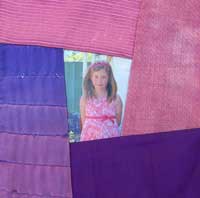
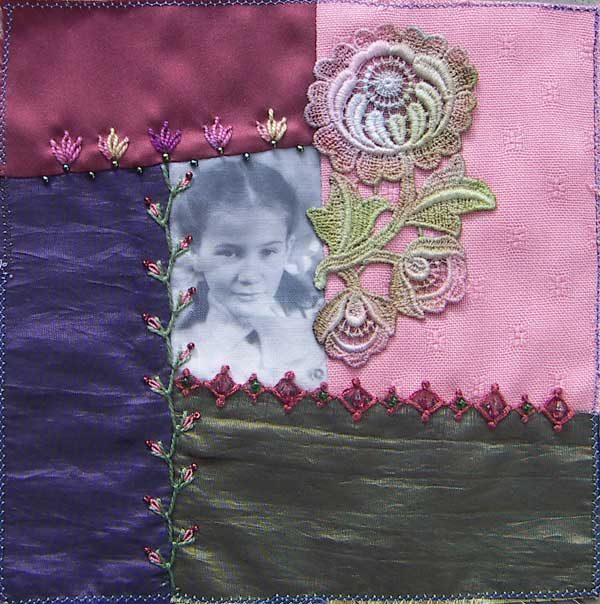
The image on this block is on the small side and little off centre which resulted in the pink patch being somewhat bigger than any other patch on the quilt, to bring it back into proportion I have chosen a pretty lace motif that covers half the patch.
This is the 15th finished block which is the half way point, 15 Blocks done and 15 Blocks to go.
|
 Firstly tonight I would like to thank everyone who has commented that they like seeing my Visual Journal Pages and Apologies to my Visual Journal teacher (Canberra TAFE 1997/8) with whom I argued that I couldn’t PLAN crazy quilts, they just happened as I stitched, I was wrong, I didn’t understand Visual Journals…In 2002 Sharon explained Visual Journals to me when she said “Your the back of an envelope girl” (I still use the backs of envelopes which I later glue into the visual journal)…I still can’t plan out a whole crazy quilt, and wouldn’t want to, but I can use a Visual Journal to plan/think/test ideas and now with blogging and the feedback that people like seeing the pages, I find that I am using it more often and more effectively, so thank you everyone. Firstly tonight I would like to thank everyone who has commented that they like seeing my Visual Journal Pages and Apologies to my Visual Journal teacher (Canberra TAFE 1997/8) with whom I argued that I couldn’t PLAN crazy quilts, they just happened as I stitched, I was wrong, I didn’t understand Visual Journals…In 2002 Sharon explained Visual Journals to me when she said “Your the back of an envelope girl” (I still use the backs of envelopes which I later glue into the visual journal)…I still can’t plan out a whole crazy quilt, and wouldn’t want to, but I can use a Visual Journal to plan/think/test ideas and now with blogging and the feedback that people like seeing the pages, I find that I am using it more often and more effectively, so thank you everyone.
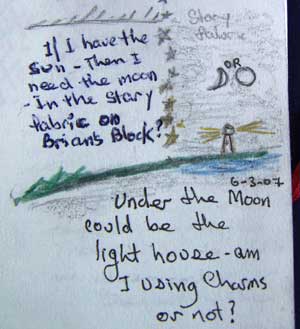
The image to the right is the first sketch/idea for tonights seam treatment…When I decided that I would use charms I expanded and expanded the idea in a new sketch…
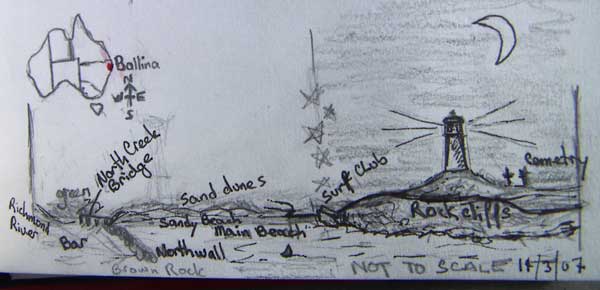
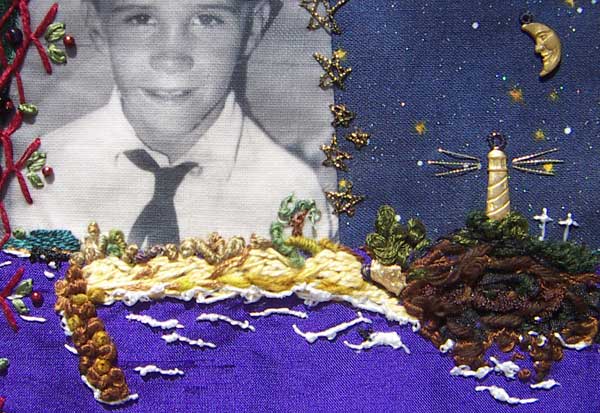
 Below is my embroidered interpretation, it is freeform, has a disjointed perspective and is not to scale, it non the less does in an impressionistic way depict about 1 kilometre of the coastline… the only lighthouse charm I had was the wrong design because Ballina light house is atop a grassy hill with a seperate light house keepers house, I solved that by using tin snips to cut the house and rocks from the bottom of the charm…The 2 white crosses in the cemetry are in memory of my father and the brother in the image on this block, we miss them greatly but I do find comfort knowing that they rest in peace only a couple of plots apart in the outer row on the seaward side of the cemetry with a million dollar view looking out over the beach to the Pacific Ocean. Below is my embroidered interpretation, it is freeform, has a disjointed perspective and is not to scale, it non the less does in an impressionistic way depict about 1 kilometre of the coastline… the only lighthouse charm I had was the wrong design because Ballina light house is atop a grassy hill with a seperate light house keepers house, I solved that by using tin snips to cut the house and rocks from the bottom of the charm…The 2 white crosses in the cemetry are in memory of my father and the brother in the image on this block, we miss them greatly but I do find comfort knowing that they rest in peace only a couple of plots apart in the outer row on the seaward side of the cemetry with a million dollar view looking out over the beach to the Pacific Ocean.
This seam finishs the 14th block for mum’s memory quilt.
|
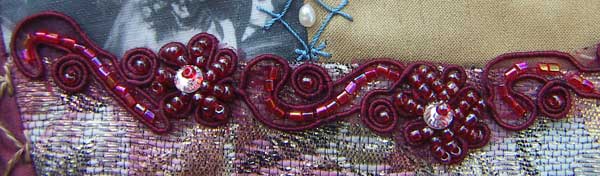
The Pink Brocade Fabric is very buzy and would have absorbed just about any embroidery I did on it, on a different type of buzy fabric I might have tried a thick dark thread but any thicker thread would have damaged this fabric which is loosly woven and includes metalic threads….I decided that a nice piece of burgundy braid would finish it nicely and when I went looking in my stash I found this beautiful piece of beaded braid which works just perfectly and finishes the 13th block for my mums memory quilt.
|


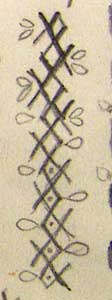
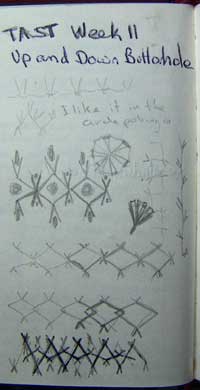 I love Up and Down Buttonhole Stitch, it is hard to draw but easy to stitch and I really like how the thread sort of curves between the stitches. I love Up and Down Buttonhole Stitch, it is hard to draw but easy to stitch and I really like how the thread sort of curves between the stitches.
The variation on the right is not unlike Feather Stitch and indeed when I went to the Contents Page of Sharon’s Stitch Dictionary to get the link I found that it is there as Up and Down Buttonhole Feathered.
The seam on the right is 2 rows of zig zagged Up and Down Buttonhole Stitch…I was going to put beads into the little V’s along the edges but decided that it looks good as it is and didn’t need any more beads.
|

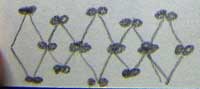
It was the big and small squares that I liked in the sketch I attempeted yesturday so today I took that part of the idea and executed it in Fly Stitch which I sealed with Colonial knot…The other thing that I did was to work the small squares first with 2 strands of a silk thread and then went back along with 4 strands of the thread for the big squares…Beads completed the seam treatment.
|

 Well this stitch did not go quite as I planned. I had planned to do the chevron variation sketch from the page in my visual journal for Chevron Stitch from TAST week 5 But when I pulled my first choice of thread through the red fabric it resisted and pulled threads in the fabric, I was doing it at a friends house and had only taken a limited number of threads and the only one fine enough to go through the eye of a smaller needle turned out to be a hard to manage rayon thread…I persisted to the end of the seam but the stitching ended up a bit wonky and if I had tried to mirror the stitch on the other side of the seam the wonks would have been exagerated so I decided that I would be best off finishing the seam simply with beads, I did give it a little interest by adding extra beads in the spaces. Well this stitch did not go quite as I planned. I had planned to do the chevron variation sketch from the page in my visual journal for Chevron Stitch from TAST week 5 But when I pulled my first choice of thread through the red fabric it resisted and pulled threads in the fabric, I was doing it at a friends house and had only taken a limited number of threads and the only one fine enough to go through the eye of a smaller needle turned out to be a hard to manage rayon thread…I persisted to the end of the seam but the stitching ended up a bit wonky and if I had tried to mirror the stitch on the other side of the seam the wonks would have been exagerated so I decided that I would be best off finishing the seam simply with beads, I did give it a little interest by adding extra beads in the spaces.
|
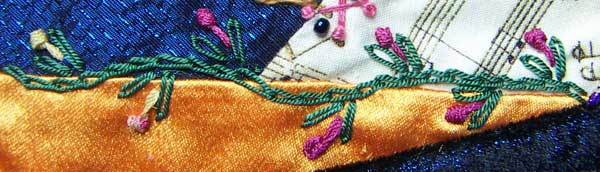
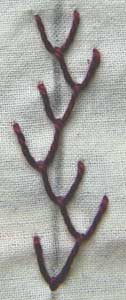
This seam is a wavy line of chain stitch with addition detached chain stitches for leaves and Pistol stitch done in a cotton floss thread.
|

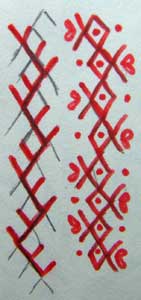  This seam treatment is one of the ideas for feather stitch in my visual journal forTAST week 7… This seam treatment is one of the ideas for feather stitch in my visual journal forTAST week 7…
When I looked at it again it had me confused as to how I had overlapped the stitches and I had to draw it again in 2 colours to figure it out.
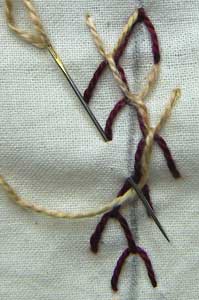
For best results choose a stranded thread so that where the second row overlapes the first row the threads will blend softly together and not be obviously double…I used pearl twist thread for my sample so you can see how the threads sit side by side so the overlaps sections are more visible.
Start by working a row of Double Feather Stitch then turn the work around so that the second row is worked in the opposite direction over the top of the first row…orientating the first stitch of the second row was a bit tricky and hopfully my samples illustrate clearly how to get that second row started…once the first stitch is in place the rest of the row is easy.
I like this seam treatment so much that I have also done it on my Box top.

|

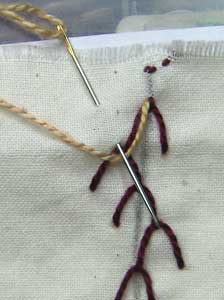
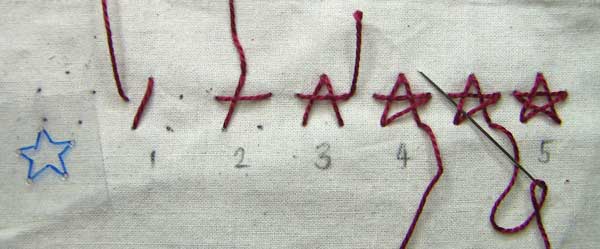
These stars are an extension of the stars on the fabric…The stars are formed from 5 Straight Stitches which I have demonstrated below, I have stitched mine free form because I like the different shapes formed by the randomly spaced points but when you are learning or if you want a regular shaped star you can make yourself a template by tracing a star with permanent ink pen on a piece of plastic and poke a whole through each point…Tip for a neat finish when doing the last stitch weave it over the first thread and under the second thread that it crosses.
|


