For the borders I needed to do a shopping trip…It was before I had stitched the blocks together so I pinned them to a piece of fabric and rolled them around a tube so that I could take them to the shop without loosing or crushing any of the blocks….My friend Lynne came with me to the fabric shop where we had fun auditioning fabrics for the borders and showing the blocks of to the staff who loved them and offered suggestions of what they liked as the borders…
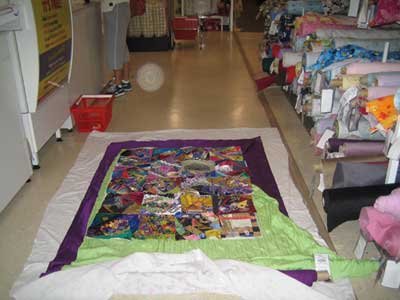
I thought that purple would be the colour for the borders but I never know what will be just right for any quilt until I lay the quilt next to them so we set about auditioning colours…we tried Purple, burgundy, some greens, blues and even a gold…Purple was the best of them all but even it looked a bit flat and dull and did nothing to enhance the blocks which are so colourfull, vibrant and full of life…How to give the border some zing?…I actually knew the answer as I posed the question, my sister had given it to me, when she first saw the blocks layed out, she suggested that a narrow border of green would look good, specifically the green that Valeri used in her block…a few more bolts of fabric were dragged out and she was right, The Purple with a narrow green border Frames the blocks as they deserve to be framed…somehow the narrow green border pulls the blocks together and makes them sing.
We had the quilt blocks on the shop counter when started auditioning the fabrics but when it became to cluttered with bolts of fabric we overflowed onto the floor.
To complete the Border on a crazy quilt you also need some lining/foundation fabric…having to line the border is a bit tedious but needs to be done because the border needs the extra substance of the lining to balance/support the thickness and weight of the crazy quilt blocks…without the extra support of the lining the borders are more likely to be dragged down by the weight of the crazy quilt blocks making them sag and look floppy…so it is worth taking the extra trouble to line the borders.
Normally to attach the border and lining I would place the border right sides together with the quilt edge and then place the lining on top of the border and pin the 3 layers together…If you have trouble keeping the raw edges of the 3 layers together you may prefer to stitch the border on with a slightly smaller seam allowance and then add the lining and stitch the seam again using the full 1/2 seam allowance.
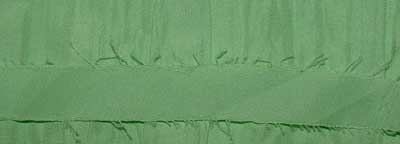
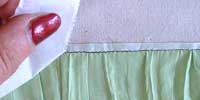
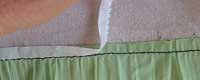
As I said that is what I would normally do but it is not what happened with this border…The Purple is Duponi Silk, a firm easy to sew fabric But the green is the stuff of nightmares…I chose it because it was the colour I wanted but the fabric itself is a polyester, its soft and flimsy, slippery and the crinkles in it make it impossible to cut a straight strip from it (I ended up drawing a thread to get a straight edge to work with)…and most problimatic of all, when I did an test iron, the crinkles ironed out…
I needed to be able to iron the borders but didn’t want to lose the crinkles….it took me a few days of thinking to work out how I could keep the crinkles and still be able to iron the borders while putting them on, turned out to be the lining that gave me my solution…Because this is not a common problem I considered not explaining the detail of what I did but when I got it finished I realized that it was probably a good technique for adding any narrow border because there is more chance of small slippages when you are trying to keep 3 raw edges lined up, small slippages are not noticeable to the eye on a wide border but a small slippage on 1/2 inch border is noticable.
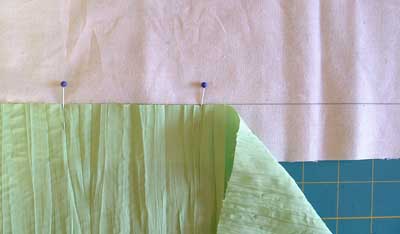
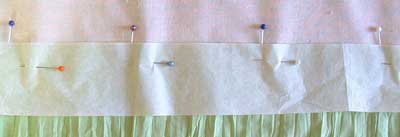
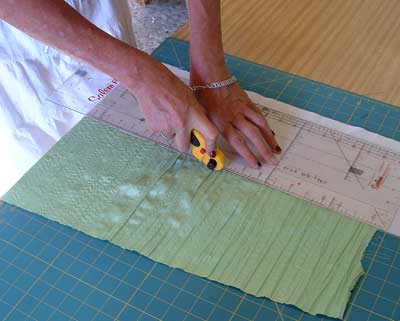
I cut strips of calico (muslin in USA) the width of the total border and marked a guide line 1 1/2 inches (width of the border plus seams) from the edge of the lining.

I placed the edge of the green fabric on the guide line and pinned it in place.
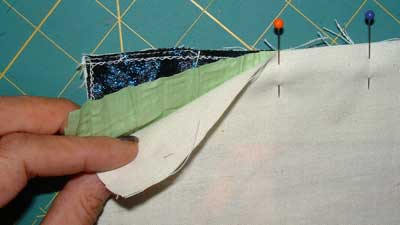
To prevent the machine from disturbing the crinkles I placed a piece of lunch wrap paper over the green fabric and pinned it in place…this step can be skipped when their are no crinkles in the fabric.
Stitch close to the raw edge of the border fabric.
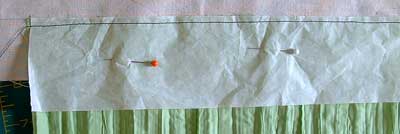
Turn the piece over and stitch close the the raw edge of the lining fabric.
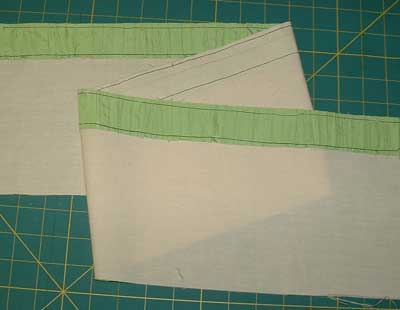
I then removed the paper…this is the same technique as I will use to remove the paper from the back of the blocks.
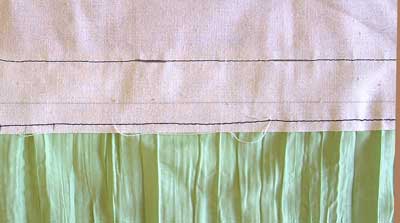
I cut the border fabric level with the raw edge of the lining…
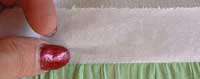
leaving me with a border strip ready to be stitched to the blocks.
I have the 2 side borders stitched on.

Next post Part 7 – More about attaching borders.
Leave a Reply
|


February 10th, 2006 at 5:58 am
It is wonderful to see how you go on with your quilt. I visit your blog often, because it is inspiration for me. Good luck.