Over the last few weeks I have shown you my miniature cloths line quilt and my visual journal sketches of ideas for this cloths line seam…Below is a 1″/12″ scale cloths line that I modeled on the one from home, I made it to display my miniature quilts at a quilting exhibition, the Amish quilt on the line is 4 1/2″ square.
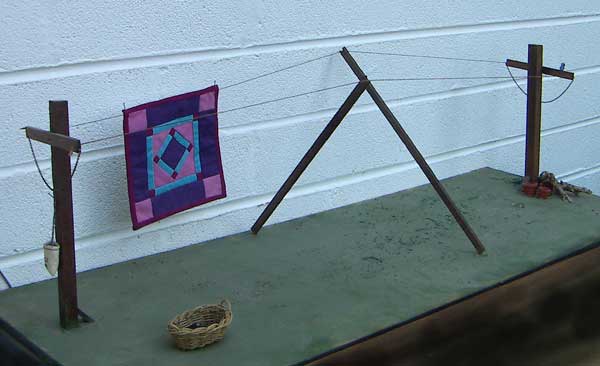
 I have also shown you the garments that I have knitted and sewn to go on the line. The photo on the right was the idea behind the dress, mum described the dresses as being like a T shirt with a skirt on the bottom…I have also chosen to use a pink singlet, a G string, and the Y Fronts. I have also shown you the garments that I have knitted and sewn to go on the line. The photo on the right was the idea behind the dress, mum described the dresses as being like a T shirt with a skirt on the bottom…I have also chosen to use a pink singlet, a G string, and the Y Fronts.
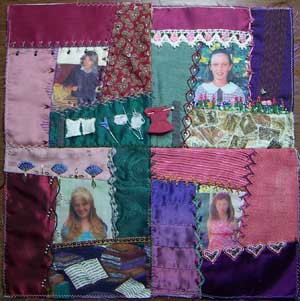
I have chosen the items for the line so that they represent the washing of the young and the old, boys and girls and from long ago and recent times…
some of the cloths are pegged with dolly pegs, some with coloured plastic pegs and some with cyclone pegs which a brother made from twisting plastic covered wire into shape, called cyclone pegs because they hold the washing on the line in very strong winds…I finished the scene by adding a tennis racket leaning on the post and and a pair of thongs in the foreground…I have uploaded a bigger image on flicka
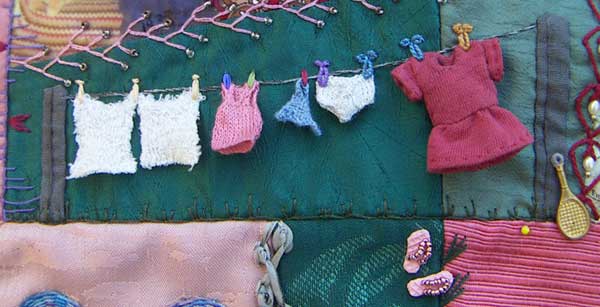
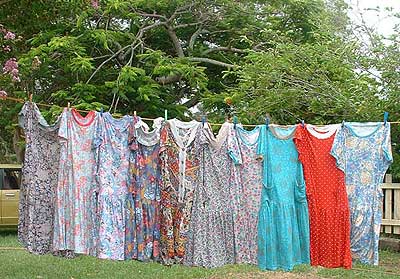
This seam is not the first quilt that the cloths line from home has inspired…a few years ago one end post which had rotted over the years snapped of at the ground when a nephew was swinging on the line…his younger sister started using the pole as a balance beam and joined by her sister they danced on it, I took some lovely photos of there dance and a friend used those photos to make the journal quilt below as a sample for her book A moment in time, available from Creative Living Media.
|
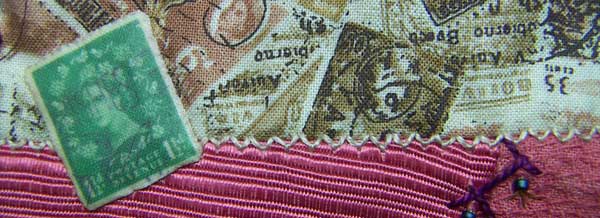
On this seam I did tiny Fly Stitches to mimic the perferations on the edge of stamps…I have also used t shirt transfer to make the extra stamp, I will probably add more stamps to this seam but will wait until I have stitched the seam at the side.
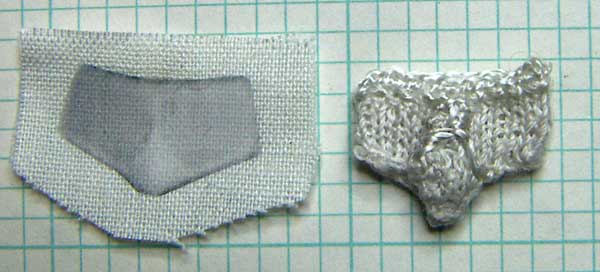
 The plan was to use T Shirt transfer for the Y Fronts on the line but I have been unable to get a clear transfer and then today when I assembled all the garments and took a good look the T shirt transfer looked flat and out of place against all the 3 dimensional garments…so what else could I do but knit them…I used a single strand of stranded embroidery thread for the knitting and a white rayon thread to define the lines at the front and to work 2 rows of buttonhole stitch around the top for the elastic…and I won’t tell you that there is an opening in the Y Front. The plan was to use T Shirt transfer for the Y Fronts on the line but I have been unable to get a clear transfer and then today when I assembled all the garments and took a good look the T shirt transfer looked flat and out of place against all the 3 dimensional garments…so what else could I do but knit them…I used a single strand of stranded embroidery thread for the knitting and a white rayon thread to define the lines at the front and to work 2 rows of buttonhole stitch around the top for the elastic…and I won’t tell you that there is an opening in the Y Front.
|
 This morning I went shopping for the Border Fabrics for mum’s quilt so that I could take photos and have swatches to put in with my entry form for the Canberra Quilters Exhibition…Entering it in the Exhibition also means that the 4th August is my deadline for finishing…That gives me 7 weeks This morning I went shopping for the Border Fabrics for mum’s quilt so that I could take photos and have swatches to put in with my entry form for the Canberra Quilters Exhibition…Entering it in the Exhibition also means that the 4th August is my deadline for finishing…That gives me 7 weeks
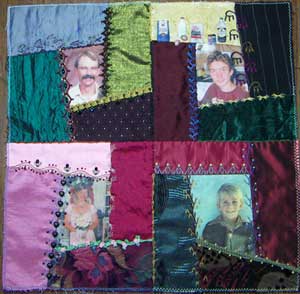
In the middle of this block you can see the start of the clothsline seam scene…I am not fitting nearly as much washing as I thought I would on the cloths line, I have narrowed down the garments I want on it but there is to much white…What can I change, the singlet is the most obvious because they do come in colours but Dad’s were always white…
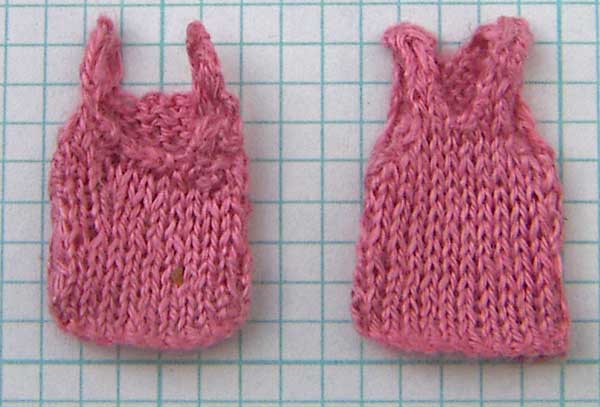
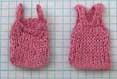 then I remembered that they weren’t always white, the occassional one was Pink from going through the wash with something red, so a pink singlet it is…I have taken artistic licence and made it a darker pink to get the added contrast against the white. then I remembered that they weren’t always white, the occassional one was Pink from going through the wash with something red, so a pink singlet it is…I have taken artistic licence and made it a darker pink to get the added contrast against the white.
I used a single strand of DMC stranded cotton thread and the tiny sock knitting needles and I knitted a singlet, I knitted the back and the front at the same time so that I didn’t have to worry about counting stitchs…I got myself confused with how to do the neck and armholes and I had dropped stitches and had all sorts of bother, despite how I cobbled the top together it is really cute but I knew that I could do better, so I knitted another one…I did have to concentrate hard while doing the neck and armholes but I am thrilled with how well my second attemp worked.
|
I got quite a few things done for the quilt today but when it came to photographing what I did I only had one short seam that was finished ready to be photographed.
It is another seam of double knot stitch but this time just to make it a little different I flip flopped the knots from one side of the seam to the other…

|
This is the second set of 4 blocks and again I split the seam across the middle into 3 sections.
The first section is more Portuguese Stem Stitch, which has become a favourite stitch, I find it very rythmic and soothing to work.

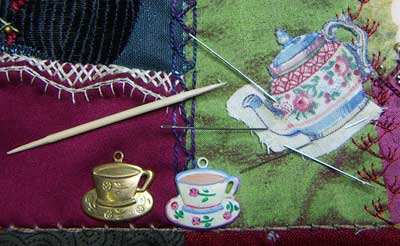 The middle section is double knot stitch above which I added a cuppa tea scene…The Tea Pot is cut from a cotton print fabric and put on with needle turn applique…I put the tooth pick in the picture to remind myself to tell you what a wonderful tool it is for needle turn applique, I have never enjoyed doing needle turn applique until a friend showed me recently how to do it using a tooth pick and it makes all the difference, when turning the seam allowance under with the toothpick the wood grips the fabric and makes it possible to make the fine adjustments required for needle turn applique….I painted the cup charm using acrylic model paints. The middle section is double knot stitch above which I added a cuppa tea scene…The Tea Pot is cut from a cotton print fabric and put on with needle turn applique…I put the tooth pick in the picture to remind myself to tell you what a wonderful tool it is for needle turn applique, I have never enjoyed doing needle turn applique until a friend showed me recently how to do it using a tooth pick and it makes all the difference, when turning the seam allowance under with the toothpick the wood grips the fabric and makes it possible to make the fine adjustments required for needle turn applique….I painted the cup charm using acrylic model paints.

The third seam is Split Stitch done with silk ribbon.

|
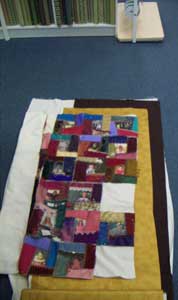
 I have now joined 3 groups of 4 blocks but only got the embroidery finished on one. I have now joined 3 groups of 4 blocks but only got the embroidery finished on one.
Below are the 3 stitches that I did on the join running across.

Coral Stitch
Double knot stitch

Scroll Stitch with narrow (1 mm) silk ribbon
|

Portuguese Stem Stitch is a satisfying stitch to work, it is only a thin line but with a thick thread it has a lovely texture.
|

Spanish knotted Feather Stitch

Closed Feather Stitch
|

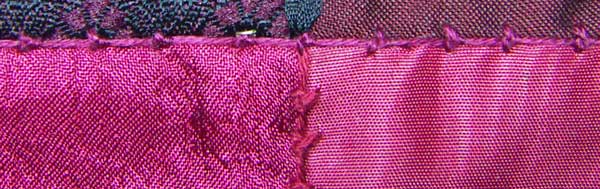
I am still feeling my way with the embroidery on the seams that join these blocks, the ones I have done have had similar colours both sides so it was easy to find a thread colour that blended into both, this join has different colours both sides and I didn’t know which colour to go with but Chequered chain stitch, from the Anchor book, solved the problem because I could just use both colours.
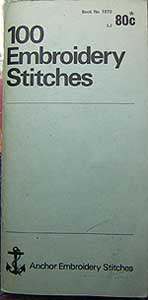
I was asked about the ‘Anchor 100 embroidery Stitches’ book…The copy I have was printed in Australia and purchased in the 1980’s…I have photographed the details of the company that published it and the cover.

|
 The green stitch on the left is 3 prong up and down buttonhole stitch done on a slope. The green stitch on the left is 3 prong up and down buttonhole stitch done on a slope.
the stitch on the right side is wheatear stitch

This stitchon the left is double knot stitch which I found on page 29 of the Anchor 100 Embroidery stitches book…the stitch on the right is cable chain stitch from page 26 of the Anchor book.
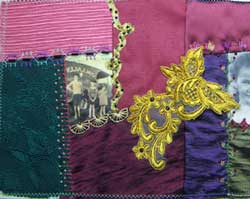
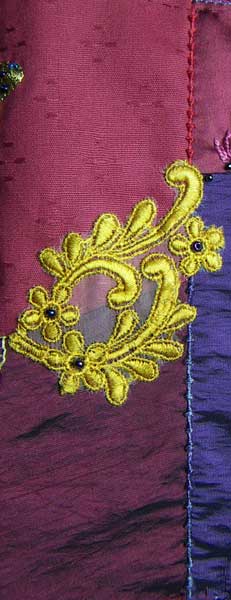
I intended this yellow motif to go over onto the next block but it went to far over…umm I cut half of it off but then it didn’t go close enough to the seam so I unpicked the other half and replaced it so that it just covered the join seam…the stitch that I did above and below is double knot stitch.
|


