Annies Crazy World


  • About

    This is Annie Whitsed's Crazy World a world where I stitch the joys and chaos of life into beautifull crazy quilts. email annie@loopylace.com
Locations of visitors to this page Subscribe with Bloglines
 
Day 32 fringe the edge of fabrics July 22nd, 2006

Fringing the edge of fabrics

The fabric patch in this detail is a loosely woven fabric, I took advantage of how easy threads are to pull out of loosely woven fabrics and created a fringe at the edge of the patch.

I started by stitching the fabric flat about 3/4inch from the edge and covered the machine stitching with a row of chain stitch I then pulled the threads out back to the stitching line.

To finish the fringe I divided the threads into bundles and used a matching thread to stitch them onto the background.

I further embellished this patch with threads laid in a grid on top of the fabric and held in place with a small cross stitch at each intersection.

Day 31 Prairie Points July 21st, 2006

Praire Points

In this Detail you can see

A Tassel Stitch which I will demo in the next few days as part of another detail.

Another way to surround a Shi Sha.

The seam to the right is a row of Herringbone Stitch that I made wider and narrower as I worked along the seam, I followed the curve of the Herringbone with a row of Blanket Stitch and finished with a row of Stem Stitch in close to the Blanket Stitch to give it more visual weight.

The main focus of todays detail which are the Prairie Points..One a basic Prairie Point which I have further embellished with beads and one that has a flash of a second colour.

Praire Points how to a

For the basic Prairie Point start with a 2 inch square of a fabric that will hold a crease when you iron it…Iron the square in half and turn the corners down so that the folds meet in the middle and all the raw edges line up…Insert Prairie Points in the seams while you are piecing the block.

Praire Points how to b

For the Prairie Point with the flash of a second colour, stitch 2 pieces of fabric together and cut the square so that One piece is bigger than the other so that when you fold the square in half a little of one colour shows along the folded edge….Iron the seam towards the side of the smaller fabric patch.

Praire Points how to 3

Place the folded square on the ironing board with the 2 coloured side facing down, when you turn the corners down the second colour comes to the front.

Day 30 Thursday July 20th, 2006

garden path flowers

Today a friend came over, with her gardening tools and dragged me out into the garden to tackle my overgrown backyard…we spent a few hours out there and took 2 boot fulls to the tip…I seldom spend time outdoors during winter but today was a lovely sunny day and although I am exhausted I feels good to have ddone so much…to celebrate my day in the garden I though tonights detail should be a detail of some of the flowers on the Garden Path…A path like this would be a good sampler of every flower that you learn to do.

More garden path flowers

Day 29 Detail Lace Fan July 19th, 2006

Last nights pearl spider is on a small piece that I called Garden Path because I was experimenting with different embroidered flowers and it ended up with a path of tiny flowers wondering around the block…I would like to say you can see it in the Gallery on my website, rather I have to say if you
take a look at it on my website you will see how much my photography/image manipulation skills and technology have improved in the 8 odd years since I set up my Gallery, Cream on Cream is particularly hard to photograph but I am sure that I can do better now and think that I should include upgrading the older images in the gallery as part of my 100 details…Garden Path is the piece that I used as the background on my bio page and the side bar for the other pages of my website.

Lace Fan

Tonights detail is also on Garden Path, It is a Lace Fan made from a few inches of Broderie Anglaise Lace.

Turn a small hem on the raw edge side with a gathering stitch, pull gathering tightly and secure thread.

Turn the ends under and stitch the fan to the background.

Finish with a Ribbon and a few beads.

Day 28 detail July 18th, 2006

Ooops spider

Last night I mentioned my mutant spiders being the first crazy spiders that I created…today I thought it would be fun to go back and show you some of the mutants.

On my second quilt I found real mutant spiders the spider pictured right that was half evolved, Stitched in 1993 (when I looked at a spider to see its detail) she has one bead bigger than the other and the legs all come out of one bead, only thing is that it is the wrong bead…the spider on the next block I made looks like a spider very similar to the ones I create today.

Below are a couple of pre 1993 mutant spiders and their webs.

Pearl spider
pearl spiders web

mutant ant spider

This one looks more like an ant than a spider.

Ant spiders web

Day 27 – How to stitch a Spider Web July 17th, 2006

Spider and web

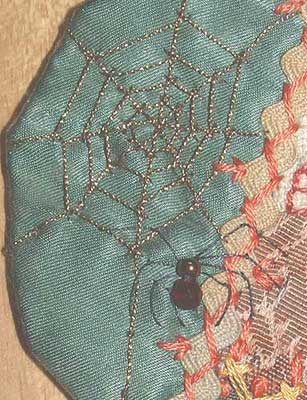
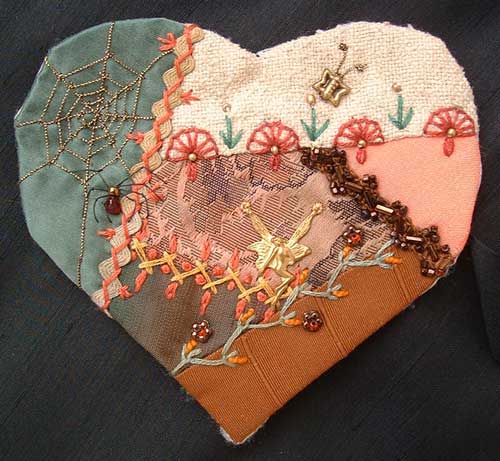
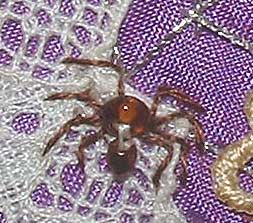
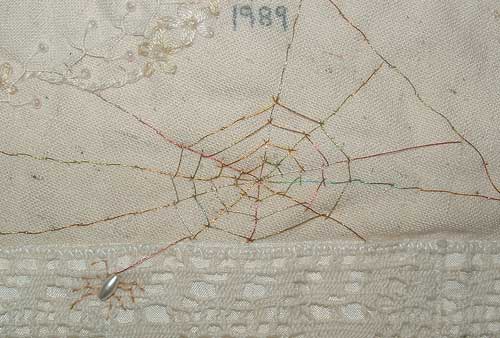
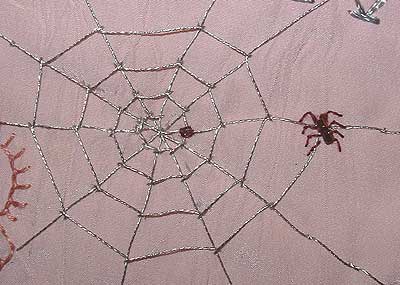
Todays detail is a spider and her web…below are instructions for stitching a spiders web and spider for yourself.

how to start a spider web

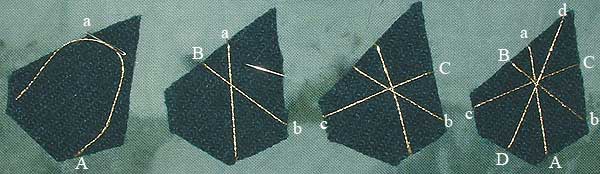
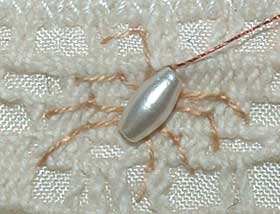
Start by laying down the spokes of the web, follow the above images bringing the needle up at the capital letters and down at the corresponding lower case letter…To finish bring the needle up at the centre and take a tiny stitch over all the threads to bring them together.

Filling in the web

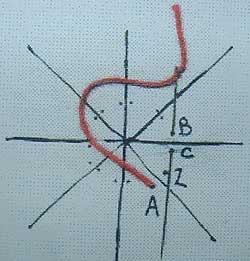
A short distance from the centre bring the needle up at A…then put the needle down at B and up at C…Repeat B C for each spoke untill you get back to the first spoke where you go down at Z…When stitching the web ALWAYS keep the loop of the thread towards the centre of the web.

the spider web

Repeat ABCZ in concentric circles around the centre of the web.

the spider

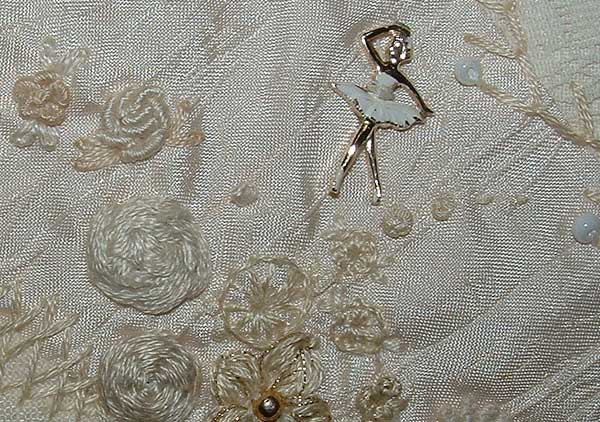
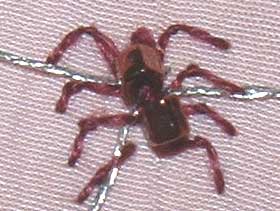
There are as many different crazy quilt spiders as there are spiders in Nature…Here is just one method of creating a spider.

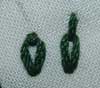
Choose 2 Beads, one a little smaller than the other and stitch them side by side.

The legs are Fly Stitch…Bring the needle up next to the smaller bead, Put the needle down at the end point of the leg and bring the needle up at the bend in the leg with the thread under the needle, take a small stitch over the thread to seal the stitch….Repeat for each leg, 4 on each side.

Don’t stress at trying to get the legs even, as long as they have a body, thorax and legs they mostly look like spiders, those that don’t still look like bugs, which are often found in spider webs anyway. The first spiders I stitched where somewhat odd looking and I call them my Mutant spiders.

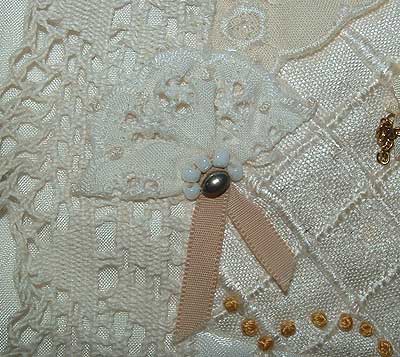
Details 24 to 27 are from this heart, I have stitched it wrong sides together with interfaceing which I cut a slit in so that I could turn the heart right sides out, it is now ready to applique onto my boxtop.

crazy quilted heart

Day 26 Sunday July 16th, 2006

feather stitch Variation

This seam is a feather Stitch Variation…as you work the seam for each stitch add an extra stitch close to it…the gold stem/buds that look like a bullion stitch in the photo are actually a straight stitch using size 3 cotton perle thread which is a thick bulky thread…I have added a flower bead to only some of the stems.

Below is a sampler showing other ways that Feather Stitch can be varied by changing elements of the stitch such as:

The type/thickness of thread.

The size of the stitch.

The spacing of the stitches.

The angle of the needle.

feather stitch sampler

Day 25 Saturday July 15th, 2006

herringbone, detached chain and colonial knots

This seam is a simple arrangement of of Herringbone stitch, Colonial Knots and Detached ChainStitch.

Detached Chain Stitch 
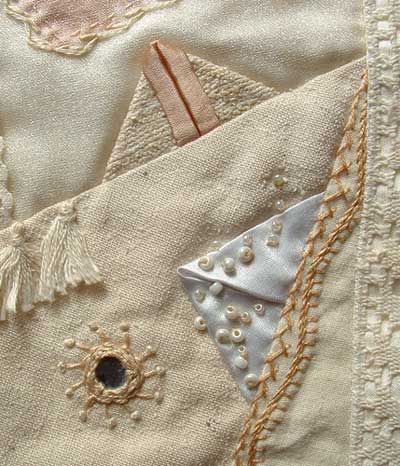
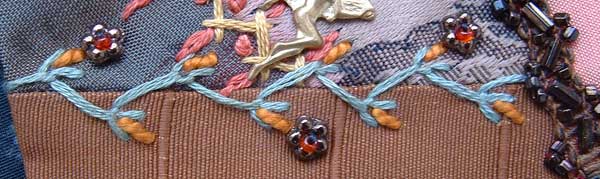
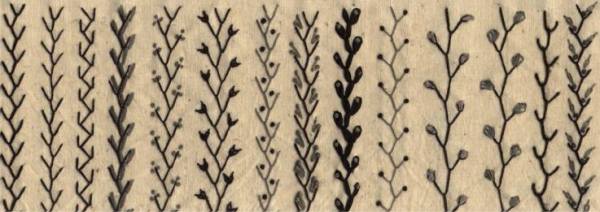
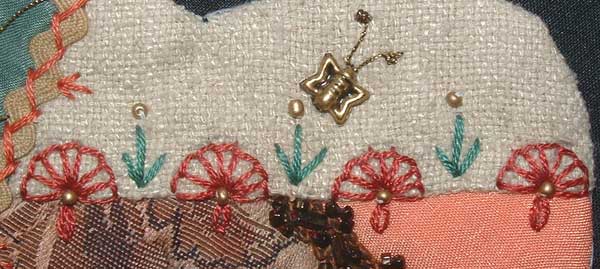
I have changed the look of the Detached Chain Stitch by using a long stitch instead of a short stitch to fasten the loop.

Day 24 Fan Friday July 14th, 2006

Buttonhole Fans

Sharon’s day 18 detail featured buttonhole wheels and this detail is another way to use them…adding a Detached Chain and a seed bead Converts the wheels into dainty Fans, I interspersed them with a simple flower of 3 straight stitches and a bead….The butterfly is one of the butterfly beads that I used to tie the All that Jazz #2 Quilt.

The seam to the left is Herringbone Stitch worked over rick rack braid that has been further embellished with 3 straight stitchs on ever 3rd wave of the rick rack braid.

Note links to How to do the stitch go to Sharon’s Stitch Dictionary with her permission.

Day 23 Thursday July 13th, 2006

House in the Snow
House in the Pines

Tonights detail is 2 examples of how I have used a few stitches to create different scenes around the same iron on Motif…Above I have used a smear of glitter paint together with a few beads and star sequins to give the little house a stary sky background.

In the second detail I have added a path up to the house, pine trees either side and a couple of sequin stars in the sky to complete the picture.

The second detail is on the tow of a Christmas Stocking, the image below is the Big image of this stocking which is 3 inchs high…I made several of them as christmas tree decorations for my kids and their cousins, this one is my Son’s.

3 inch high Christmas Stocking