I made the pink thumb pin cushion at Nowra Crazy Quilt Retreat and have had a couple of requests for the pattern, today I have got around to writing the instructions… I had to remember/work out how to make it and got the size of the square wrong on my first attempt, the gold one, and it is on the tight fit side…
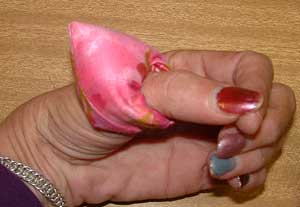 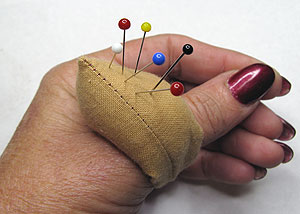
I also realized that to illustrate it clearly I needed a fabric with a right and wrong side, that is when I chose the fabric that matches the work box I showed last night.
To make your own start with a 4 inch square of an even weave fabric.
Turn one corner to the wrong side as per the photo.
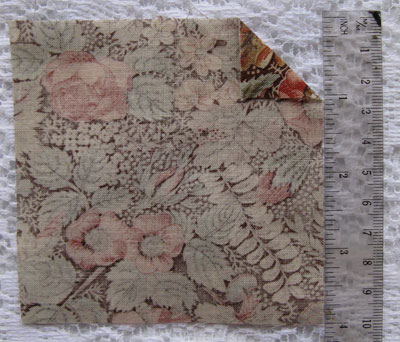
Fold the square, right sides together, diagonally with the turned under corner at one end.
Starting at the turned under corner, use a 1/4 inch seam to stitch 2 edges of the triangle, stopping a 1/2 inch before the end.
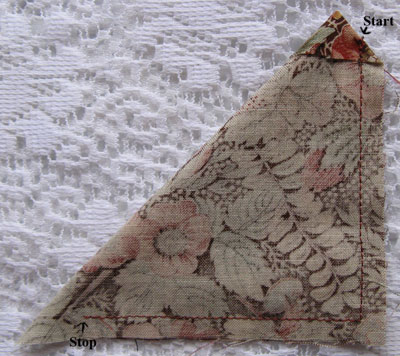
Clip the point to reduce bulk.
In the middle of the fold cut a 1 inch slit along the fold.
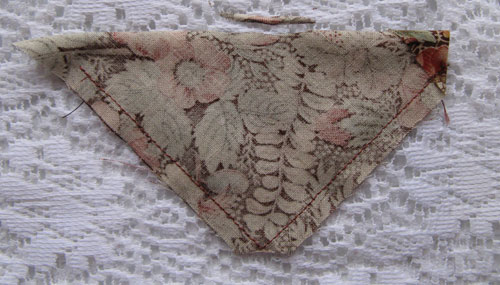
Turn right side out through the hole, pushing the unturned corner all the way through.
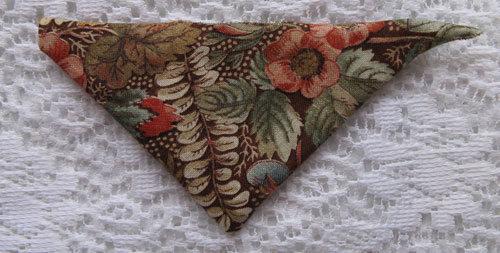
Stuff the central portion until it is firm.
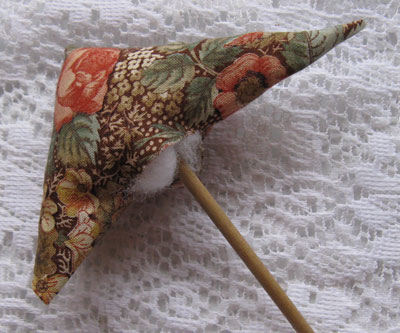
Turn the edges of the slit in and whip stitch to close the hole… This is a little finddly and you may find that it puckers a bit as you stith it, Don’t stress if is not real neat as this seam is on the inside of the finished ring.
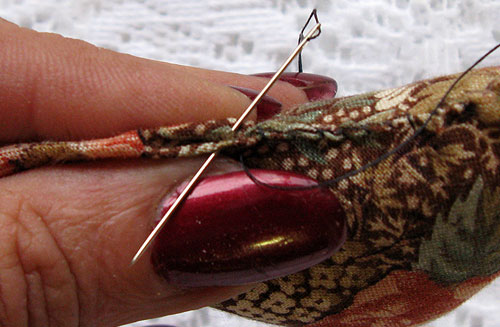
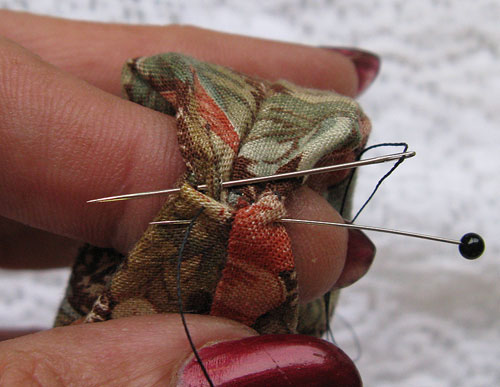
Wrap the long points around your thumb and use a pin to mark the overlap.
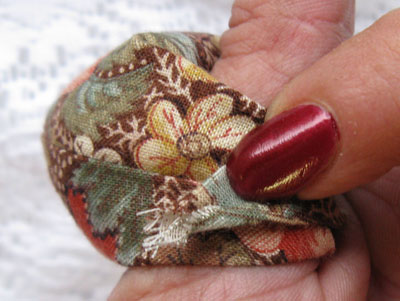
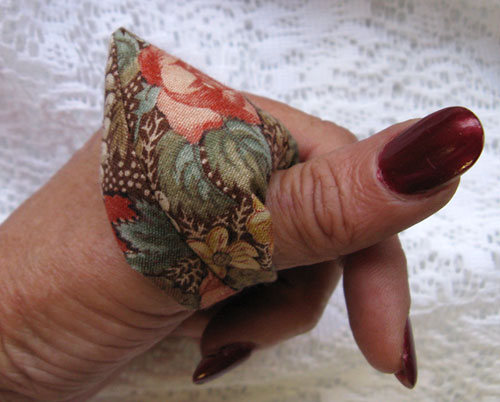
Poke the raw point into the turned under corner pin and test size…adjust until it is a comfortable fit…Stitch the ends together.
Happy Stitching.
Leave a Reply
|


March 22nd, 2012 at 2:58 am
[…] Thumb Pincushion […]
April 4th, 2012 at 9:31 pm
A wonderful idea and very clear tutorial. Thank you.
April 6th, 2012 at 3:23 pm
Fantastic just made one and will be making more, thanks again.
April 12th, 2012 at 6:22 am
i’m from belgium, and i like it… it never leaves my thumb xxx
July 1st, 2012 at 10:55 am
[…] Thumb Pin Cushions […]
August 3rd, 2012 at 10:24 am
Thank you for the tut! I have worn mine out and didn’t know how to replace it. You are so nice – the tut is very professional. Love your entire site. bg
August 3rd, 2012 at 6:38 pm
A great tutorial. I’m a beader and sewer. I find this works wonderful when I’m working with a fine needle while stringing beads. I’m no longer searching my work space to find the needle after setting it down while I work with the beads. I’m now able to hold both the beads and needle in one hand as I use the other for my beads. Pass this on to all your beading friends.
September 25th, 2012 at 6:30 am
Made my first one really cute, and handy
December 7th, 2012 at 2:24 am
Just found this on Pinterest and am excited to make one for my sister, who makes costumes for a theater company. She will enjoy this handy little pincushion.
January 2nd, 2013 at 9:31 pm
thank you for your fab tutorial, just made one and its brilliant!
January 3rd, 2013 at 5:01 am
I love this. Thanks so much!
January 27th, 2013 at 11:36 pm
Thanks! I can’t wait to try it!
March 1st, 2013 at 4:37 pm
Hi! I LOVE this! I made one tonight for my Pastor’s wife in mere minutes with a scrap of leftover fabric. (Mine’s next!) Thanks for the tutorial! 🙂
May 12th, 2013 at 11:43 am
Just talking about this type of pincushion at my guild’s quilt show today with one of the older menbers and then I found it here made one great tutorial
June 21st, 2013 at 2:08 am
Love this pincushion! Definitely making one (or two!) Thanks for sharing.
August 22nd, 2013 at 6:22 am
For stuffing, you can use 0000 steel wool . . or an SOS scouring pad.
Either one sharpens your needles as you insert the pins/needles. Polyester fiberfill tends to dull.
August 25th, 2013 at 10:43 am
Thank you so much for this tutorial! It is such a fabulous idea and so easy to make! Because I could definitely already feel the sticks in my thumb, (yeah, I’m pretty accident prone!) I made one littler
alteration…before slip stitching the one inch opening closed, I stuck a penny in it. Not only did it help to hold back the stuffing while stitching closed, but it will also sit on top of the thumb and keep me from sticking pins in myself! Simple solution!!
December 11th, 2013 at 12:29 pm
Hi,
Thank you for your lovely tutorial. I am going to try it.
Maya
July 14th, 2014 at 10:55 pm
Tutorial still popular as you can see by the date of my comment. Thanks, was in need for this handy tool.
November 5th, 2014 at 1:59 pm
Just came across your article on Pinterest. I’m glad I did and I love your thumb Pin cushion. I’m going to make a few to give to my friends at our sewing group and one for myself. Many thanks for sharing.
Jenny Anderson
January 21st, 2015 at 10:33 pm
This little gem is so clever! Thanks for sharing!
February 17th, 2015 at 7:37 am
I saw where someone asked what to fill pincushion with, my grandmother, mother and I have always used sawdust. I usually use the light weight pillow ticking for the cover as it is very tightly woven. Also for the larger cushions I have also used light woven canvas. Very durable and lasts along time. In fact I still use the canvas pincushion my mother made me about 50 yes ago.
April 3rd, 2015 at 2:19 pm
glad i was able to find this pattern. Had a little trouble making it w/4″ sq. working w/5″ sq worked well. What a handy little piece of sewing equip. I love it!!
May 10th, 2015 at 1:23 am
Great tutorial! I have the exact printed fabric you chose. Bought it over 23 years ago and still have more than enough to make your cute pin cushion! Thank you!
May 10th, 2015 at 5:09 pm
Thanks very much
July 4th, 2015 at 10:47 am
Annie, Thanks for the pattern. I was given one of these about 20 years ago and lost it, so sad because it was so handy. Now I can make some – for me and my friends. Thanks again.
December 27th, 2015 at 10:41 pm
Brilliant just made one. Thanks
January 9th, 2016 at 3:29 am
These are best stuffed with sawdust. I used to make these and sell them on my craft stall. You’ll find that you don’t stab yourself quite so easily. It’s after the style of the Victorian pincushions that were mostly made out of velvet and decorated in the most beautiful way
February 21st, 2016 at 8:02 pm
I cut out the squares and took them to a meeting and sat and sowed them, took them home and turned them inside out and stuffed them, sowed up whole at the top and joined them, did find it fiddly but persevered and WOW it worked
April 24th, 2016 at 6:01 am
thank you for pattern, made them years ago but forgot how useful they are
July 30th, 2016 at 10:16 am
Your thumb pin cushion is such a cute idea. Thank you for the tutorial. I have 5 sisters and we are always looking for unique “just because” gifts. This one for sure is going on my list.