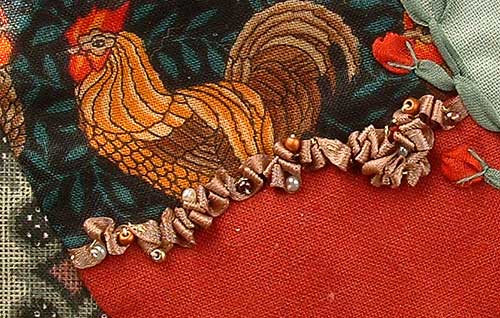
Ruched Ribbon..I used a narrow satin ribbon, gathered it reasonably tightly and stitched it place with seed beads, scrunching it together more at one end.
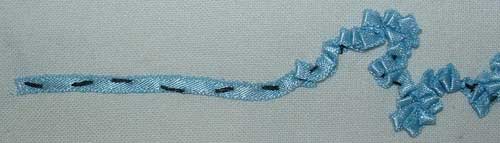
To Ruch ribbon run a gathering thread along the length of the ribbon and gather the ribbon to disired density or to fit the seam it is to cover.
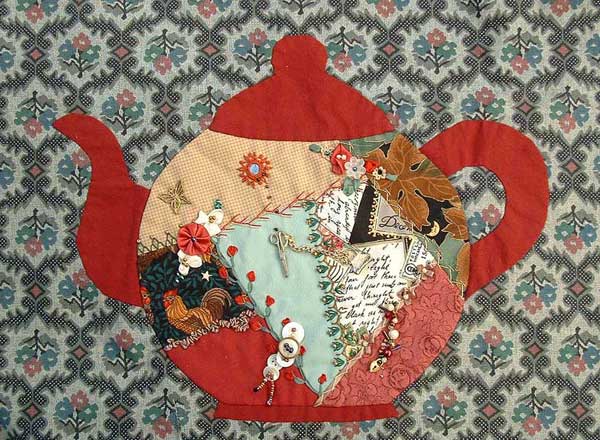
You will have guessed that details 5 to 11 are from the same project, I have now detailed all the embellishments and below is the Project that they are all on so that you can see how the individual embellishments work together…I have put a Large image on flicka.
Leave a Reply
|


July 2nd, 2006 at 9:58 am
Hi Annie–
This is perfect– the whole picture! I have a teapot pattern from the new Fons and Porter quilt magazine for applique and I was saving it for using with crazy quilting techniques. This is so helpful and timely for me.
Thanks again 🙂
July 2nd, 2006 at 4:55 pm
Hi Annie 🙂
I had to come back again and look some more. I really like this alot.
I was particularly glad to see your method of ruching. I thought it would have to be so much harder. I had held off doing it. When I saw this, I right away went looking for some ribbon to ruche for a current project.. I like how easy and adjustable it looks to put the beads in the ruching as well.
I have to say, you have some good ways to manipulate ribbons.
I have to say thanks again, it is such a treat.
July 3rd, 2006 at 11:37 am
Annie,
I am so happy to see the project you have been teasing us with. I’ve been loving your details, and couldn’t help but notice the beautiful fabrics you were using and how they all went together so well. I had been hoping you would show us the whole picture, and WOW, it is really lovely. What will you make out of it?
July 4th, 2006 at 1:51 am
Hi Winnie, what will I make out of it?…Umm I think that I did intended to frame it but have never got around to it as its main purpose I made it was a sample for a crazy quilt class I was teaching at a quilting retreat that had a theme of Teapots.
July 4th, 2006 at 10:33 pm
I like it … and it looks like Sharon and Jerry’s “real teapot” that they have both just written about in their blogs ( http://inaminuteago.com/blog/index.php/archives/2006/07/02/teapots-and-coptic-textiles/ and http://lostbiro.com/blog/?p=248 )
hmmm … just been doing a bit of thinking (for 30 seconds) and I came up with an idea for it – make a pile of smaller blocks to go around it (maybe with cup shapes on them?) and hand them around at the Canberra Crazy retreat, and/or any other places you get together with crazy quilting friends, and get people to add embelishments – then you can put the cup blocks around the teapot one and call it “Tea with friends around” and/or you could put a border around it, with a whole pile of “Suffolk puffs” on it and call it “Tea and biscuits” … or something like that …
Andrea
… thinking that maybe I might try and do something like that … (maybe I will just do a teapot block and hand it around at the retreat for people to add bits to … that idea could look good in tea and coffee coloured fabric and thread 😉
July 7th, 2006 at 4:38 pm
I love your teapot. 🙂
January 3rd, 2007 at 3:44 pm
I love your small crazy quilting, will help me to understand method of crazy quilting, love your site, thank you
November 15th, 2010 at 12:02 am
I would sew it into a tea cozy. Iam a tea drinker. Its lovely. I may have to keep my eyes opened for a teapot pattern.