With this join I have the bottom half of mum’s quilt together…I did only get the lower half of the join embroidered today .

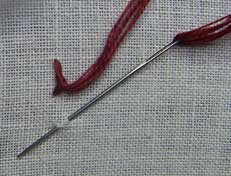
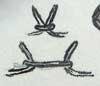
The stitch on the left which I illustrated the other night is NOT Double knot stitch…When looking through the Anchor embroidery book tonight I realized that I had miss read the instructions and have been doing something different. maybe I can call it Single Knot Stitch?…The stitch on the right IS Double Knot Stitch.

between the 2 blocks on the bottom row I did a section of Spanish Knotted Feather Stitch between 2 short sections of Double knot Stitch which I will illustrate correctly in the near future.
|
In the first section of the the join from yesturday I did Portuguese Stem Stitch and then continued the French knots on the block above so that they trailed over the seam.
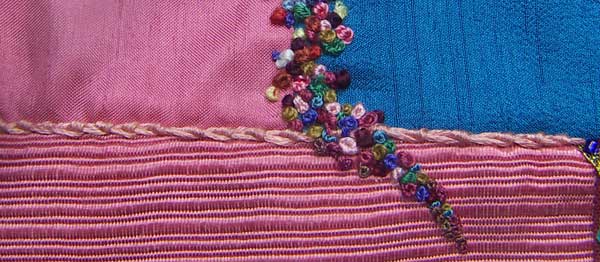
The second section is Double knot Stitch, I do really enjoy doing this stitch and I like the repition of one element when everything else is different.

The third section asked me for a wider seam, I think because the lace motif got cramped against the seam and needed more pink background at the top, whatever the reason it gave me a seam to do Arrowhead Stitch which is this weeks TAST stitch.

On the fourth section I have done Coral Stitch which you can’t really see in the photo because it can’t really be seen on the block. 
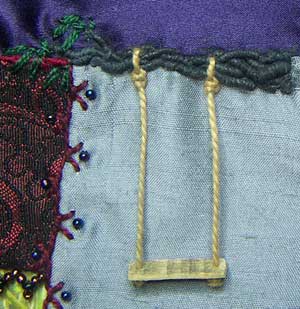 TAST Week 27 was Bullion Stitch, I don’t much like doing Bullion knots but I did like the way Elizabeth used Bullion knots for the trunk of a tree…Ah thinks me that is how I can do a branch to hang the swing from…I left the last section of the previous join for the Swing. TAST Week 27 was Bullion Stitch, I don’t much like doing Bullion knots but I did like the way Elizabeth used Bullion knots for the trunk of a tree…Ah thinks me that is how I can do a branch to hang the swing from…I left the last section of the previous join for the Swing.
Great Texture but my choice of threads didn’t work I used several shades of threads to get the colouring that I wanted but didn’t count how they would work in the Bullion knots and I ended up with a rather more specled branch than I wanted.
A little bit of grey paint was the easy solution…The swing is a couple of threads and a tiny bit of wood, I have left it hanging loose from the tree and hope that it doesn’t catch on things because I don’t want to stitch it down.
|
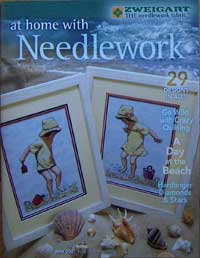 Today the postman delivered to me a complimentry copy of issue 5 of a new magazine, At Home with Needlework, It features a crazy quilted pillow by Pam Kellogg, the last line of which refers readers to my website piecing lessons for more information. Today the postman delivered to me a complimentry copy of issue 5 of a new magazine, At Home with Needlework, It features a crazy quilted pillow by Pam Kellogg, the last line of which refers readers to my website piecing lessons for more information.
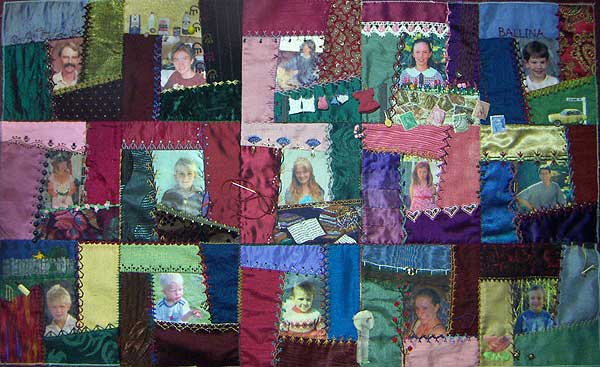
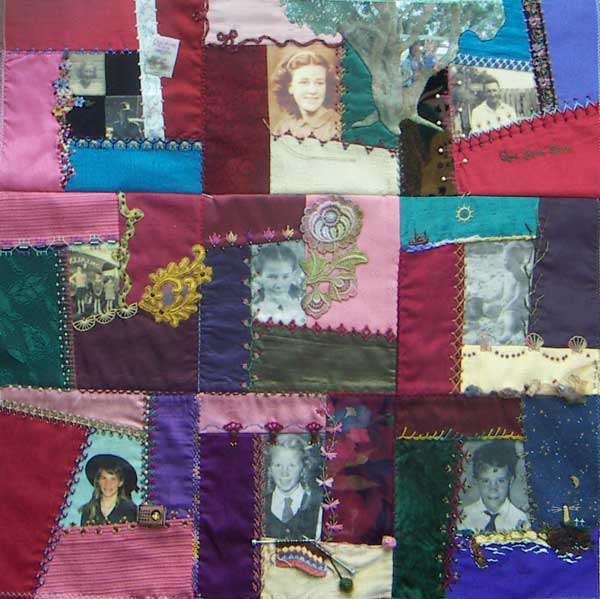
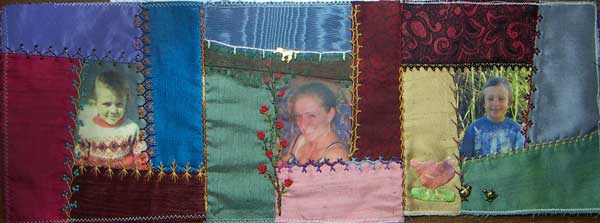
I did get the next seam stitched but didn’t get any embroidery done because tonight I had a date with my daughter to go to an Alice Cooper Concert…My daughter and I are very different and we don’t have a lot of interests in common so it is nice when things come along that we can do together and both enjoy…Jessie’s image is the bottom left corner block.
|
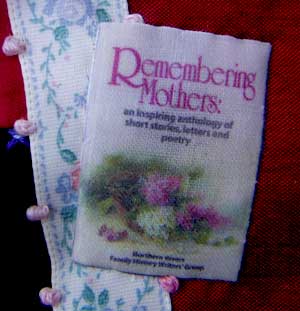 Remembering Mothers…This is the cover of a book Published by the Northern Rivers Family History Writers’ Group, It is an anthology of Short Stories, Letters and Poetry to which my Mum contributed a 16 page story of her Mothers life. Remembering Mothers…This is the cover of a book Published by the Northern Rivers Family History Writers’ Group, It is an anthology of Short Stories, Letters and Poetry to which my Mum contributed a 16 page story of her Mothers life.
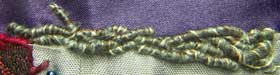
Down the new join I finished the tail of the bow to cover the upper portion of the seam and did Double knot stitch on the lower section…

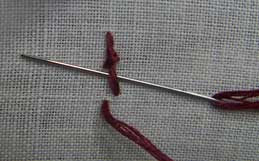
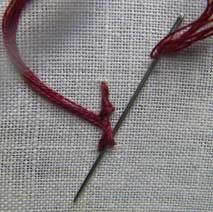
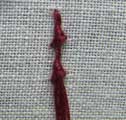
I enjoy doing Double Knot Stitch and as I seem to be repeating it on the join seams I thought that I should make a sample to illustrate how to work it.
|
This morning I had the curtin nearly done on mum’s block when I had a slight mishap and decided to remove it and try again, I will tell you that saga tomorrow because I decided that what I wanted to do on the join would be easier to do before the curtin was on the block…
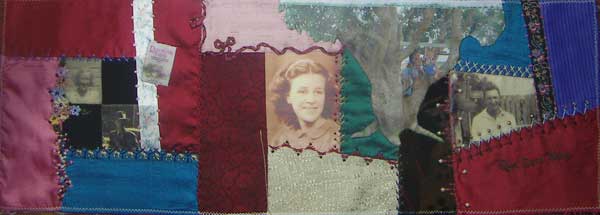
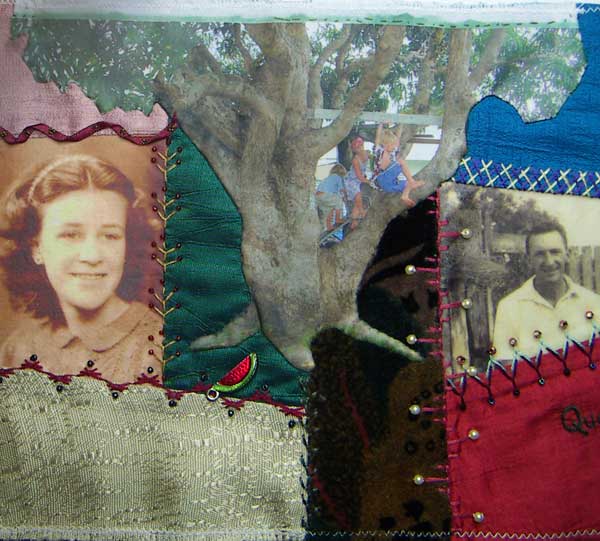
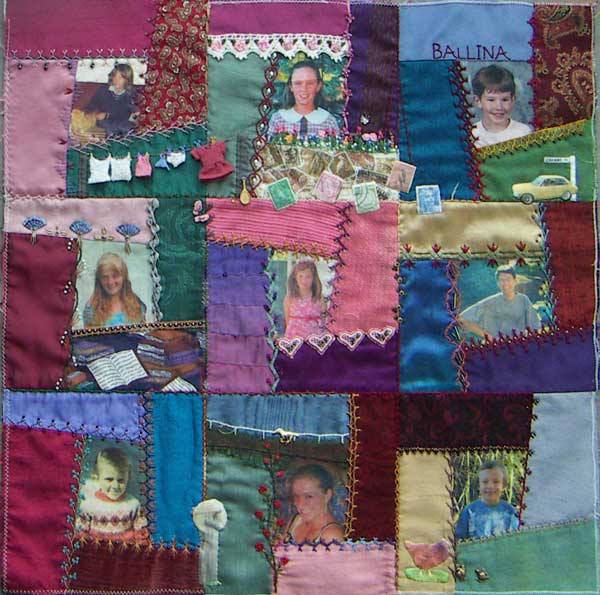
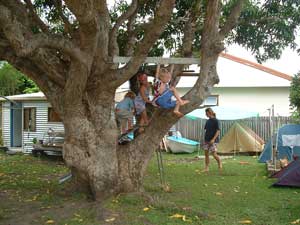 So I have joined mum’s block to Dad’s block and appliqued an image of the Mango Tree over the seam so that they both fall under its canopy…The Mango Tree is in the Middle of the Backyard, A Grand Old Tree that is dear to us all and I am relieved that it has turned out as well as I’d hoped because I want to name mum’s quilt “Under The Mango Tree”… So I have joined mum’s block to Dad’s block and appliqued an image of the Mango Tree over the seam so that they both fall under its canopy…The Mango Tree is in the Middle of the Backyard, A Grand Old Tree that is dear to us all and I am relieved that it has turned out as well as I’d hoped because I want to name mum’s quilt “Under The Mango Tree”…
The Photo on the right was the best one I could find that had good detail of the trunk, I copied a section of leaves from another photo to extend the canopy on the left side…I also liked that this image had the kids playing in the tree…and at this point I would like to Thank and give credit to my neice who took this photo as well as the grindstone and the chook when I gave her free use of my digital camera a couple of christmasses ago.
To applique the images done with T shirt Tranfer paper I print the image on the Transfer Paper and cut it out at the edge of the image before ironing it onto the fabric, this gives me a soft edge to stitch into, I do needle turn applique because I don’t want pin holes in the image, the T shirt transfers have a plastic surface and are a little stiff but if I take my time its not much of a problem and worth it for the effect…
 What I have found a problem is that to get the best colour I transfer the images onto white fabric but white fabric is the hardest to applique because even the smallest speck of white showing draws the eye so I have to be carefull to turn under every bit of white…But I solved that problem today, after ironing the transfer onto the white fabric and before I peeled of the paper I used a black pen to draw around the trunk and a green fabric pen to draw around the leaves and because a little bit of black showing looks like a shadow and dissappears into the background it made the applique much easier. What I have found a problem is that to get the best colour I transfer the images onto white fabric but white fabric is the hardest to applique because even the smallest speck of white showing draws the eye so I have to be carefull to turn under every bit of white…But I solved that problem today, after ironing the transfer onto the white fabric and before I peeled of the paper I used a black pen to draw around the trunk and a green fabric pen to draw around the leaves and because a little bit of black showing looks like a shadow and dissappears into the background it made the applique much easier.
|
The Units are getting bigger, with this join I have a unit of 9 blocks.

Across the join I have done Coral Stitch with silk ribbon.

Double knot stitch flipped from side to side.
 And on the last intersection I extended the double knot stitch uo and across in the same thread. And on the last intersection I extended the double knot stitch uo and across in the same thread.
Down the Bottom I have added an image of the Grindstone, one of those things that has always been in the backyard…It was used to sharpen cane knives etc but I can also remember turning the handle just to see how fast I could make the wheel spin…
|

This seam on mum’s block is a combination of straight stitch and Fly Stitch with beads.
I have joined the penaltimate block to the next blocks
On this new join I have done Double Knot Stitch

and this one was supposed to be Cable Chain Stitch but the thread didn’t pull all the way through when I did the first Stitch, because the thread was sitting nicely, instead of pulling the stitch tighter till it made the flip, I left the rest of the stitches loose.

|
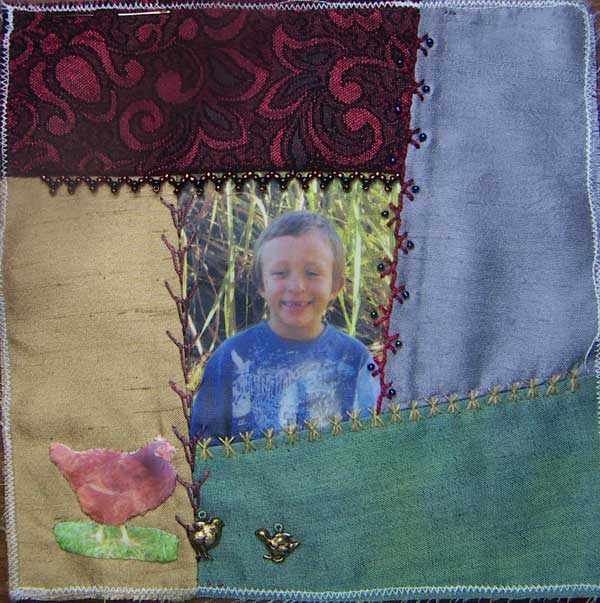
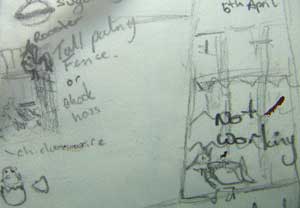  I have done so many stitches on mum’s quilt that it is getting difficult to think of stitches that I haven’t done so need to look for ideas…I starte by flipping through my visual journal and found this little diagram from the TAST Week 11 which was Up and down buttonhole stitch I liked the second sketch and made a seam from it. I have done so many stitches on mum’s quilt that it is getting difficult to think of stitches that I haven’t done so need to look for ideas…I starte by flipping through my visual journal and found this little diagram from the TAST Week 11 which was Up and down buttonhole stitch I liked the second sketch and made a seam from it.
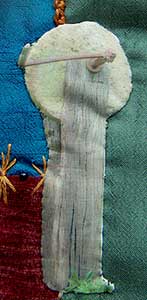
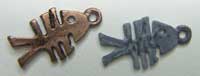
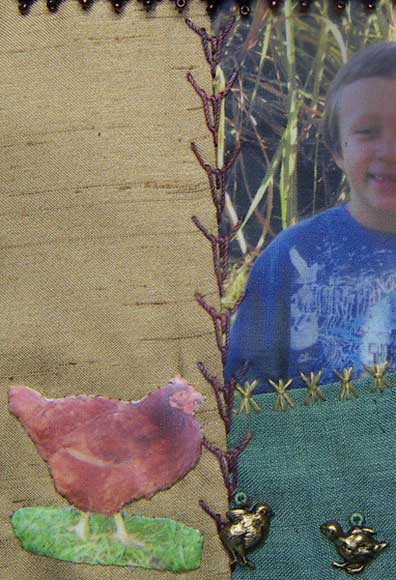
I then pulled out Butterflies which was my second quilt…I was looking for something with a natural feel so that it would blend with the chooks at the bottom, I found the seam done with the purple thread which worked well…As for the chooks, I started with grand ideas of a whole chook pen seam, modified my ideas after I tried drawing it, I was then going to have the chook with scraps of food to peck through and I painted a fish skeleton charm to be part of the scraps but when it came to the crunch the space was to small to fit enough other scraps to disguise…so I modified my ideas again and left it at the chook and a couple of chicken charms…and
The penultimate block is finished
|
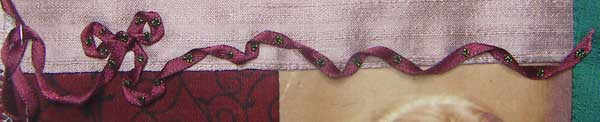
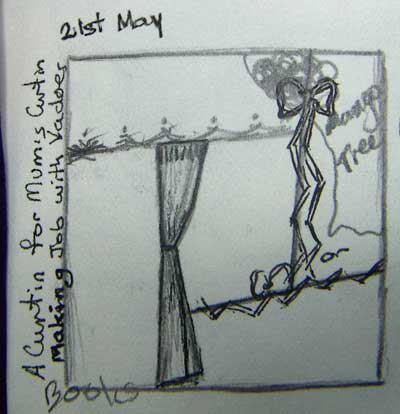 As you can see in my visual journal I have had the curtin and bow planned for this block for a quite a while, I just didn’t know where I wanted the bow…when I did decide on the top seam, In my head I had the bow on the right hand end, just as well I checked before stitching it on because it would have clashed with the mango tree I have planned for the top right corner of the block…I have will stitch the left hand tail after I have joined the block to the next one when I will twist the tail up around the corner. As you can see in my visual journal I have had the curtin and bow planned for this block for a quite a while, I just didn’t know where I wanted the bow…when I did decide on the top seam, In my head I had the bow on the right hand end, just as well I checked before stitching it on because it would have clashed with the mango tree I have planned for the top right corner of the block…I have will stitch the left hand tail after I have joined the block to the next one when I will twist the tail up around the corner.
Click here for instructions for making ribbon bow.
|
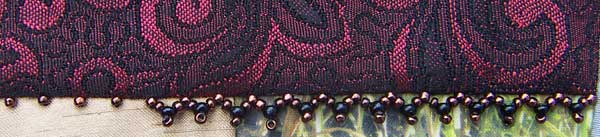
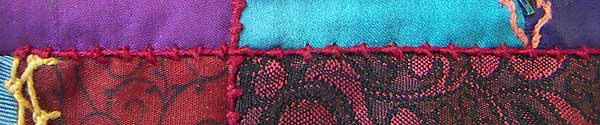
Sometimes I have absolutly no idea where ideas come from, for this seam I looked at the fabric and saw a beaded edge on it.
I have left part of the seam unfinished to show that the first row of beads is stitched at 1/4″ intervals with the whole facing down from the seam…I stitched the first row of beads in place because I wanted the beads to sit flat on the fabric and not stitck up.
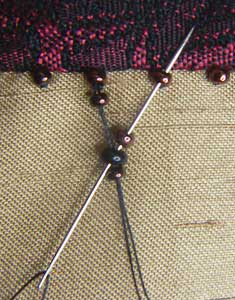
To work the rest of the pattern I went down through an anchored bead, picked up a brown, a black and another brown bead…Put the needle back up through only the black bead, picked up a brown bead and up through the next anchored bead in the row and take a backstitch on the back before taking the needle to the front again and down through the same anchor bead. you may need to jiggle the thread through the beads to tighten up the loop
|


