
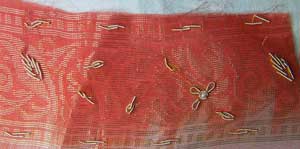
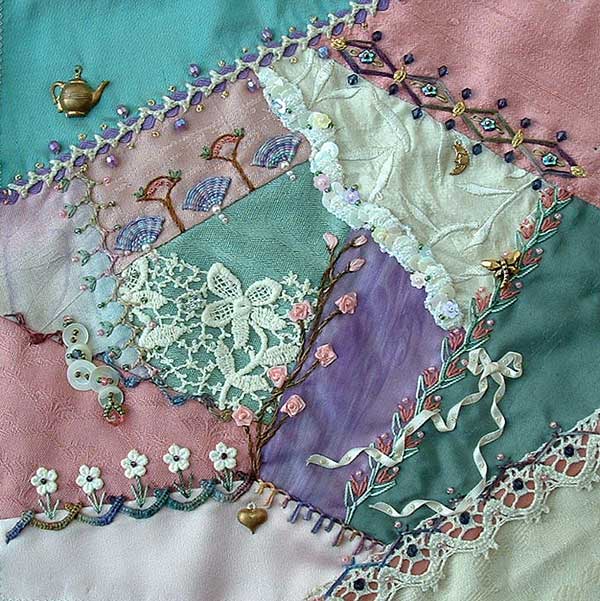
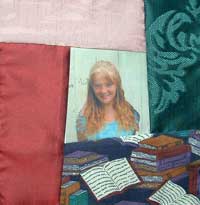
This is a simple seam with a curved line of Stem Stitch trimmed with Straight Stitches and Beads…I chose a simple stitch that I could work in a fine thread for this seam because the red fabric is really difficult to stitch through, even with the fine thread you can see where threads in the fabric have pulled.
|
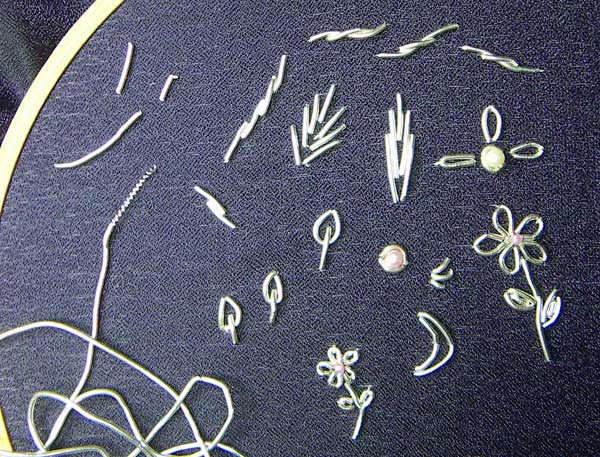
 I spent most of today cleaning and getting ready for the Canberra Crazy Quilters meeting which was here tonight, we had a great time as usual…One of the ladies brought along a book about sardi emboidery and gold work, I remembered that I had some Purl, actually I had some years before I even knew what it was used for, but I have never tried to use it…After everyone had left I found it as well as a small piece of sari silk that has a design worked in Purl. I spent most of today cleaning and getting ready for the Canberra Crazy Quilters meeting which was here tonight, we had a great time as usual…One of the ladies brought along a book about sardi emboidery and gold work, I remembered that I had some Purl, actually I had some years before I even knew what it was used for, but I have never tried to use it…After everyone had left I found it as well as a small piece of sari silk that has a design worked in Purl.
Purl is strange stuff, comes in long lengths that sort of wobble in your hand, made from fine wire wrapped like a spring to form a hollow tube from which short lengths are cut and stitched on like beads…I couldn’t find anything on the internet and the books I have only gave the most basic information so I stitched a sample by copying the patterns on the sari bits and then added a few of my own…it is easy enough to stitch on but working out how long to cut the curved bits and cutting the bits the same length is a bit difficult.
|
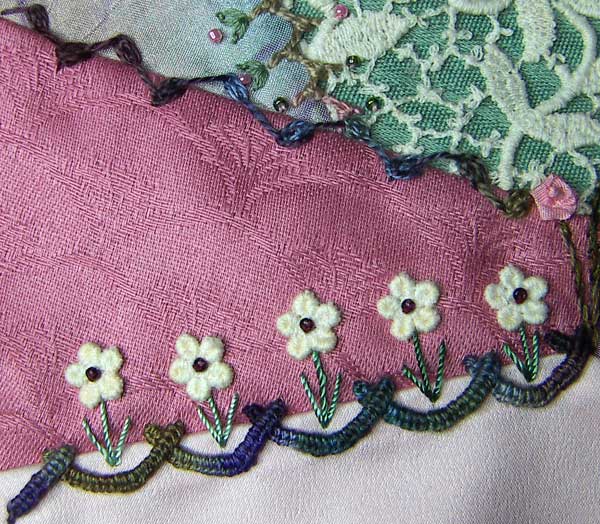
How do you know when a crazy quilt block is finished? A Frequently asked question…most common answer is that the block will tell you…I will add to that, that sometimes it is helpfull to get a second opinion.
When I finished embroidering the seams on this block I expected to add several embellishments but after adding the button cluster I placed a few charms but could see no where else that needed further embellishment…the block was telling me that it was finished but with so few embellishments I didn’t beleive it till I got a second opinion. I asked Sharon when I visited her for a sewing afternoon and she agreed that it was finished…I used to add embellishments to a block as I thought of them, often keeping seam stitches low key and then putting embellishments over them, this year I have been thinking seam treatments and because my seams are becoming fancier they read on the block as embellishments which is why the block is finished sooner than I expected.
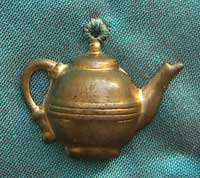
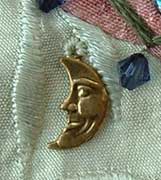
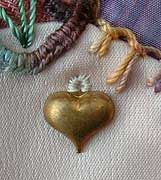
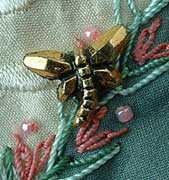
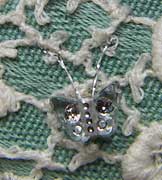
The charms I added are a teapot, a moon, a heart, a dragonfly and there is a tiny butterfly bead hiding in the lace.
And Here is the Finished Block
|

I started by doing the Palestrina Stitch on a sample block to get the feel for it, I did 2 rows with there arms touching which formed square spaces down the middle…On mum’s quilt I did 2 rows with their arms touching and then added beads in the spaces down the middle.

|
 This is the 20th block for mum’s memory Quilt. This is the 20th block for mum’s memory Quilt.
For the seam I had in mind Oysters ah la Natural…I dyed some silk ribbon in a mottled grey oyster colour and then did to rows of randomly zig zagged Oyster Stitch…I’m not sure the seam worked as I envisioned but I kinda like it anyway.

|
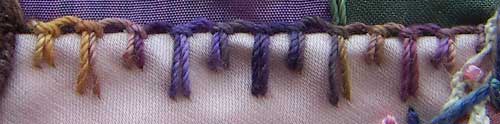
This Up and Down Buttonhole Stitch is the last seam on this block…now for the embellishments.
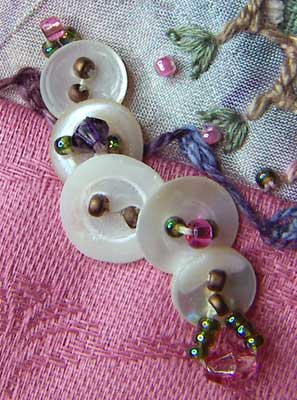 I have added a buttoncluster on the left hand side…and don’t know where to go from there, I have auditioned a few charms but most of them make the areas look crowded or just look out of place, I am going to sleep on it before doing any more. I have added a buttoncluster on the left hand side…and don’t know where to go from there, I have auditioned a few charms but most of them make the areas look crowded or just look out of place, I am going to sleep on it before doing any more.
|
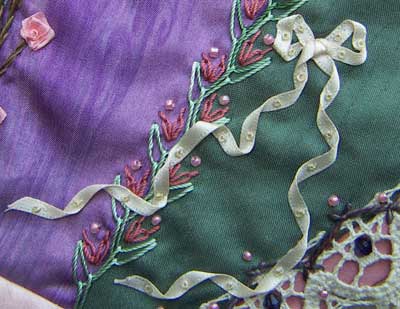 The Ribbon for the bow was easy to find today… The Ribbon for the bow was easy to find today…
click here for instructions for making the bow…normally I would do the knots with a different coloured thread but this block already has enough colour and I chose the cream ribbon to bring more cream into the block so I kept with that and did cream knots.
Admin note: I have made a good start on my new years resolution of blogging frequently thoughout the year and this post is my 103 consecutive post which is a new personel record for consecutive daily posts.
|
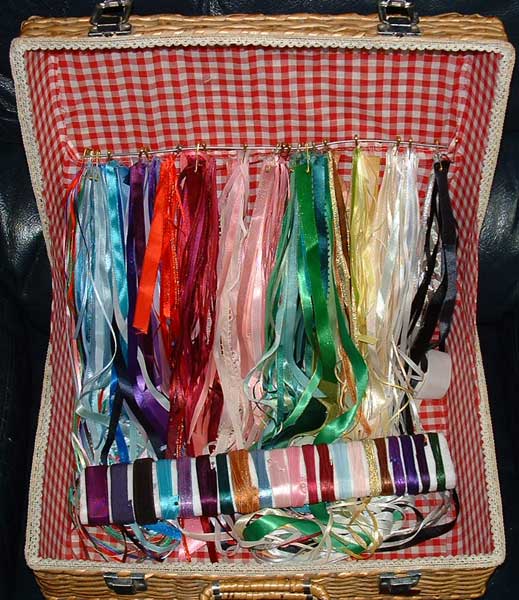
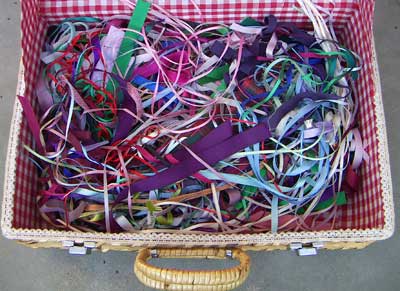 Or maybe that should be ‘On Track’ because organizing my stash is one of my goals for this year…I was side tracked from stitching today when I went to get a piece of satan ribbon to put a bow on the birthday block…confronted with this tangled mess I started sorting them, I started by dividing them into rough colour groups which I held together with a pin stuck through close to the end of each ribbon…I then took the colours one at a time, I put pieces shorter than 6″ into a small box and rolled the longer lengths around a piece of styrene foam, the remaining pieces I further sorted into wide and thin ribbons and held each group together with safty pins, so that I don’t have to open the pins everytime I want a piece of ribbon the pin is very close to the end of each ribbon so that I lose less than 1/4″ of ribbon when I cut pieces from the pin. Or maybe that should be ‘On Track’ because organizing my stash is one of my goals for this year…I was side tracked from stitching today when I went to get a piece of satan ribbon to put a bow on the birthday block…confronted with this tangled mess I started sorting them, I started by dividing them into rough colour groups which I held together with a pin stuck through close to the end of each ribbon…I then took the colours one at a time, I put pieces shorter than 6″ into a small box and rolled the longer lengths around a piece of styrene foam, the remaining pieces I further sorted into wide and thin ribbons and held each group together with safty pins, so that I don’t have to open the pins everytime I want a piece of ribbon the pin is very close to the end of each ribbon so that I lose less than 1/4″ of ribbon when I cut pieces from the pin.
I threaded the pins onto a length of coat hanger wire which I attached to the lid of the basket so that when I open the basket the lid pulls up the end of every piece of ribbon so that I can see what is there.
|
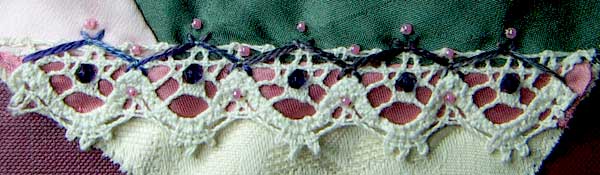
This seam has a piece of pink satin bias binding (to bring pink down into this corner of the block) overlaid with lace held in place wit herringbone stitch and trimmed with beads.
|
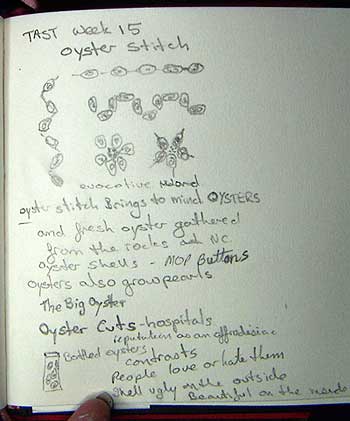 I like Oyster Stitch but when I sat down with my visual journal I found that my mind was playing with ‘Oysters’ instead of the stitch, did you know that Australia has a BIG Oyster, not one of the better big things lol, I will have to get another block for mum’s quilt pieced so that I can combine the stitch with the memories, the Big Prawn referred to in the link to the big oyster is in my home town where mum still lives. I like Oyster Stitch but when I sat down with my visual journal I found that my mind was playing with ‘Oysters’ instead of the stitch, did you know that Australia has a BIG Oyster, not one of the better big things lol, I will have to get another block for mum’s quilt pieced so that I can combine the stitch with the memories, the Big Prawn referred to in the link to the big oyster is in my home town where mum still lives.
Back to Oyster stitch, I did use it one one seam today, a simple zig zag variation which I have left unbeaded because it will probably end up as the background to a button cluster.
The other seam is buttonhole stitch done over herringbone stitch trimmed on one side with straight stitches and lace flowers.
|


