This post is in response to the following comment made when one of the email lists I am on was discussing Tatting.
“Don’t knock the first tatting efforts. I remember Our Annie learning at Toorak and coming up with knotty efforts (are you here Annie) but what she did with them on her CQ was beautiful. Wonder if Annie has a pic somewhere?”
Yes I am here Maureen and here are those first knotty efforts…when the thread knotted I just started again.
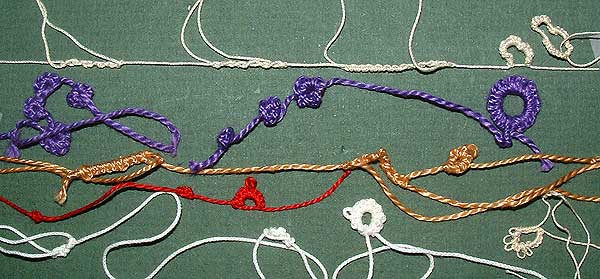
I found that when I started using a thicker thread I could see what was happening with the knot…I could see that it was the looped thread that needed to be kept slack so that it would loop around the shuttle thread when I pulled it tight, which is the flick of the wrist that tatters refer to…I practiced doing just half the knot, which is known as a Josephine Knot, it makes a slightly twisted loop which is rather nice on its own, I then practiced the second half of the knot until that felt comfortable, this also gave me practice in closing the loops and starting the next…once I had the hang of each half of the knot I was able to put them together…by this stage I had enough control to leave the space between knots that form picots.
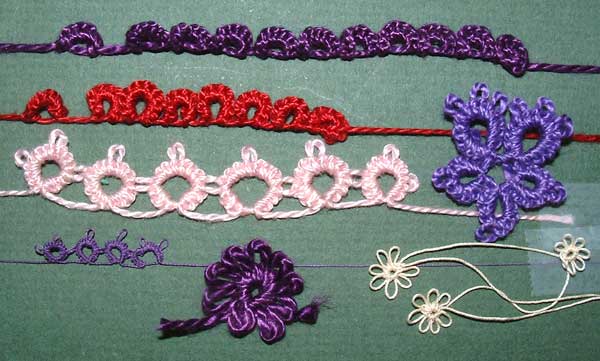
Once I had mastered the knot I was able to use finer threads….That is about all I learnt about tatting because that is all I need to know to be able to tat cute little butterflies to add to my crazy quilts.
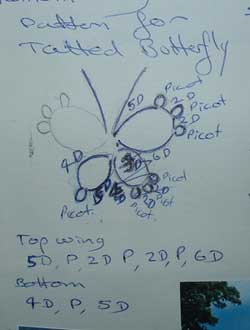
The butterfly is an adaptation of a larger one that I was given and this is the pattern as I wrote it in my visual journal…D = double knot and P = Picot….try them for yourself and as Maureen said don’t knock those first efforts.
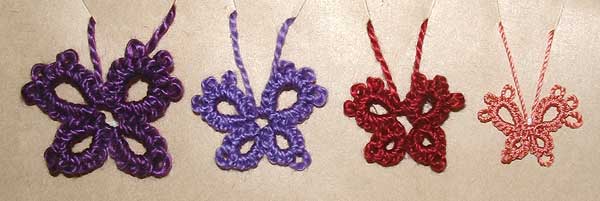
All the butterflies below use the same pattern the difference between them is the thread used…The little pink one is a silk thread which is expensive to tat with but it Tats up lovely. I add a bead for their body when I am stitching them to a the crazy block…
|