| |
About
This is Annie Whitsed's Crazy World a world where I stitch the joys and chaos of life into beautifull crazy quilts. email annie@loopylace.com
All That Jazz
Annie\'s Website
Bags-of-Fun
Blogroll
Websites


|
|
Before pinning the top and bottom borders I check that the side borders are square at the ends…you may have noticed that I do a lot of checking of measuremnets and angles, that is because I like the accuracy and it is easier to check and get it right the first time than it is to unpick and resew.
Position the border on the quilt right sides together and when pinning work from the centre out towards the ends…When looking at the photos in my last post you may have noticed that as well as the guideline for the border I also marked the stitching line on the back of the lining, I have marked the stitching line because the quilt is now very heavy, even with the ironing board supporting the weight, it pulls and gets caught making the guide on the sewing machine difficult to follow and as the lining is easy to draw on it becomes easier to stitch along a marked line.

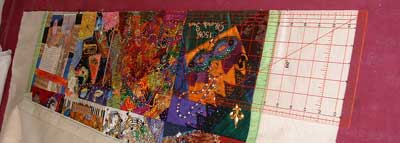
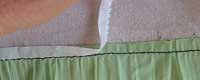
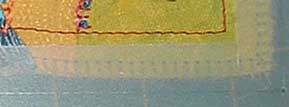
Detail of the corner with the lining and first border on.
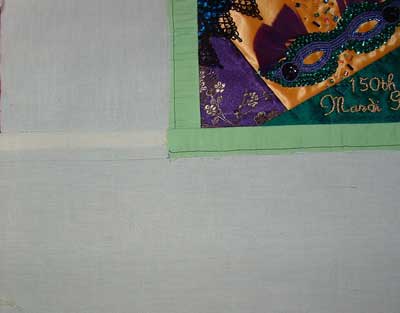
And so All that Jazz has its first border.
*At this stage I again deviated from what I would Normally do…Normally I would add the remaining border, stitching the sides on first and then the top and bottom…with the quilt top finished I spread out the backing the batting and the quilt top to make the quilt sandwich…And then to hold the layers together, I stitch through beads and hide stitches under embellishments….works for me on my quilts but on the back the stitches are randomly placed and the back is not pretty and all that Jazz deserves a pretty back.
I also have the problem of the weight differential with heavily embellished blocks being next to lightly embellsihed blocks….When I was telling my sister why I was constructing it the way I am, I was talking about weight bearing seams and stress points and she said that it sounded like I was a Quilt Engineer, I thought that it sounded like a good title so next post will be Part 8 – Quilt Engineering…
|
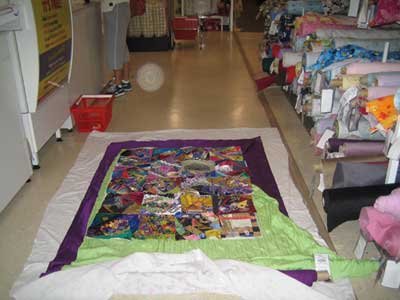
For the borders I needed to do a shopping trip…It was before I had stitched the blocks together so I pinned them to a piece of fabric and rolled them around a tube so that I could take them to the shop without loosing or crushing any of the blocks….My friend Lynne came with me to the fabric shop where we had fun auditioning fabrics for the borders and showing the blocks of to the staff who loved them and offered suggestions of what they liked as the borders…
I thought that purple would be the colour for the borders but I never know what will be just right for any quilt until I lay the quilt next to them so we set about auditioning colours…we tried Purple, burgundy, some greens, blues and even a gold…Purple was the best of them all but even it looked a bit flat and dull and did nothing to enhance the blocks which are so colourfull, vibrant and full of life…How to give the border some zing?…I actually knew the answer as I posed the question, my sister had given it to me, when she first saw the blocks layed out, she suggested that a narrow border of green would look good, specifically the green that Valeri used in her block…a few more bolts of fabric were dragged out and she was right, The Purple with a narrow green border Frames the blocks as they deserve to be framed…somehow the narrow green border pulls the blocks together and makes them sing.
We had the quilt blocks on the shop counter when started auditioning the fabrics but when it became to cluttered with bolts of fabric we overflowed onto the floor.
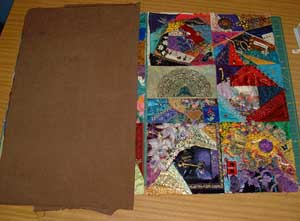
To complete the Border on a crazy quilt you also need some lining/foundation fabric…having to line the border is a bit tedious but needs to be done because the border needs the extra substance of the lining to balance/support the thickness and weight of the crazy quilt blocks…without the extra support of the lining the borders are more likely to be dragged down by the weight of the crazy quilt blocks making them sag and look floppy…so it is worth taking the extra trouble to line the borders.
Normally to attach the border and lining I would place the border right sides together with the quilt edge and then place the lining on top of the border and pin the 3 layers together…If you have trouble keeping the raw edges of the 3 layers together you may prefer to stitch the border on with a slightly smaller seam allowance and then add the lining and stitch the seam again using the full 1/2 seam allowance.
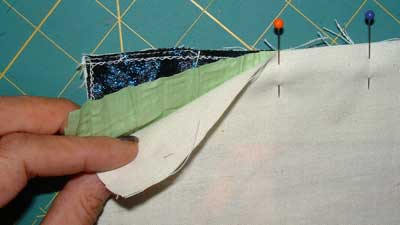
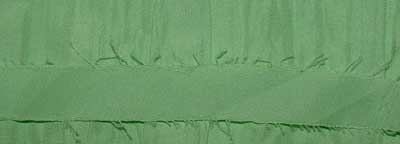
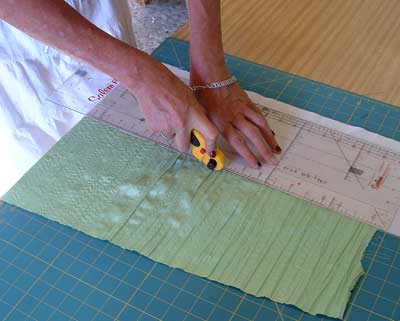
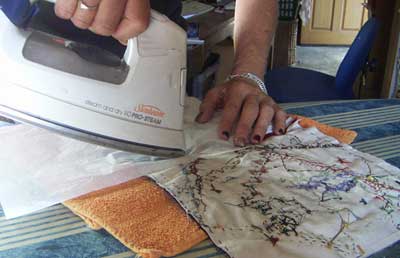
As I said that is what I would normally do but it is not what happened with this border…The Purple is Duponi Silk, a firm easy to sew fabric But the green is the stuff of nightmares…I chose it because it was the colour I wanted but the fabric itself is a polyester, its soft and flimsy, slippery and the crinkles in it make it impossible to cut a straight strip from it (I ended up drawing a thread to get a straight edge to work with)…and most problimatic of all, when I did an test iron, the crinkles ironed out…
I needed to be able to iron the borders but didn’t want to lose the crinkles….it took me a few days of thinking to work out how I could keep the crinkles and still be able to iron the borders while putting them on, turned out to be the lining that gave me my solution…Because this is not a common problem I considered not explaining the detail of what I did but when I got it finished I realized that it was probably a good technique for adding any narrow border because there is more chance of small slippages when you are trying to keep 3 raw edges lined up, small slippages are not noticeable to the eye on a wide border but a small slippage on 1/2 inch border is noticable.
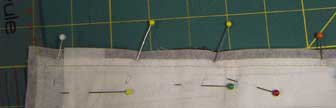
I cut strips of calico (muslin in USA) the width of the total border and marked a guide line 1 1/2 inches (width of the border plus seams) from the edge of the lining.

I placed the edge of the green fabric on the guide line and pinned it in place.
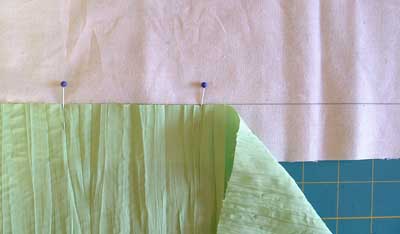
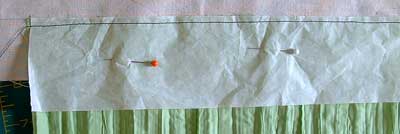
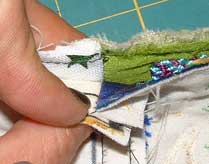
To prevent the machine from disturbing the crinkles I placed a piece of lunch wrap paper over the green fabric and pinned it in place…this step can be skipped when their are no crinkles in the fabric.
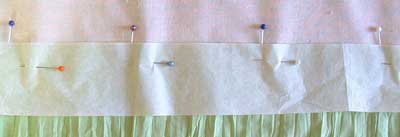
Stitch close to the raw edge of the border fabric.
Turn the piece over and stitch close the the raw edge of the lining fabric.
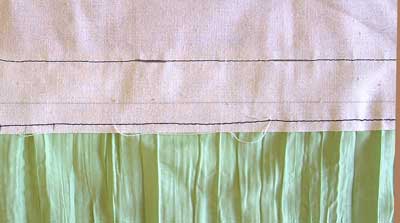
I then removed the paper…this is the same technique as I will use to remove the paper from the back of the blocks.
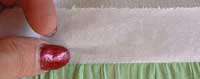  
I cut the border fabric level with the raw edge of the lining…
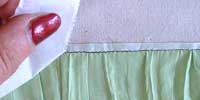
leaving me with a border strip ready to be stitched to the blocks.
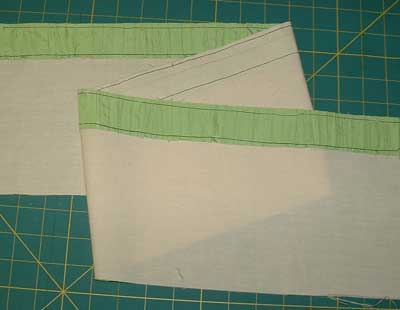
I have the 2 side borders stitched on.

Next post Part 7 – More about attaching borders.
|
Nearly Done…
ONE…
|
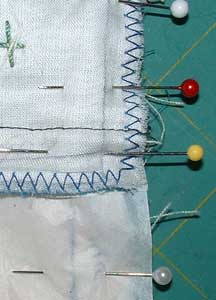
To align the seam intersections on blocks that have the seams ironed open, spear a pin through the seam of both blocks and while that pin is holding the seams together put pins either side of it, after the intersections are pinned in place, pin the end rest of the seam and when stitching the seam stitch as close to the pin before the intersection as you can so that it has the least space to slip out of alighnment (Note Don’t stress over getting perfect joins because whilst I aim for perfect alignment of seams at the corners they are not necessary on crazy quilts because the joins will be covered by buttons and never be seen anyway).
As I said I ironed the seams of Catherine’s block to one side, I also ironed the rest of the seams on the quilt to one side because as well as the odd bead deflecting your stitching off line, as the units you are stitching get bigger they get heavier and the weight can pull the work off line…If the miss stitching goes into the finished area of the block or the raw edges get pulled out of alignment then it needs to be unpicked but if the raw edges are still together and the miss stitching is within the seam allowance then it is OK to oversew the seam on the correct line, leaving the miss stitching in the seam allowance, it just means that the seams need to be ironed to one side because it won’t iron open.
To align seams that are ironed to one side the seams need to be facing in opposite directions.
Butt the joins together and pin…Joins where the top seam points towards the sewing machine are the easiest to get perfect because the seams lock into each other conteracting the effect of the machines foot dragging the top layer.
  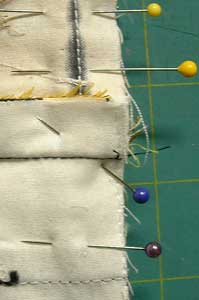
When you have joined as many pairs as you can continue joining smaller units into bigger units….Five…Four….Three…
As the units get bigger, as well as getting heavier, they take longer to stitch and clank around more as you manipulate them through the machine…to protect the embellishments I spread a piece of old sheet between the layers to prevent the embellishments clanking and catching on each other.
To counteract the increased chance of slipping as the quilt gets bigger and bulky, I use more pins as the seams get longer.

Two
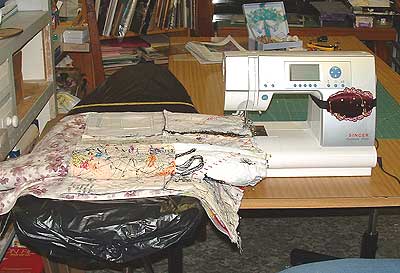
To support the weight of the quilt when stitching the last seam I covered the ironing board with plastic to make it slippery, put it beside the sewing machine which I had moved to the corner of the table and adjusted the height to be level with the bed of the sewing machine…
ONE………for one you will have to wait till I have stitched that last seam…in my next post, Part 6 – Borders to Frame All that Jazz, I will show you the borders we have chosen and how to stitch them on.
|
To join the blocks into pairs lay them side by side to check that they are right way up… As I trimmed each block I printed out the block and artists statement from the All that Jazz Gallery so that I could get a full appreciation of each block while I was lucky enough to have them in my hands, I have also attached all the info and extra beads that came with the blocks to the print outs. I also used them to check that I had the blocks right way up, on most of the blocks the top was obvious but it wasn’t until I checked with the photos from the gallery that I realized that until then I had Catherines block on its side…yep it is worth checking…you will also be checking that you will be stitching the correct edges.
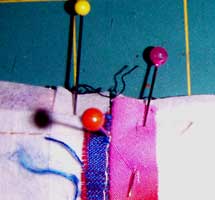
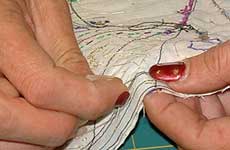
Place one block face down on the other, match up the raw edges (or paper edge) and pin the seam…Pin the corners first and then use as many pins as necessary along the seam.
And how many pins are necessary?…
Well if there is no slippery fabrics and no bulky embroidery beads or embellishments within 1/2 inch of the seam then you may only need 1 or 2 pins.
If the blocks have slippery fabrics then you will need a few more…Velvet is the worst, I resorted to stitching the velvet section of one seam by hand but found on another block that putting a few extra pins, where I could leave them in place whilst stitching the seam, prevented the velvet from slipping.
If there are bulky embellishments near the seam extra pins will help prevent the seam slipping because of them…
Some embellishments are to bulky to stitch over…These can be marked with a pin on either side, then when stitcing the seam stitch as far as you can without forcing the fabric, stop and restart on the other side of the embellishment.
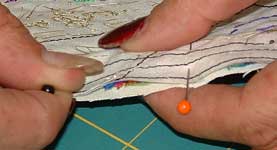 
Hand stitch the gap in the seam.
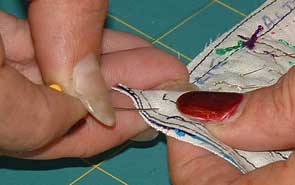
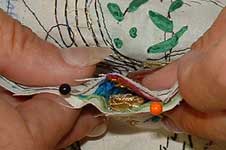
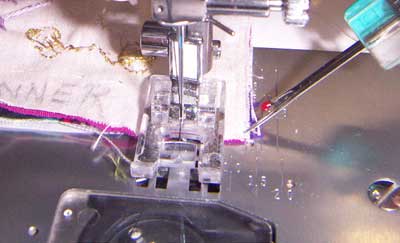
Some embellishments I pin out of the way (or in this case needled because the needle is finer and less likely to damage the ribbon than a pin) before stitching the seam so as not to risk catching them in the stithing.
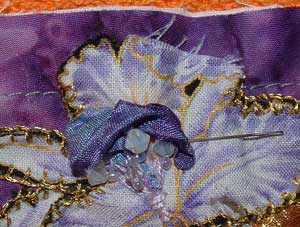 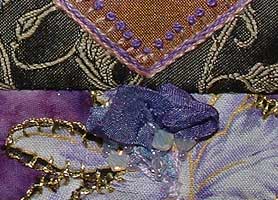
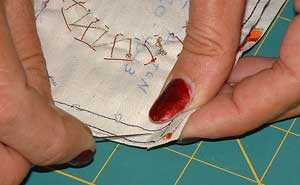
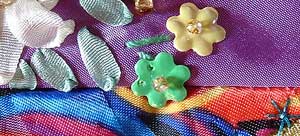
I had to rescue this poor little flower after I had stitched it into the seam, fortunaly I have a replacement flower in the bag of beads that Sharon gave me for christmas.
I used the zipper fit when stitching Catherine’s block which was heavily embellished with beads and charms to the very edge…
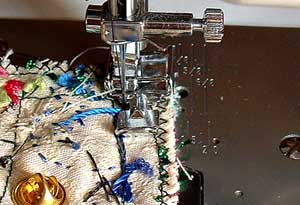
The Sewing Machine…
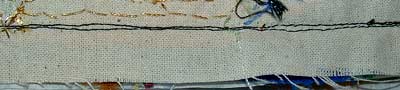
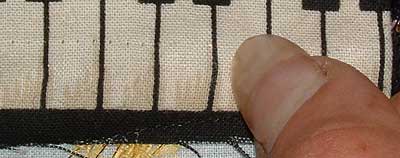
Thread the sewing machine with light coloured thread if most of the fabrics in the quilt are light or with a dark thread if most of the fabrics in the quilt are dark…I have used black thread.
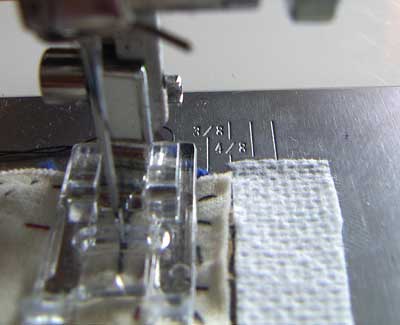
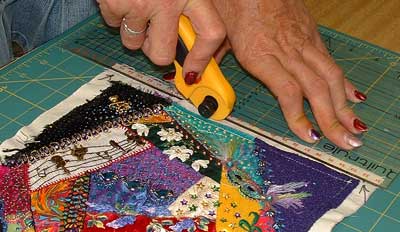
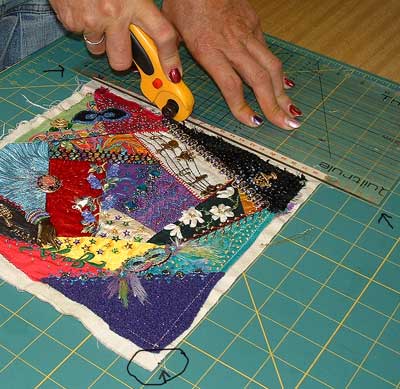
Stitch the seam by guiding the raw edges along the 1/2″ mark on the sewing machine…If you have trouble seeing the line you can mark it with a piece of tape (note masking tape works better then the medical tape I have used to demonstrate because I couldn’t find the masking tape)…If you have trouble guiding the edges along the line try using a commercial magnetic seam guide or a piece of sticky foam core board or something else that will give you a ridge to guide the fabric.
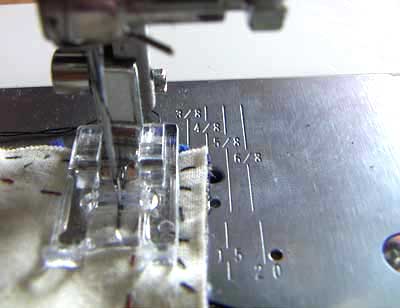  
Don’t be tempted to rush the end of the seam, it usually results in a slightly smaller seam allowance at that end which can distort the finished size of the block…to aviod that happening keep the raw edges on the guide line until the very end of the seam.
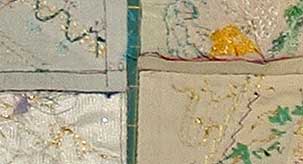
I ironed the seams open to distribute the bulk of the fabrics…When ironing the seams on my own work I iron with a flat iron…When ironing other peoples work I use just the tip of the iron and I use a piece of paper under the iron to further protect the fabrics.
Well I ironed the seams open until I got to Catherine’s block where I ironed the seams away from her block because that balances the weight of her block better.
Time for me to go and stitch the next few seems and take the photos that will show you how to Join Pairs of Blocks Together into bigger units that will join to make the quilt top…
So Stay tuned for Part 5 – Joining Pairs of Blocks Together.
Side story – How hot was it?
You will have noticed that the colour in the photos vary greatly, the variation is due to the different times of the day that I have taken them, different light on different days (today there was an orange tinge to the air from fires that are burning over the border) and 2 different cameras because yesturday after taking yet another photo to illustrate a point I got a Card Error message…I was just glad that there was only one photo lost and that I have a spare digital camera so I could keep working…Today I tried it again and the card is working, it is a coller day today and I think my dear camera had heat strock yesturday…it was that HOT.
|
Under sized blocks aren’t generally a problem, they happen because the embrodiery pulls the fabric in but if one person cuts out all the foundations, pieces and embroiders the blocks then all the blocks for their quilt will shrink at about the same rate so that when it comes to sizeing the finished block the smallest block can be measured and then all can be cut to that size.
For a group quilt each block is measured and cut by a different person, pieced by a different method onto a variety of different foundation fabrics, then some are lightly embellished and others are heavily, make that Very heavily embellished with a variety of different types of embroidery and beading..it is no surprise that there is a variation in the sizes of the blocks, actually the surprising thing is that the greatest variation was only 1/4″ shy of the asked for size.
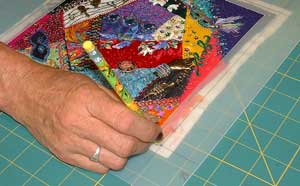
My own block was was undersize, just in the top right corner I fixed it by using fusible webbing to add small strips of fabric, it worked on mine but I didn’t want to put fusible webbing on anybody elses block…I thought about different things that I could do…I could mark the stitching line onto the back of the blocks and match them up when I pin the blocks together but the embroider and beads would have made the lines difficult to mark and besides I hate matching seams…I could baste the blocks to another piece of fabric but that would have added unnecessary weight and bulk so I would have to cut out the middle of the fabric just leaving the bit I needed around the edge but that would be way to much effort when all I want is a guide to line up with the edges so that the seam lines would match up….All the blocks do have sufficient seam allowance so I could have cut all the blocks down to have 1/4 inch seams but 1/2 inch seams sit flatter in the finished quilt so I didn’t want to do that…Ummm I wonder, I don’t even know where the thought came from but less than a minute later Linda was square…The solution was to cut a 9 inch square of lunch wrap paper and to pin the undersized block to it…easy peasy and Linda you are now a square.
Stay tuned for Part 4 – “how” to stitch the blocks together
|
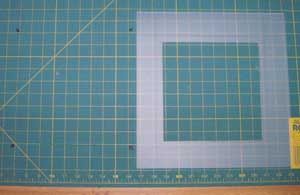
I am now ready to start cutting…When trimming traditional quilt blocks to size the ruler or template is placed on top of the block…Doesn’t work for crazy quilted blocks, the embellishments destabalize the ruler makeing it impossible to get a clean accurate cut…The Trick is to trim the blocks from the edge, that is where the 9″ square marked with arrows on my cutting board come into play…
Warning: Trimming the blocks from the edge does mean that if you slip with the cutter it will cut into your block as well as possible injury to yourself…So Please do be carfull with your cutters, use a sharp blade so that you don’t have to push hard and force it through the fabric; Hold your ruler with a firm downward pressure; Don’t be tempted to cut at awkward angles, it may save a few seconds at the time but the risk of injury to self and block are substantially increased, it also makes it harder to line up the ruler and see the line to be cut, much easier to Always spin the block so that you Always cut away from your body.
The first cut…
If the corner points have been marked through the hole in the template than the 1st cut is made where the ruler lines up with 2 of the marked spots.
Otherwise position the block in the marked square on your board, eyeballing its position and making sure that the block is meeting or covering all edges and corners…place the ruler so that it is lined up with the cutting boards grid lines that you can see above and below the block, the fabric under the ruler is what will be cut off.

For the second cut spin the block and line up the first cut edge with one edge of the 9″ square marked by the arrows… place the ruler on the second edge again lining it up with the cutting boards grid lines that you can see above and below the block.
repeat for remaining edges which should leave you with a 9″ square block and because all the blocks are measured from the same marked square than all blocks should be of equal size…
that is unless some of the blocks are under size…Linda noticed from the photo that her block was not the full 9 inches and that she wasn’t square (see comments) but her Eeeeek will fade away when she sees how easily I can make her into the full 9” square…So watch this space for Part 3 – “how” to make Linda into a square….
|
Blocks for group quilts are inevitably different sizes and this one is no exception…the different sized blocks are more of a problem with traditional patchwork blocks, which have points that may need to be cut off, than what it is with CQ blocks and actually this lot or pretty good with only small variations in size of the embellished area, together with 1/2 inch seam allowances to play with my job easy.
In Their blogs today Linda described me as “(Genius and Goddess of Quilting)” and Sharon described me as “an expert assembler – with a passion for getting such things just right”…what they mean is that I will measure everything to the nth degree and that my corners will meet perfectly, even though they will be covered by the buttons that will hold the quilt layers together, other people would describe me as anal retentive LOL but when you know “how” it is really not difficult to get such things just right…
Note: I use a rotary cutter and board, if you don’t have this equipment you can follow along using your table where my board is and mark your fabric with a ruler and pencil, then use scissors to cut along the marked line.
Before starting
I marked a 9 inch square on my cutting board with black arrows. this can be done with a piece of masking tape if you don’t want to draw on your cutting board.
I made a plastic window template with the 8 inch finished size cut out and the 1/2 inch seam allowance lines marked onto it.
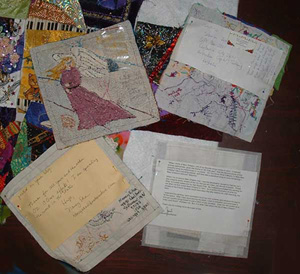
I pinned the block information to the pin board so that I could work with the blocks, you can see the contents of this one on Vivienne’s blog
Preparing Blocks
The First thing that I did with each block was to put the window template over it…
I could see at a glance wether the block was under or over size.
I could see where the maker intended the edge of the finished block to be.
And I could see any stitching that would need removeing from the finished size of the block.
The next thing that I did was to remove any stitching that would be visible on the finished size…
…and yes that does leave holes in the fabric, it marks some fabrics more than others and is easier to get out of some than what it is others…hint longer stitch lengths leave less marks (and are easier to pull out) and hand basting is much easier to remove and leaves far fewer marks on the fabric…
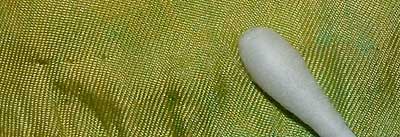
A gentle massage with your thumbnail or between your fingers will remove the holes from most fabrics.
For the more stuborn holes I used a damp cotton bud….hint do a test in the seam allowance to make sure that the water is not going to mark the fabric.
Most blocks had enough extra seam allowance that I could eyeball the first cut but some blocks, whilst their foundation was full size the patches only had 1/4 inch seams so there was no room for error, on those blocks small holes in the template, at the corners of the cutting lines, allowed me to mark the corners to make the first cut.
Blogging this is taking me longer than it is to make the quilt lol and it is again time for me to get some sleep…so watch this space dear friends for Part 2 How to trim blocks to size.
|
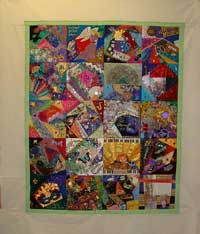
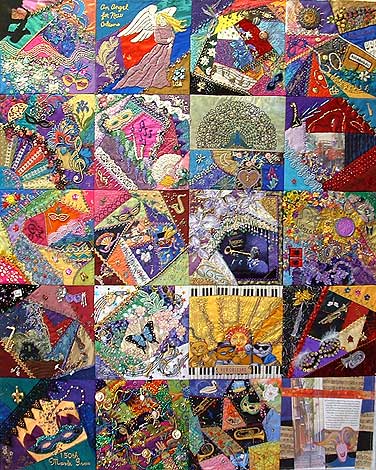
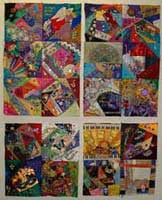
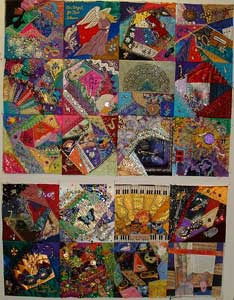
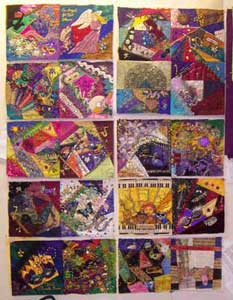
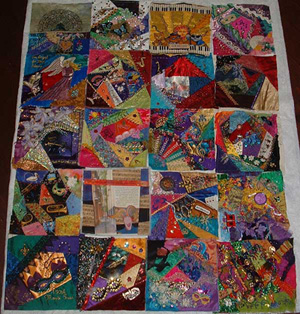
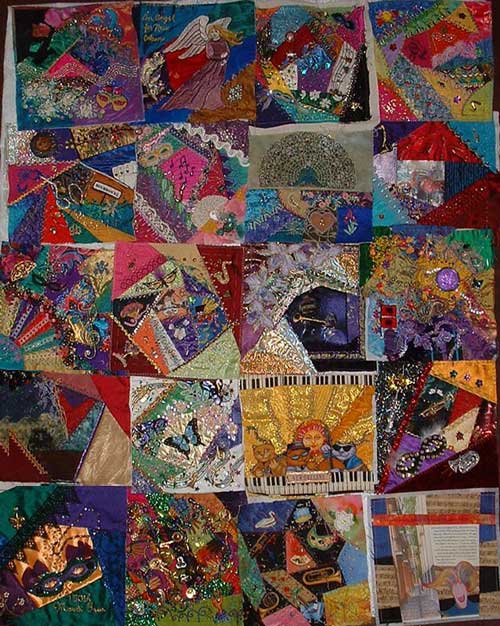
When arranging blocks for a quilt it is possible to go on rearranging the blocks till you have many different arrangements but none neccisarily better than another…I felt that with the difficult and distingtive blocks positioned the others blended nicely around them and I resisted doing anymore rearranging, I did visit Sharon so that she could cast an eye over them to see if anything looked out of place to her, Jerry was there and he thought that the yellows in the top right corner didn’t look balanced being up there on there own, so I looked at the blocks that could be moved and we tried Valeri’s block 2nd row down on the left, not good because it put to much pink in the 2nd row, but swapping with the block below did work and that was the last change made…
Home again I took everything off my pin board and pinned the blocks to it…I stood back to look at them and all that I could think was WOW…
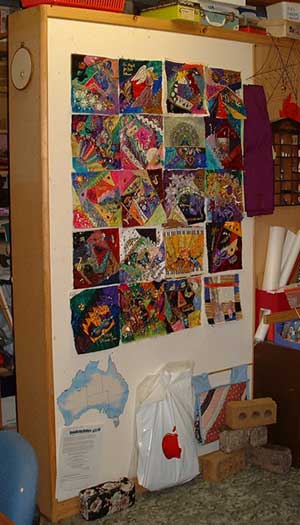
I have half the blocks trimmed to size and stitched into pairs and 123 photos to sort through and resize so that I can to show you step by step how to stitch blocks into a quilt…
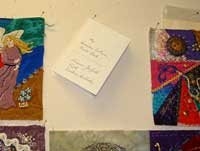
Note to makers of the competitors blocks, who may be wondering where there blocks are…they are in the white bag with the red apple that is pinned to the bottom of my pin board.
|
When I got the blocks from Sharon they where in the plastic bags that they had arrived in and the first thing that I did was to remove each block from its bag, I wrote the makers name with pencil in the seam allowance on the back so that there could be no mix ups and I pinned the notes and bags of extra beads to the back of the block so that everything connected to each block could be kept together….
I handed the blocks, with its info attached, to my sister who enjoyed having a good look at each block before laying it down on the sheet I spread on the floor to protect them so that when all were done they where arranged in the random order in which they came out of the bags.
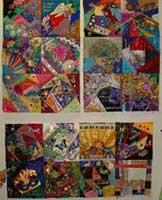
I am now going to try and tell you my thoughts as I rearranged the blocks into a visually pleasing quilt…The
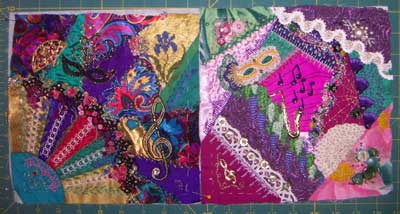
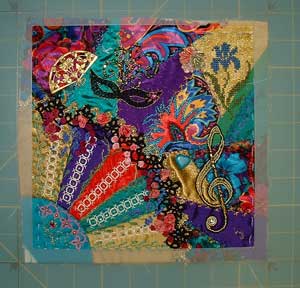
All that Jazz blocks varied greatly in colour and style and comlexity and they needed to be blended into a balanced whole…
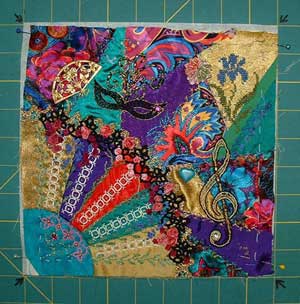
The first block that I moved was Marty’s, as winner of the popular vote I felt that Marty’s beautifull block deserved to be in the central portion of the quilt which is more a focal point for the eye than the edges.
Janet added no embroidery or embellishment to her block which I thought was going to make it difficult to position but when we read the words ‘Do you know what it means to miss New Orleans’ it seemed obvious that it should be in the bottom right corner like a signature block because the simple message seemed to summarize the feelings of the quilt.
Catherine takes the prize for the heaviest block received and I placed it in the bottom row where I felt that it would be least likely to cause the quilt to sag under its weight.
Willa’s ‘Sunrise in New Orleans’ was the most distingtive block and needed to be carefully placed and that was easy to do as the block told me that it needed to go down the bottom of the quilt where the sun’s rays could rise into the quilt.
Alison’s Lois Armstrong block needed to move to the right side so that Lois would be blowing his Trombone into the quilt. I put it in the central portion of the quilt because Alison’s block is one of my personal favourites.
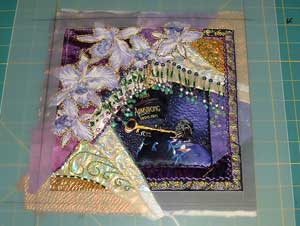
Linda’s fan is also a distingtive feature and looked best on the left side where it had more space to show it off.
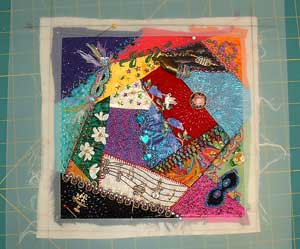
Betty’s peacock with his stunning tail needed to come into the centre of the quilt where it could be framed by the surrounding blocks.
Sharon’s Saxaponist looked a bit trunkated with other blocks around it so I moved it up to the top left corner where he not only plays into sharon’s block but plays into the whole quilt.
Kate’s Angel flew to the top row from where he could keep watch over New Orleans.
Pam I love your block but it did set me a challenge, being the only block to use white fabric, it was the most difficult to position….folding the seam allowances back so that there was less white helped, with less visible white I found the spot down the bottom where it is balanced by the light colours in Alison’s.
|
|
|

