Annies Crazy World


  • About

    This is Annie Whitsed's Crazy World a world where I stitch the joys and chaos of life into beautifull crazy quilts. email annie@loopylace.com
April 2024
M T W T F S S
« Nov    
1234567
891011121314
15161718192021
22232425262728
2930  
Locations of visitors to this page Subscribe with Bloglines
 
Day 82 – The Bottom of the Sea September 10th, 2006

The bottom of the sea

Across the bottom I used a piece of tulle net as a setting for marine creatures and a ships steering wheel and an anchor, evidence of man even at the bottom of the ocean…the Sea Urchin on the left is an upside down suffolk puff with a little stuffing, held on by the threads that pull it into shape and finished with a bead…the pink beaded starfish is an old covered button with the beads stitched to it…If you look closely to the right of the sea urchin, tucked in, almost hidden under the net, is a fish skeleton, I found the brass fish skeleton charms in a shop that was selling them off cheap because they weren’t good sellers but they appealed to my slightly warped sense of humour and I bought the last of their stock, about 30 of them and one has found its way onto most marine themed pieces that I have made.

Day 81- Above the Water September 9th, 2006

Light House

In tonights detail I have let the work flow out into the border and created a complete scene with a piece of ribbon floss and 3 charms…Across the top seam I ruched a piece of varigated ribbon floss to resemble the white wash of the waves where the ocean meets land and added a palm tree to represent the Beach…Because the border fabric is dark I saw it as night and put a moon in the sky and there beside the sea is also a light house which comes into its own at night time…and wasn’t my camera clever to put a light in the light house for me?…

Day 80 – Net September 8th, 2006

Net

Tonights detail features more shells…This time they are arranged on a scrunched up bit of gold net fabric which I used because I needed to balance the gold fringe I used in the first detail of this project which is quite visually heavy.

Day 79 – Shuttle Tatting 102 September 7th, 2006

Tatted blossoms

A tatted blossom branch with attached spider web…The Butterfly was machine embroidered by Maria Vialle.

I have chosen todays detail in respose to Jenny’s comment to my post yesterday about learning to Shuttle Tat

Jenny’s said: Well done! You have mastered this art well in one colour. It is easy to learn using 2 colours, that way you can see what is happening with the “flip” snip…

Jenny is right…When learning to Shuttle Tat 2 colours is easier than one…

Tie the end of the Shuttle thread to the second colour…with the knot on your forefinger wrap the second colour around your fingers and let it fall off the back of your hand (see image below)…from there it is the same as one colour tatting…the shuttle thread is the core thread, the second colour makes the loops which will give the tatting its colour…Working with 2 threads means that you can tat straight lines as well as loops and if you work with 2 shuttles you can alternate the colours as I have done in todays detail.

Tatting with 2 colours

Day 78 – Shell Clusters September 6th, 2006

Shell Clusters

Todays detail covers a larger area because I wanted to show the Shell Clusters and I thought that one image would put them in better context than 3 seperate images would.

The seam treatments between the Shell Clusters are a Knot Trail, Loopy Ribbon and Ruched Ribbon

Day 77 – Rock Pools September 5th, 2006

Sailing boat and a Whale

The seam treatment in todays detail are the full Button Hole Wheel with extra little straight stitches around the edge to make them look like something that you would find in a rock pool.

Sailing in the calm waters near the coast is a sail boat while a whale frolicks further out to sea.

Also in this detail you can see how I wound the Coral Stitch seaweed through the lace embellishment.

Day 76 – Seaweed and Shells September 4th, 2006

Seaweed and Shells

The ebroidered Shells are made up of a straight stitch down one side and 4 buttonhole stitches done as in buttonhole wheel with small fly stitches at the bottom to finish the shell shape.

The Seaweed is Coral Stitch done in various shades of green silk ribbon.

Day 75 – Cleaning a Crazy Quilt September 3rd, 2006

Vacuuming to clean a crazy quilt

It is just as well that I am in a mood for spring cleaningas the next piece I am going to detail is framed without glass and when I took it down from the wall it was very dusty…

I cleaned it by placing tulle over the piece, to protect the embellishments and vacuuming the dust away.

This next lot of details is from a 20 x 17 inch piece that I made in 1994 for a flying Arts teaching tour with the brief of teaching crazy quilting with an environmental theme…The environment that I chose was the marine environment…it is interesting looking back, this is the first strongly themed crazy that I had done and at the time there was no interenet and few books to find out how and there was not a lot of supplies so I was working with what I had and adapting stitches and embellishments to fit the theme…I had a few false starts with it but do like the way it came together in the end.

Tonights detail is 2 embellishments, the first image is a smaller version of the embellishment in the second image…They are both done with light shade fringing, twisted to stick out at odd angles and held in place with shells and beads…some of the shells are plasic buttons others are real shells, I use shells from neck laces when I can get them because they already have a whole in them, if I am using shells from the beach I try and punch a hole with a needle, when that doesn’t work I use an electric drill with a tiny drill bit.

Fringe Sea Weed

Fringe Sea Weed and Shells

Day 74 – Wedding Report September 2nd, 2006

Originally Blogged 20 May 2005

My Son zig zagging the seams
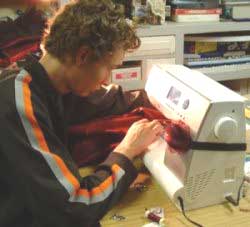
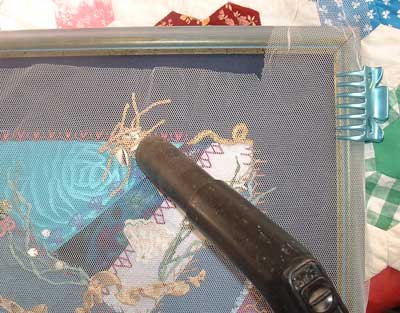
The dress was nearly finished before I left, with a little help I had the skirt in one piece, the godets had stitched in perfectly and on the right is a photo of my son zig-zagging the seams while I cut out the lining for the top which I got stitched in so that all I had to do was stitch the side seams and attach the skirt, problem was that I had lost the measurement for how wide I needed the arm hole and there was nobody else awake at that time to redo them for me.

My flight from Canberra to Newcastle was a bit novel as I flew from Canberra up to Brisbane where I waited 2 hours before flying down to Newcastle, for those of you that are not familiar with Australia that is about 2,000 kilometres of flying to finish about 400 km from where I started.

Front of Dress
With assistance to pin the side seams it didn’t take me long to finish the dress…When we got the 2 dresses together they were similar but not the same, The bride had cut her crazy quilted panel wider than I had and my neckline, even after I had made it higher, was still lower than hers.

It was to be a garden wedding but we had to go to plan Z and decorate inside when it turned out to be a rainy day. We draped the curtain lace that was to decorate the arch around the lounge room window in much the same way as it was going to go on the arch and decorated it with bunches of cream and dark red roses we made from wide paper ribbon…initially it was disappointing that it rained, particularly when people in other parts of oz have forgotten what rain is, it is so long since they have seen it, but the decorated window looked lovely and made a nice backdrop for the service and being inside was cosy and somehow seemed to make everyone very friendly so that guests that didn’t know each other when they arrived fell into easy conversation with each other, another thing that contributed to the friendly atmosphere was that it was a self catered wedding with guests bringing a plate instead of a present, there was many willing helpers to put the food out on the tables and to clean it away after the meal and they all said that they had enjoyed being apart of the wedding….(*note for non Australian readers, when we are asked to take ‘a plate’ to a function it is implied that there will be food on the plate…and it was a lovely variety of food that was laid out on the table).

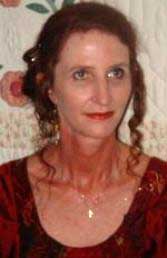
A friend who is a hairdresser did our hair and makeup and we did look beautiful…see new photo in my side bar.

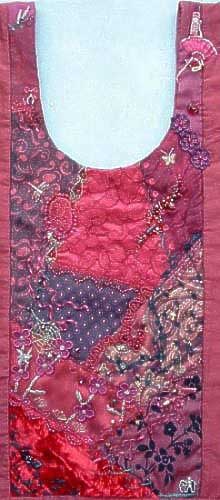
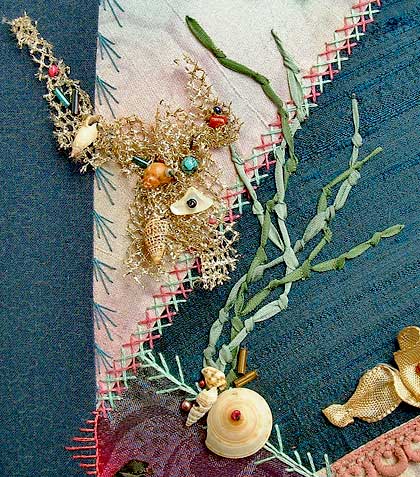
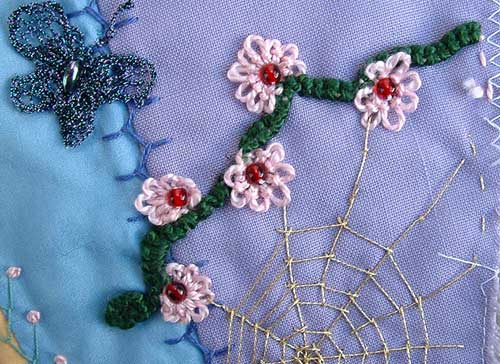
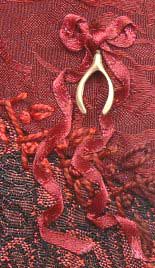
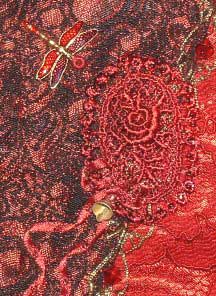
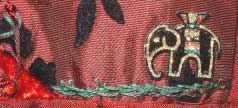
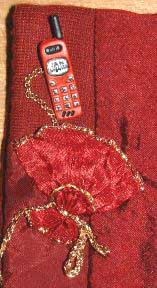
The unfortunate thing about the rain making it an indoor wedding is that the lighting was dim and it was crowded making photos hard to get back far enough to take photos and I don’t think that we got a good full view photo of us wearing the dresses…Ooops, when I get to see all the photos I will choose the best of them to show you and I am going to visit Sharon on the weekend and get her to take a full shot photo in daylight hours…In the meantime here is the finished front Panel and I Have put a large image of it on Flickr. Thank you to all who have sent me comments today it is lovely to know that you have all enjoyed the making of my dress…

Originally Blogged on 23 May 2005 – Loose Ends and A Good Laugh

When I told my sister this tale she cracked up laughing and said that I had to blog it…

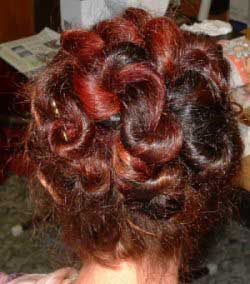
So let me set the scene…Sunday afternoon, the mission was to get a good photo of the Bridesmaid dress and I organized for my sister to do my makeup, my niece to do my hair and for Sharon to take the photos…I had a disorganized morning and wasn’t ready when my sister and niece arrived so they had a cup of tea while I had a shower…when I came down after my shower my sister had her first laugh as I had put on the undergarments and then pulled on purple tracky pants, yellow ankle socks to protect the stockings and red walking shoes and with it a pretty floral top which I had chosen because I didn’t want a garment that I had to pull off over the hair, it was a funny look….I gathered up makeup, hairbrush, hairbands and bobby pins, my sister did my makeup with instructions for touching up the lipstick and then my niece did my hair managing to get a resonable copy of the style that it was done in for the wedding…I like how it shows off all the different colours in my hair.

Back of my Hair Front of my Hair

With hair and makeup done I packed up the dress and shoes and drove over to Sharon’s…in the car on the way over I noticed that I had forgotten to paint the 3 fingernails that I had removed the polish from, must remember to hold my hands behind my back…by the time I got to sharon’s there wasn’t much light time left so I slipped the dress and shoes on straight away and we went outside, I tried 
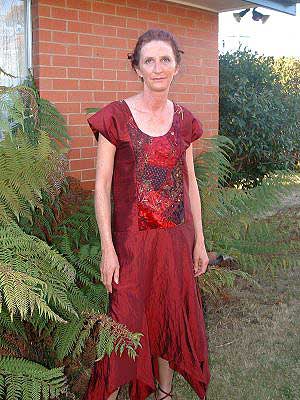
the postion of the sun limited where we could take them but there was a nice spot out the back and Sharon checked the surrounds so that the lights wouldn’t be coming out of my head etc and took about 20 photos….and If I didn’t told you that the nails should have been dark red and that I forgot to put the earings on you probably wouldn’t notice…you probably wouldn’t even notice that I forgot to touch up the lipstick….and the photo probably even looks OK to you….but

…but I can’t look at it without laughing because when doing my hair my sister had put bobby pins in to hold the curls that were to fall softly down the side of my face…and I, ditze that I am, forgot to take the bobby pins out….Sometimes I do wonder about myself…hope that you have all had a good laugh too…

The Wedding Party

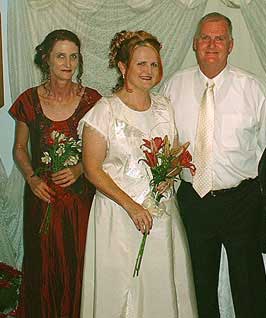
Photo of the bride and groom…Jan and Bob

And the wedding report finsihs the details on My Brides Maids Dress.

Day 73 – Counting down…2…1… September 1st, 2006

Originally blogged 02 May 2005 – 2 days and counting down – decision time.

I spent most of today doing anything and everything other than stitch on the dress, late afternoon I started sewing the last of the beads and charms on but it wasn’t till I visited my sister this evening that I figured out why I was delaying cutting the fabric, it was because I wasn’t happy…the skirt of the brides dress is 6 gores with lace godets but when I went shopping for burgundy lace I only found one that would have been ok and it was way to expensive for just ok so I didn’t get it…my other alternative was organza and I love the colour of the organza I have but it didn’t seem right…my sister suggested doing them in the same fabric as the skirt…did I have enough???…Yes, I had bought a little extra because I knew that I could use it in swaps and the fabric is wider than I thought …decision made and I am happy now…next question do I need to line the skirt? I will decide that tomorrow after I have had some sleep…goodnight

Originally Blogged 03 May 2005 – 1 day…that is 24 hours to finish.

Late this afternoon I was hitting the panic buttons…the crazy patchwork is done, everything is cut out but I had not thought about how I was going to hem the godets…naroow lace would be easy but I don’t have any, I did some experiments, binding them with organza tried silk ribbon but neither looked any good…was starting to think that I would have to hand hem them…do I have time???…not then I didn’t, Tuesday nights I play in a 10 pin bowling League with my daughter and she interupted my panic insisting that it was time to go…we did go, I played 3 above average games, had a good night and came home much calmer…and thinking clearer, I thought to try the roled hem foot on the sewing machine, it worked well and all the edges are hemmed….and now I am going to spend of few of my remaining hours sleeping….

Originally 04 May 2005 – Confession Time

it is 6.25am…My Bags are packed and I am leaving in 10 minutes to catch the plane …and it is just as well that I have a couple of days still before the wedding because…… the dress is not finished……

Photos and wedding report next week…Byeeeeeeeeeeeeeeee

Originally Blogged 19 May 2005 – The Embellishments on my Bridesmaid Dress

Bow and Wishbone

The embellishments are my favourite part of crazy quilting and here are the finishing touches that I came up with for My Dress.

On the top left shoulder I added another ribbon (and I have just noticed that I forgot to do colonial knots over the tacking stitches). This bow together with the 2 lower down on the block created a nice visual flow and movement through the block…It also gave me a place to put my wishbone, I particularly wanted to include the wishbone because for the first wedding that I ever went to (I think that I was about 12), my cousin had collected chicken wish bones for months, gilded them and tied them to the name place cards with a cerise coloured ribbon bow, I have always remembered those gilded wishbones and associated them with weddings …and this charm is an example of how obsessive I can be to get the effect I want, I started with a brass charm but it was to bright a gold colour so I undercoated it, spray painted it with a light gold and then a coat of spray lacquer, a very subtle difference that the photo doesn’t show but it matches my memory better.

Dragonfly charm

I bought The Dragonfly charm on my overseas travels last year and being the perfect colour he had to go on….The bell that I put under this bow was not the perfect colour, It was a silver earring, the only bell I could find that was small enough but having gilded the wishbone I figured I could gild the bell too.

Elephant

In the Bottom right hand corner I added a small iron on elephant because I collect elephants and the bride has made an elephant quilt.

Ribbon Fan and Phone Charm

This is the ribbon fan that I made to go on the back of the dress and then didn’t use…It is on the right shoulder and overlaps onto the rest of the dress…behind the fan is concealed a tiny pocket into which is chained a mobile phone…the phone is hidden because phones don’t belong at weddings but the whimsical side of me had to include a phone in this piece because of the many many hours that we have spent on the phone, this dress was designed over the phone but even before we lived in separate towns when we lived less than 5 minutes drive apart it was on the phone that we could most conveniently meet…The Mobile phone was a silver button that I bought at Beadies shop in Amsterdam, my son painted it red to match the dress.

Finished Bead Trail 
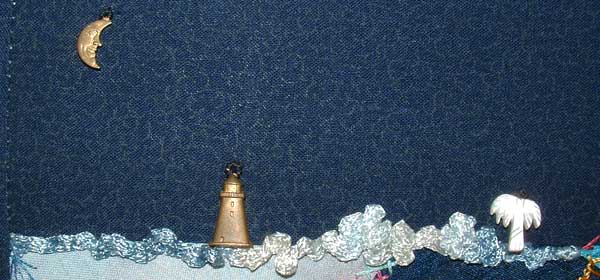
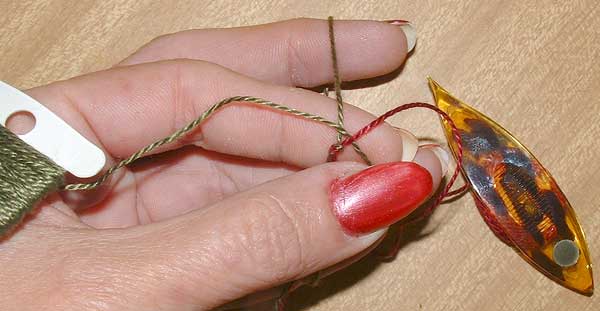
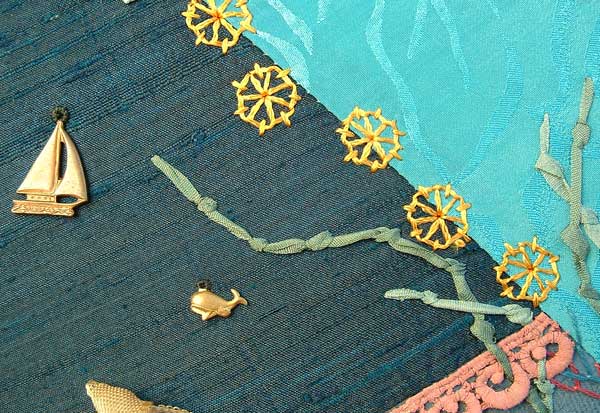
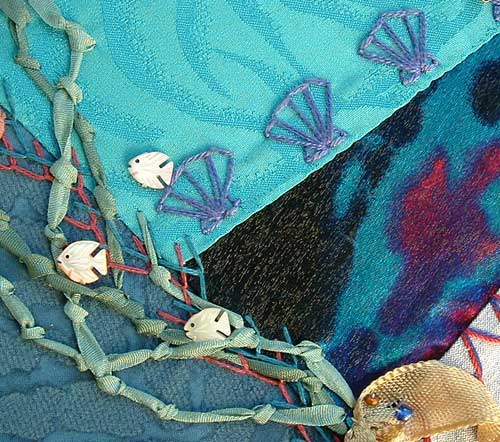
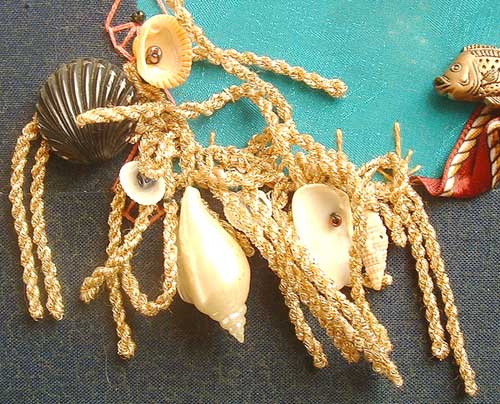
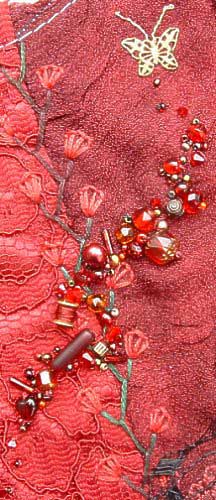
And this is the finished Bead Trail.

Just for the record Today is my first anniversary as a blogger.