Annies Crazy World


  • About

    This is Annie Whitsed's Crazy World a world where I stitch the joys and chaos of life into beautifull crazy quilts. email annie@loopylace.com
April 2024
M T W T F S S
« Nov    
1234567
891011121314
15161718192021
22232425262728
2930  
Locations of visitors to this page Subscribe with Bloglines
 
Work Box and Accessories January 20th, 2008

This is a Work Box and Accessories that I made as a gift in 1987…I have picked it to show tonight because it has a follow up in tomorrow nights post.

Workbox and Accessories

Frameing November 14th, 2007

Framing

Before I went on Holiday I had everything, except the cut in the mat board, ready to frame a friends embroideries…I have a cutter to cut the hole but since having to wear glasses I don’t trust my eye and I baulked at making the cut…When I did do one of the cuts today I was not at all happy with it, it wasn’t may eyes that let me down but my hands and I was not able to keep a consistant even pressure as I pulled the cutter along and the result was a jaggered cut…on to plan B, I took the mat boardes to the frameing shop and paid a few dollars for them to make clean, crisp cuts around the hole…

Because the embroidery is 3 dimensional I put in a thin border of foam core to hold the mat board and embroidery back from the glass…After getting the first one into the frame I looked at it and oops I had forgotten to put the mat board in…re assemble it with the mat board…Tip remember to put all layers into the Frame.

Together again…oops there is a thread in there…take it apart, remove the thread, reassemble it…Tip last thing before putting the embroidery in the frame check glass for smudges and embroidery for fluff and threads.

Second frame assembled without a single oops but…

Ooops When I came to assemble the third frame the glass was to big to fit, when I measured the hole it was just a bit smaller than the other 2 frames…this meant that I had to undo the second frame to exchange the glass, cut a sliver off every side of the mat board and restretch the embroidery over a slightly smaller board…There was no predicting that problem.

Holiday Snaps Day 18

Miniature knitting May 8th, 2007

knitting seam in my visual journal

Above is the sketch in my visual journal for a knitting scene seam…I can remember my mum knitting, she did it because she had to but she hated it, until she got a knitting machine…A knitting machine would be very difficult to embroider but I reckon hand knitting will remind the family of the knitting machine that mum did love.

I used an emery nail file to file the ends of skewers to make needles small enough for the miniature knitting I need for this seam, The first piece below is a practice run to get the feel for the size, the second piece to work out the pattern that I want to do…The pattern is in memory of a much loved jumper that mum did hand knit from scrapes of wool, it had rows of diamonds about an inch high and was passed down from child to child.

knitting for a knitting seam

Inspiration from past work May 5th, 2007

I didn’t get any stitching done today but even when I am not stitching I am still thinking about mum’s quilt…One of the Seam Scenes that I want to do is a cloths line and the image below is part of my inspiration…The image is of a Miniature Quilt (5 x 6 inches) that I made in 1985.

Miniature Cloths Line Quilt

Our 2007 Painted Easter Eggs April 9th, 2007

repaired egg finished being painted Patricia commented that my repaired eggs would be even more special now and she is so right. You may not have noticed but one of the repaired eggs hadn’t been finished and I didn’t expect that it would be but the nephew was so impressed that I had repaired it that he finished it and to me that makes it even more special.

These are our 2007 eggs

our 2007 eggs

Mine is the candy egg (top right corner) like the ones we had when I was a kid…when every one is here I can only do a simple one because I am on call to find cardboard etc and help when required.

For my second egg I thought that having repaired the eggs, humpty dumpty would be the appropriate egg for me to paint this year and I remembered that I had made one before for the top of a cake I made for a nieces 2nd birthday in 1983 (Cake design frim The Australian Women’s Weekly Children’s Birthday Cake Book), I found the Photo and started making one the same but have decided that the cardboard coat makes him far to stable to be humpty so I am now going to Paint the coat onto the egg shape.

humpty won Humpty dumpyt cake

A Rare Sight April 8th, 2007

So that we would have plenty of room to work at painting our Easter Eggs, I cleaned off the table and all the benches in my study, I occasionally see the top of my table but clear benches are a rare sight

A rare sight - Clear table and benches

the painting equipmentMy neice shows off one of the baskets of equipment that she helped me put together…each basket held a pencil, 2 paint brushes, a piece of styrene foam, water bottle, a paper towel, skewers, 2 blown eggs and a chocolate egg…These are the paints we use.

The paints we use

Today we had 9 Painters, painted some delightful eggs and had a lovely time…I will take the detail photos tomorrow in the daylight in the meantime here they are on the table after everyone had gone home.

Days done

Painting Eggs – Its become a Family Tradition April 7th, 2007

In my neices words Painting Eggs has become a family tradition, Easter 2005 I blogged how the tradition got started and 4 years of painted eggs.

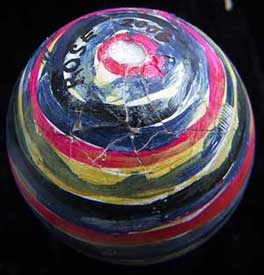
I didn’t get Our 2006 eggs blogged…initially because I wasn’t very organized to get them dated, lacquered, photographed and put away…subsequently because while they were waiting for me to finish them I knocked them on the floor….Oooooooops
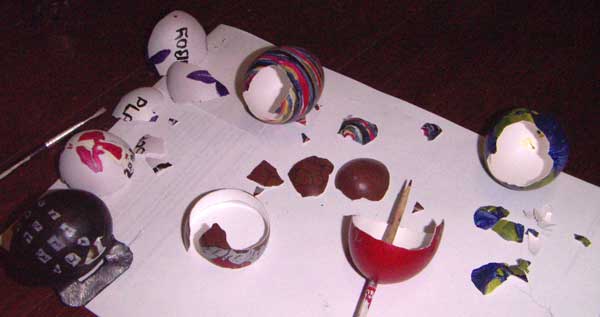
Broken eggs

I was upset with myself but not devasted because from the beginning I had let them be touched because really they have to be held and turned around to appreciate their full beauty, they are a living collection which means they are at risk of being broken…still I didn’t know what I would do if one did get broken…

I picked up the pieces, put them in a box and put the box on a shelf in a dark corner. I just couldn’t bring myself to throw the pieces out.
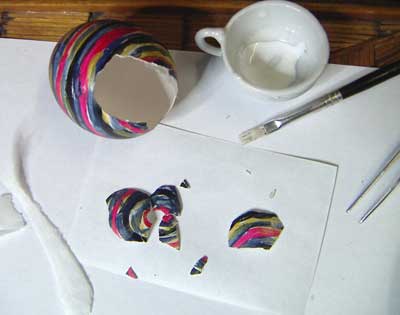
repairing broken eggA couple of weeks ago I pulled the box out and wondered if it was possible to repair them, what if I glued strips of paper under one side of the join with half the paper sticking out so that I could glue the matching bit of shell to the paper as well…nothing ventured nothing gained…I seperated the pieces for each egg, 2 of them broken into largeish pieces, 2 of them with shattered ends, each egg with about 15 pieces to be joined…it took time because I had to let the glue dry before joining the next piece…

…the joins are far from perfect but the eggs are in one piece and the cracks give them character.

I am well aware that this is a crazy thing to have done and you are allowed to laugh, Everyone else has…what I find more amazing than the fact that I was able to do it is that when I picked the pieces up off the floor 11 months ago I actually found every last chip of all the shells.
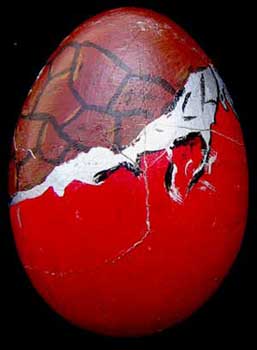
egg egg repaired ella egg repaired

roses egg repaired ella egg repaired

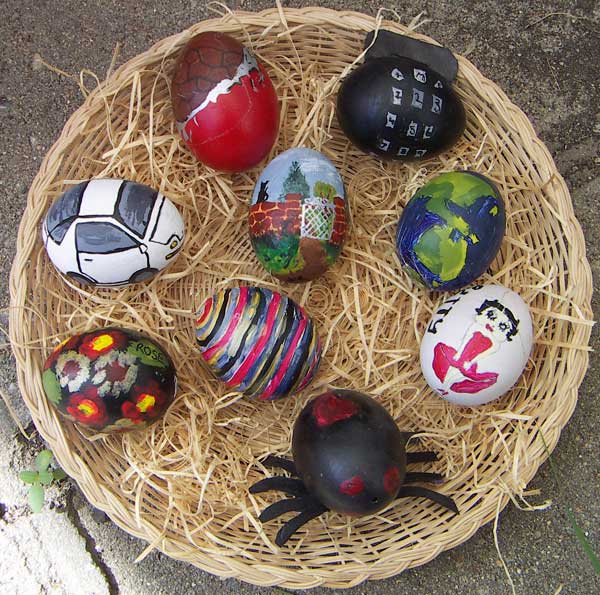
Below are all the 2006 eggs

2006 eggs

Some of you may recognize the wall on my egg, as the one on my Bags of fun, ‘A Charming Garden’ bag.
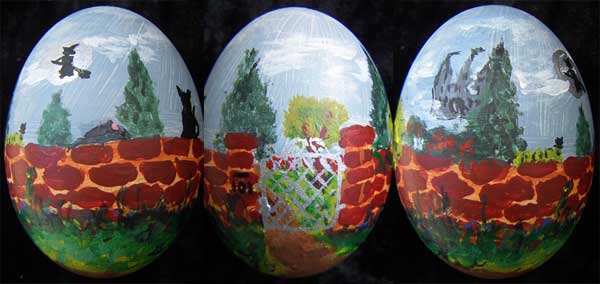
My 2006 egg

I am organized this year…I have all the eggs blown and undercoated, have purchased new fine brushes and have the paints all ready….Wishing you all a happy, safe Easter.

Beaded Strawberry January 18th, 2007

Scissors KeeperAt tonights Canberra Crazy Quilters meeting we had a mini lesson and we all made one of these sweet little beaded strawberries.

Posted in Not Crazy || 1 Comment »
Happy New Year January 1st, 2007

New Years FirworksHappy New Year Everyone…I hope you all have a wonderful 2007.

My New years resolution is to Start Blogging again and to blog regularly all year.

And I am at least well started with a New Years Day Post…celebrating with a photo I took at last nights Fireworks…To photograph fireworks one really needs a more sophisticated camera than mine and a tripod but I got some interesting effects.

Going back to last year, my last post was my 5oth B’day invitation…the weather was a perfect 29 degrees, My Mum with a brother and his family made the long trip down to surprise me, and together with other family and friends we had a lovely Garden Tea Party…and below is the wonderful Crazy Quilt Cake that my son and niece made for me…being 50 is Good

Crazy Quilt Birthday Cake

I wasn’t the only one to have a B’day, another of my nieces turned 10 and I made her a Garden Party Cake, I used the same trees for the Garden as I used on my other nieces Winter Wonderland Cake

A cake for my niece

Ten Pin Bowling Trophymy daughter and I play in a ten pin bowling league and this year we came second (last year we came 3rd and for years before that we were last place).

I also spent a lot of time in my garden, the drought and water restrictions have made it hard but I used birthday money to buy weeper hoses and together with soil wetter and thick mulch the garden is surviving I did a lot of cleaning up so that it looked lovely and neat for christmas and the rain that we have had in the last couple of days has washed everything clean and made the whole garden look bright and the plants have loved it…

that about catches me up and I will say goodnight with a photo I took today of the miniature agapanthus that is just coming into bloom…

Miniature Agapanthus

Crossing of the To Do List September 5th, 2006

I have quite a long to do list and I am always happy to be able to cross something off…before I went to visit Jan and Bob I got the apron, that I started making for Bob over a year ago, finished so that I could deliver it to him….Because the applique made the back messy I decided that it had to be lined and if I was going to line it I might as well make it 2 sided so I put pockets at the bottom of the reverse side so that he can wear it in his workshop…If you visit Bob’s world you can see a photo of him wearing his Apron

An Apron for Bob Reverse side