Annies Crazy World


  • About

    This is Annie Whitsed's Crazy World a world where I stitch the joys and chaos of life into beautifull crazy quilts. email annie@loopylace.com
April 2024
M T W T F S S
« Nov    
1234567
891011121314
15161718192021
22232425262728
2930  
Locations of visitors to this page Subscribe with Bloglines
 
Day 11 -Ruched Ribbon July 1st, 2006

Ruched Ribbon

Ruched Ribbon..I used a narrow satin ribbon, gathered it reasonably tightly and stitched it place with seed beads, scrunching it together more at one end.

how to ruch

To Ruch ribbon run a gathering thread along the length of the ribbon and gather the ribbon to disired density or to fit the seam it is to cover.

You will have guessed that details 5 to 11 are from the same project, I have now detailed all the embellishments and below is the Project that they are all on so that you can see how the individual embellishments work together…I have put a Large image on flicka.

Teapot with day 5 to 11 details

Quilt Roller Mark 2 March 24th, 2006

Well actually it is an extension to my first quilt roller…when I put the skirt on the first roller I really wanted to make it as long as the quilt but it seemed like an awful lot of extra fabric that I couldn’t justify using as I alos had to make a bag to protect the outside of the quilt…So I made the roller with a mini skirt but the idea of a long skirt didn’t leave my head and in the meanwhile I had a problem with what size to make the bag, I wanted the quilt to be a snug fit in the bag so that it didn’t slip around inside…I rolled the quilt firmly and measured the circumference and could have made a bag that fitted it snuggly and but what if the next person doesn’t roll the quilt quite as firmly so it is just a little bit bigger and wont fit back in the bag, you know like tents that are all neatly folded into a bag when you buy them but never fit back in the bag again…So I just have to make the bag a bit looser and accept that it may move around in the bag…still my head is saying I don’t like that I want there to be the least chance that the embellishments will move around and rub on the back of the quilt…what if I do make the skirt longer and put ties on the end but to do that I would have to make the skirt wider so that the ties are at the end of the quilt not around the quilt itself where they could leave depression marks on the quilt…but that would require even more extra fabric…I tell myself that its all getting to complex, that I should just make the bag and be done with it…but the idea wouldn’t let go in the back of my mind I kept designing and imaging how it would work..Ummm…light bulb moment….what if as well as being wider than the quilt it is longer so that when rolled the end of the quilt would be well back in the roll and protected…I wouldn’t need to make an extra bag…and that would mean less extra fabric…and the extra fabric could be cheap fabric, actually an old sheet, which is what my quilts end up being rolled in, would work perfectly.

For most of the extra fabric I used a piece of calico that never did wash soft and was to stiff for any other use but is perfect for my long roller skirt…I made up the area with some black fabric left over from another project and to match it to the quilt I used the last strip of the green backing fabric and finished the end with a purple silk binding.

Quilt roller

The roller skirt is about 6″ wider and longer than the quilt.

quilt laid on roller

When the quilt is rolled the ends are tied

The ribbon is tied around the ends

To finish off the quilt roller I used T shirt transfer to add the name of the quilt…I am delighted with how well it works…It looks like a big candy wrapper which is probably appropriate considering the eye candy that is inside…

Eye Candy Wrapper

Quilt Packageing March 18th, 2006

Something else that we needed to think about for the All that Jazz quilts is that we need to send them over the big pond from Australia to the USA and from there they will be posted out again to their new owners…I couldn’t figure out a practical way to send them flat, I didn’t think that folding was an option because #1 in particular could not be folded without folding through blocks…the option that is left is to roll them…that means that we needed something to roll them around and that something needed to be light weight so as not to cost to much when posted.

I started with the tube from a roll of fabric which I wrapped in batting to about a 6″ diameter…
I cut a piece of muslin (calico in USA) (the width of the quilt plus the diameter of the batting roll plus 2″ for a hem at each end) x (the circumference of the roll plus seam allowance) …I hemmed the ends stitched a half inch seam down the length, turned it right sides out and inserted the batting covered tube….I used a strong thread to run a gathering stitch around each end, like the end of a bolster and when they where gathered to the centre, how could I not finish the ends with a button, I was at Sharon’s when I did the gathering and I raided her button box for 2 small white shank buttons to finish off the ends…

End of Roll

The extra bit of fabric that you can see coming out of the roll is, a rolling skirt…to make it I cut a piece of the fabric about an 1″ wider than the quilt plus hems each side by about 15″…I hemmed the edges, put a binding on one long side and put the other long side into the seam before stitching the seam on the tube cover.

adding the roller skirt

And what you ask is a rolling skirt…it is a little, possibly crazy, invention to overcome a problem that I have when rolling quilts…The problem being that it can be difficult to get the leading end of the quilt to tuck in to start the roll without catching on any embellishments or getting some of it folded back and doing it without loosing the tension of the quilt on the roll and on larger quilts you often need a second person…with the rolling skirt the end is automatically rolled in and I am single handed able to get a firm neat roll quickly.

place end of quilt on top of skirtend of quilt held into roll

All that Jazz #3 Update

The fabric I chose to redo All that Jazz #3 is a pinkish purple slub silk, I have photographed it with the borders of the other 2 quilts and I have freyed out a bit of the fabric to show you the 2 colours of thread that have been used to weave the fabric.

All that Jazz border fabrics

Naked Blocks – Berets and Bags June 5th, 2005

Last week when I went to visit Sharon’s last week I took with a package of UFO bits, pieced circa 1998, it contained a couple of berets and the pieces of a Bag together with lining fabric, binding, cord and clips.

Pieces to make a bag

As Sharon looked at the pieces of the Bag she commented on my unusual choice of fabrics and was telling me that I should Blog the fabrics that I have used….and then she told me that I had pieces from 2 Bags and I have, I have the back and flap for a Blue Bag and the front for a Black Bag…

Back of Bag

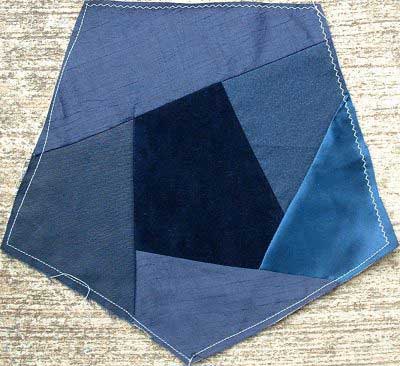
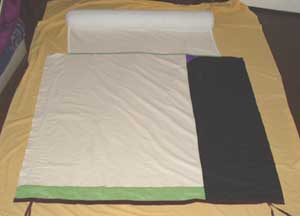
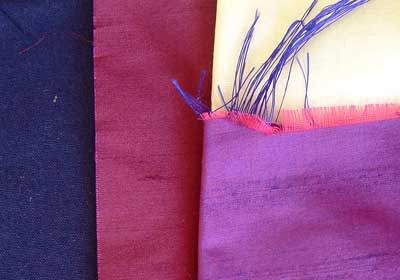
The fabric on the left is a piece of Gabadine, the duller of the 2 fabrics on the right is the quilting cotton that I used as the Border on Butterflies, my second crazy quilt.

partially pieced flap for bag

The partially pieced flap has a piece of fabric from a man’s tie and prairie points set into a seam.

Front of bag

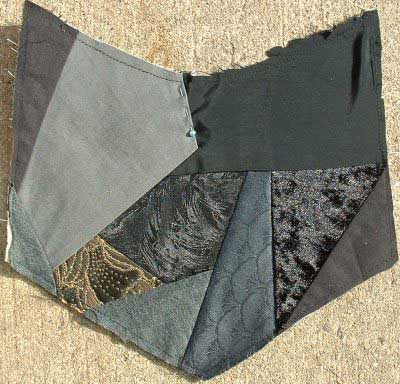
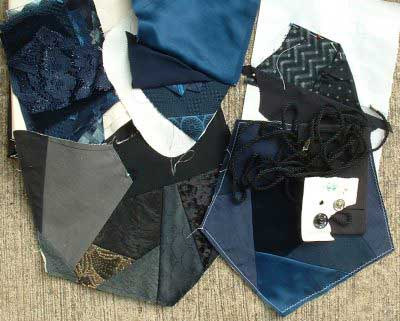
This is the front for a black/grey bag with a touch of gold…the 2 fabric patches on the top right are from my quilting cotton stash…the small triangle of grey at the bottom is a cotton stretch knit fabric that I made a T shirt from in the early 1970’s.

seam pinned ready to sew a pocket formed by folding the fabric

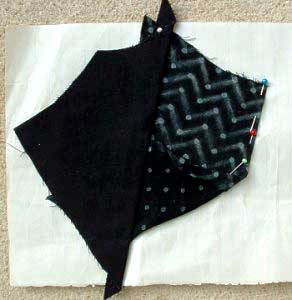
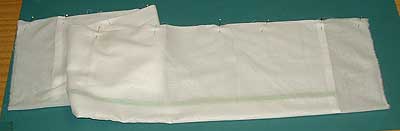
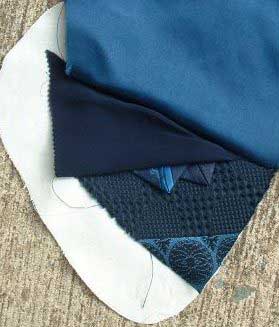
Also in the package were these 2 pieces of fabric pinned to a piece of paper…The spotted fabric is folded back on itself, I do sometimes use the back of fabrics but I have no idea what I was trying to do at the time…Sharon and I decided that I had to use it somewhere as a pocket, I often add little pockets on my crazy quilts and this is a cute way of doing it.

Beret ready to embroider

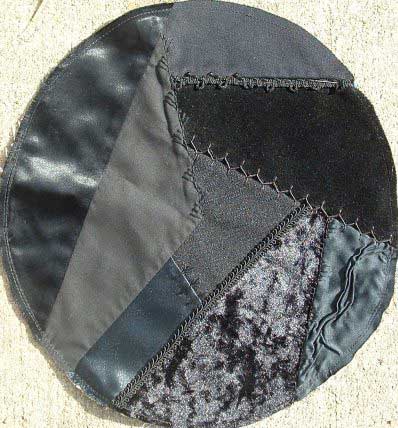
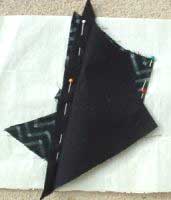
one of the Beret is all Black, normally hard to photograph I was thrilled to get a good photo of it, I love that black is only black till you put it next to another black….In this block the small top piece is Gaberdine and the grey looking piece on the left is a polycotton….The ripples in the bottom right patch are made by leaving the fabric floppy and then tacking it down, I will add beads in the ripples that are formed.

Another pieced beret

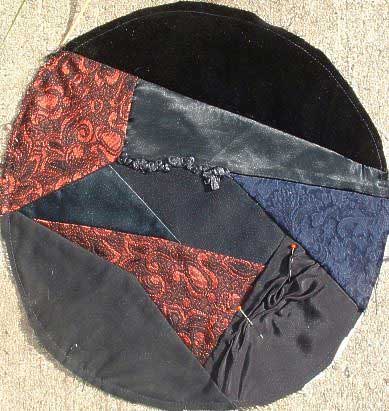
This Beret also has a piece of Gaberdine and a piece of poly cotton as well as a scrunched patch.