
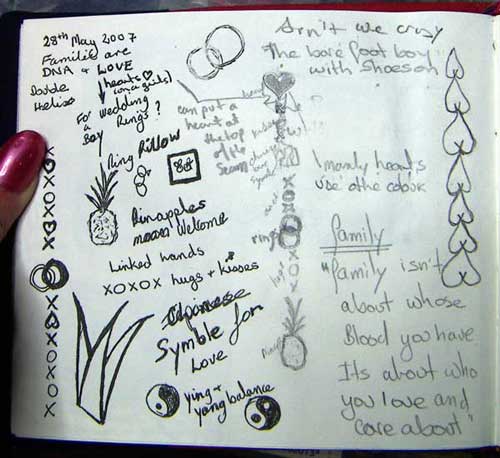
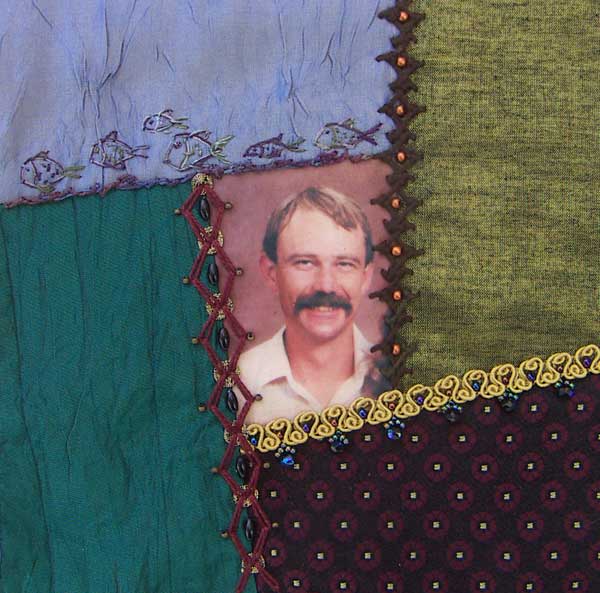
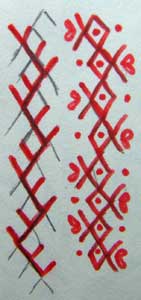
I used my Double Helix seam on this block because the young lad on the block is my brothers step son and I wanted the stitches to say that our genetics are only a part of family the other part is love…I then got my thoughts twisted up because the obvious symble of love is hearts but I couldn’t see hearts on a boys block…I played around with other ideas in my visual journal, the best I had come up with was rings combined with O and X for hugs and kisses, when I talked it over with my sister she looked at the line of upside down hearts on the right of the page and said this is nice, I had rejected it after doing it because when I looked at it I saw ‘bums’, as I told her what I saw I thought well thats sort of OK because a kid would probably find that funny anyway and with that thought I came full circle, I could put hearts on a boys block.
The funny thing is that I am the only one that saw the Double Helix in the first seam, when I asked my sister and some quilting friends at a meeting tonight what they saw they all answered with either fish or gum leaves.
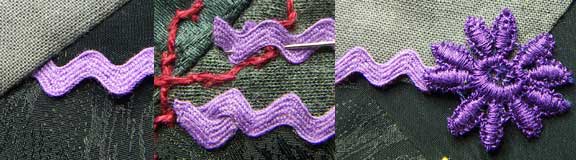
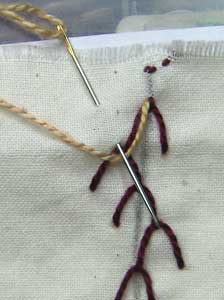
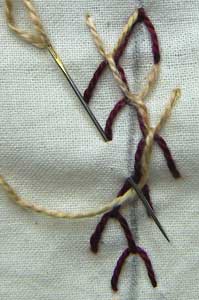
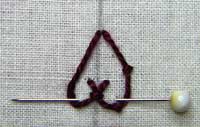 The Hearts are Up and Down Buttonhole Stitch based on detail 255 which had been inspired by one of Elizabeth’s stitches, When Elizabeth saw what I did with her stitch she commented that it wouldn’t take much to make it into a heart…well it was easy all I needed to do was put the pin lower (so that it was under the up an down bit) and do an extra stitch on each side to hold the shape. The Hearts are Up and Down Buttonhole Stitch based on detail 255 which had been inspired by one of Elizabeth’s stitches, When Elizabeth saw what I did with her stitch she commented that it wouldn’t take much to make it into a heart…well it was easy all I needed to do was put the pin lower (so that it was under the up an down bit) and do an extra stitch on each side to hold the shape.
|

For this seam I have chosen a low key stitch for a couple of reasons…firstly because I need a few basic stitches to tie the new blocks together with those I did nearly 14 years ago…the other reason is that the over the top showy seams need some less showy seams to balance them and avoid competition… the seam I have done is Feather stitch with detached chain stitches
|
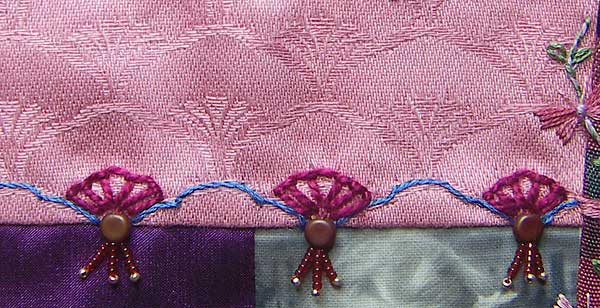
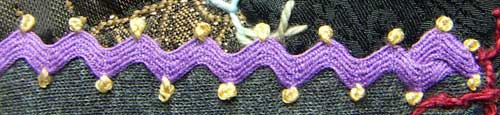
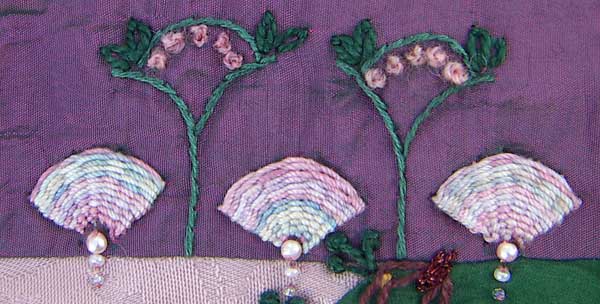
No prizes for guessing that this seam idea came from the pattern in the fabric…
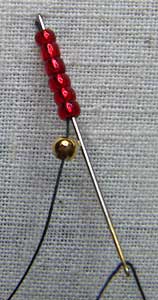
The dangling beads are done by threading beads to desired length of dangle, select the end bead and go through it only once before putting the needle back through the rest of the beads in the dangle and through to the back of the fabric…leave thread a bit loose when securing thread on the back, if thread is to tight the dangle will stick up instead of dangling
|
In a comment re detail 260 I was asked
‘how do you hold down the rickrack while you sew the herringbone stitches?’
I start by attaching one end of the ric rac (These also work for braids and laces)…There are several ways to attach the end of the ric rac to the seam: I mostly slit a few stitches in a seam, slip the end of the ric rac under it and then restitch the seam, If I don’t have access to the seam I turn the end under, with ric rac you can twist it back on itself so that the end finishes tucked in or the end can be covered with a lace motif or a button cluster or on of Sharon’s ric rac roses would cover the end nicely.
The actual answer to the question is that I don’t hold the braid down while doing the stitches…I lay it along the seam, if it moves I adjust it before taking the next stitch…If you are still learning the stitch or just knot comfortable without the ric rac being held in place then you can run a tacking thread down the middle of the ri rac braid, work the stitch and then remove the tacking.
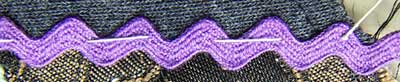
Work the Herringbone Stitch into the spaces on the ric rac.

To hold the ric rac (this also works well with ribbons) on with Colonial Knots come up close to the edge of the ric rac braid or ribbon, make the knot and go down just beside the braid.
or use any other stitch that you can fit into the spaces or a combination of several stitches.

|
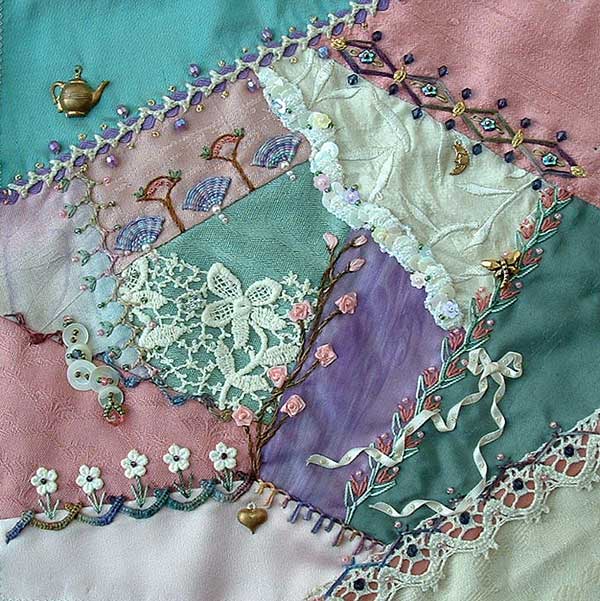
How do you know when a crazy quilt block is finished? A Frequently asked question…most common answer is that the block will tell you…I will add to that, that sometimes it is helpfull to get a second opinion.
When I finished embroidering the seams on this block I expected to add several embellishments but after adding the button cluster I placed a few charms but could see no where else that needed further embellishment…the block was telling me that it was finished but with so few embellishments I didn’t beleive it till I got a second opinion. I asked Sharon when I visited her for a sewing afternoon and she agreed that it was finished…I used to add embellishments to a block as I thought of them, often keeping seam stitches low key and then putting embellishments over them, this year I have been thinking seam treatments and because my seams are becoming fancier they read on the block as embellishments which is why the block is finished sooner than I expected.
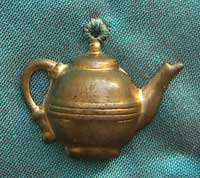
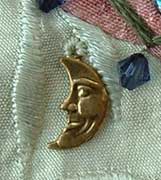
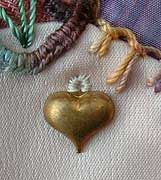
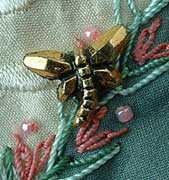
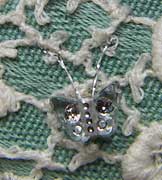
The charms I added are a teapot, a moon, a heart, a dragonfly and there is a tiny butterfly bead hiding in the lace.
And Here is the Finished Block
|
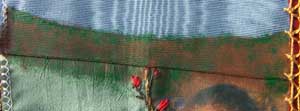
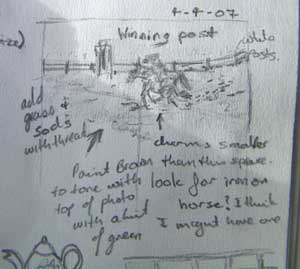 The pencil sketch is my first ideas for a picture seam to represent that my 2 youngest brothers and a sister in law worked with horses. The pencil sketch is my first ideas for a picture seam to represent that my 2 youngest brothers and a sister in law worked with horses.
I thought that an embroidered track would be to textured for the scale of my horse charm so I decided to paint the track…scary decision, paint can’t be undone like stitches if it doesn’t work…best have a practice which I did in my visual journal.
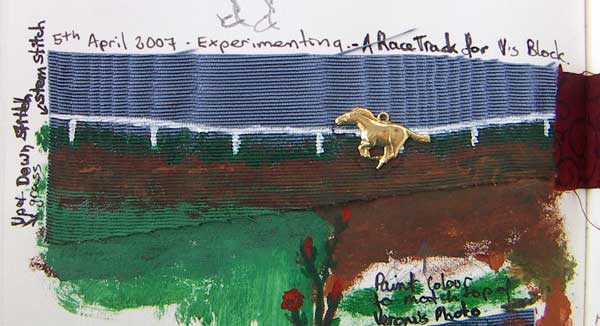
I used acrylic paint and the fabric was easier to paint than I thought it would be and I think it will work…time to be brave and put paint on my block…
I built the scene up in layers letting the paint dry each time before adding the next layer.
I started by covering the area with brown…..
The second layer is splodges of dark green along the edges and a little bit on the track.
I then used lighter browns and greens and a finer brush to blend the track area and add grassy details to the edges.
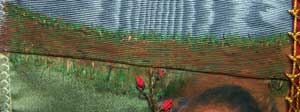
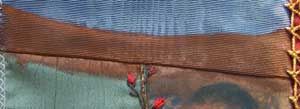
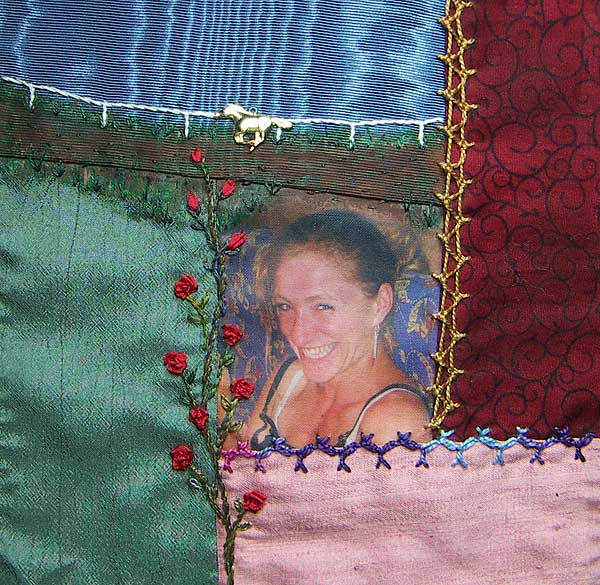
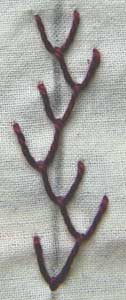
I used single strands of brown and green embroidery thread to add just a little bit of texture and finer details, stem stitch for the fence and finished the seam by extending the tip of the climbing rose to make it apart of the picture.

The 19th block for my mum’s memory quilt.
|
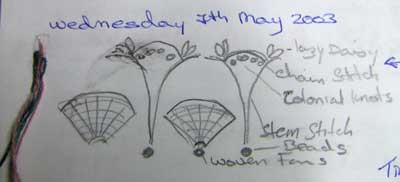 This sketch in my visual jouranl is of a seam on one of Sharon’s Blocks. This sketch in my visual jouranl is of a seam on one of Sharon’s Blocks.
The first seam below is how I interpreted it on my Box Top
This second seam is how I interpreted it today on the birthday block.
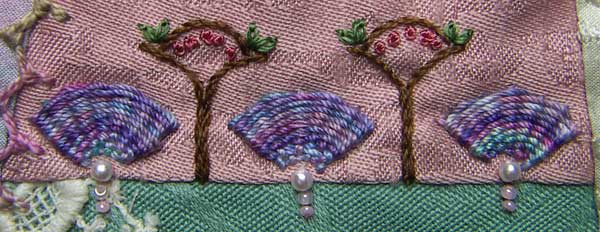
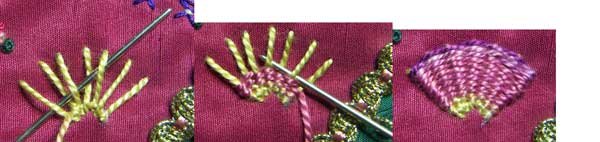
The Fan is woven over 7 spokes…To get the spokes of the fan even I draw the fan on the back of the block…Bring the thread up close to the bottom of an edge spoke, rethread with a tapestry needle (if you don’t have a tapestry needle use the eye end of the needle for the weaving) and weave over and under to the other end.

Go around the end spokes so that the weave is reversed in the opposite direction…For a tight weave use the needle to push the woven rows tightly together…Continue weaving until there is no more of the spokes showing and take the thread through to the back…Note varigated threads with quick changes between colours work better than the one that I used for this sample.
|
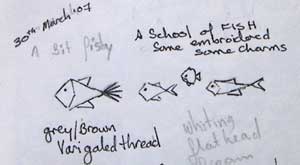 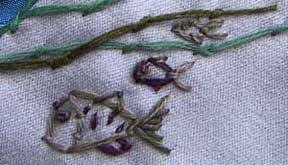
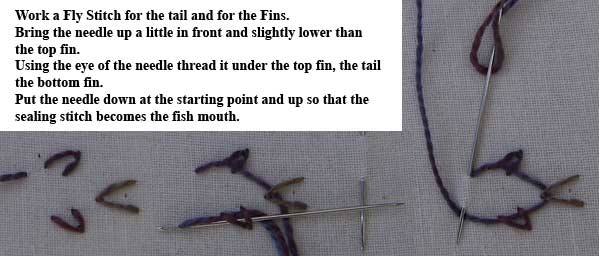
 Add an almost straight fly stitch to divide the head from the body and a spot for an eye. Add an almost straight fly stitch to divide the head from the body and a spot for an eye.
The positions of the Fly stitch for the tail and fins will determine the size and shape of your fish and the great thing about doing it this way is that fish come so many shapes.
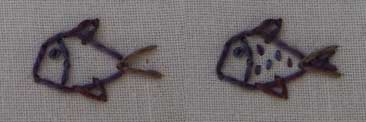
Depending on the size of your fish, additional detail can be added with a few straight stitches to fill in the tail and tiny straight stitches that look like scales…The varigated thread that I used gave surprise colouring on the fish.
I was going to have just the school of fish swimming along above the seam but because the thread I chose for the fish blends a little with the watery background the colour didn’t work to frame the image at the top…my solution was to add the riverbed which I created with a haphazard line of mixed coral stitch and oyster stitch to get different sized lumps and then a second row to intersperse the colours on the varigated thread the second row is mostly threaded along the first with just a few extra knots to fill in along the seam.
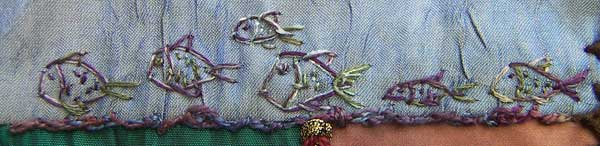
Progress has been made…When I kick started this UFO I had 9 blocks made in 1994…I have now matched that with 9 made in 2007… below is the 18th block.
|

 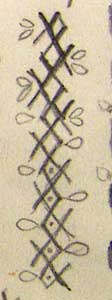 This seam treatment is one of the ideas for feather stitch in my visual journal forTAST week 7… This seam treatment is one of the ideas for feather stitch in my visual journal forTAST week 7…
When I looked at it again it had me confused as to how I had overlapped the stitches and I had to draw it again in 2 colours to figure it out.
For best results choose a stranded thread so that where the second row overlapes the first row the threads will blend softly together and not be obviously double…I used pearl twist thread for my sample so you can see how the threads sit side by side so the overlaps sections are more visible.
Start by working a row of Double Feather Stitch then turn the work around so that the second row is worked in the opposite direction over the top of the first row…orientating the first stitch of the second row was a bit tricky and hopfully my samples illustrate clearly how to get that second row started…once the first stitch is in place the rest of the row is easy.
I like this seam treatment so much that I have also done it on my Box top.

|

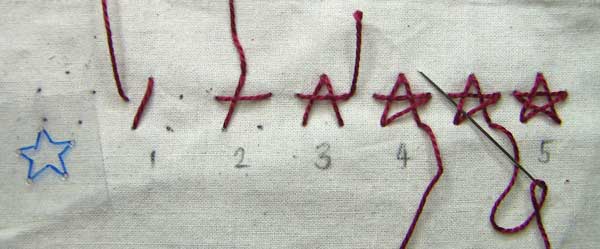
These stars are an extension of the stars on the fabric…The stars are formed from 5 Straight Stitches which I have demonstrated below, I have stitched mine free form because I like the different shapes formed by the randomly spaced points but when you are learning or if you want a regular shaped star you can make yourself a template by tracing a star with permanent ink pen on a piece of plastic and poke a whole through each point…Tip for a neat finish when doing the last stitch weave it over the first thread and under the second thread that it crosses.
|


